This post is sponsored by Tulip.
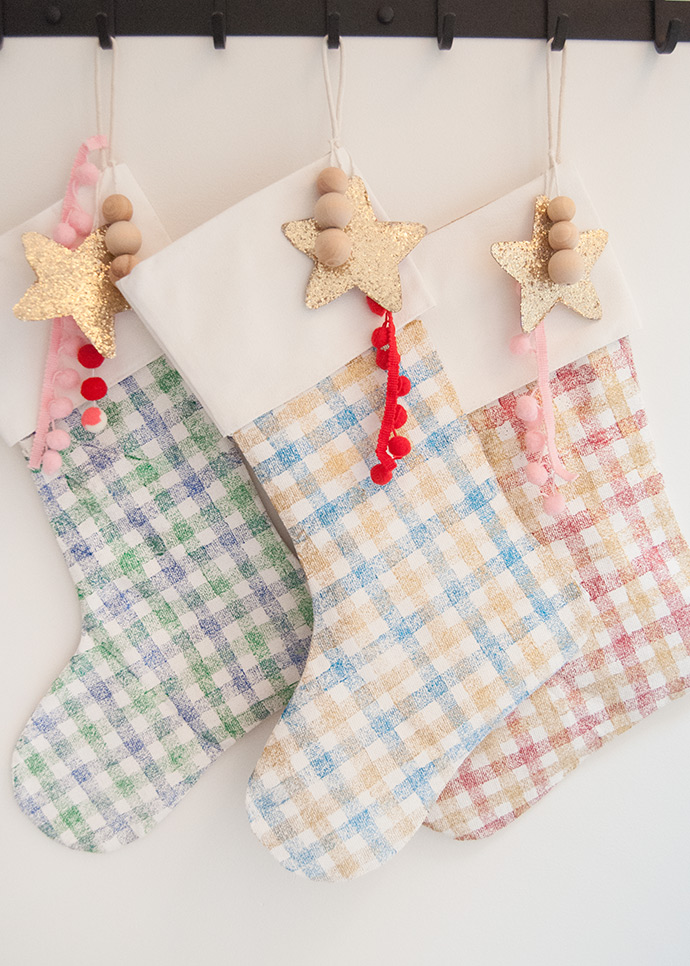
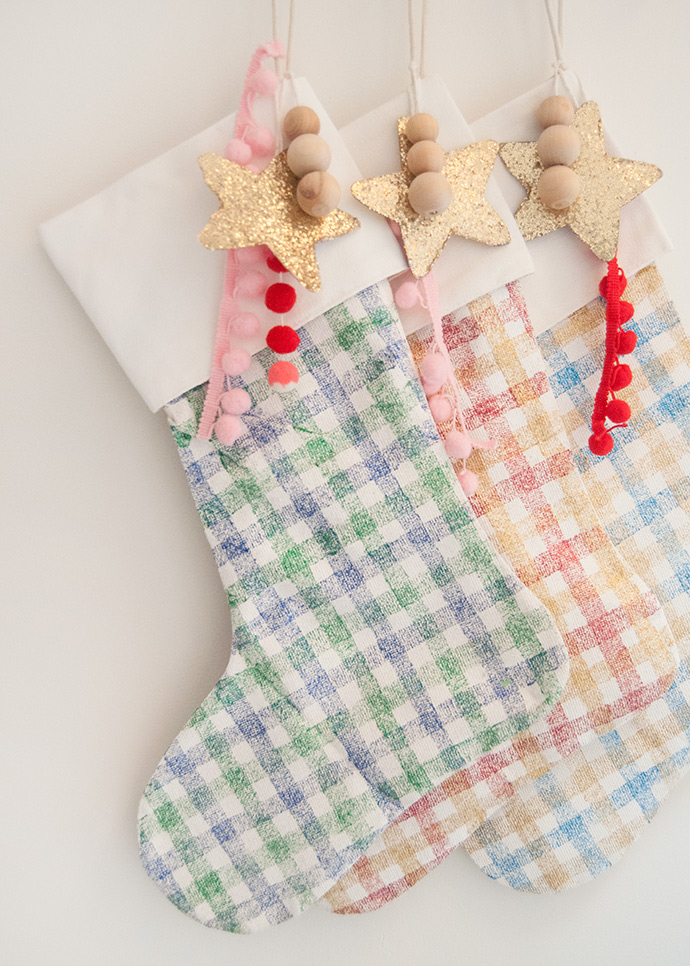
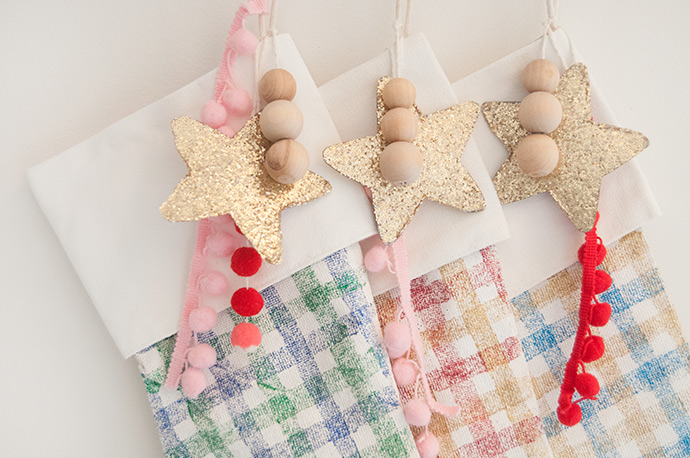
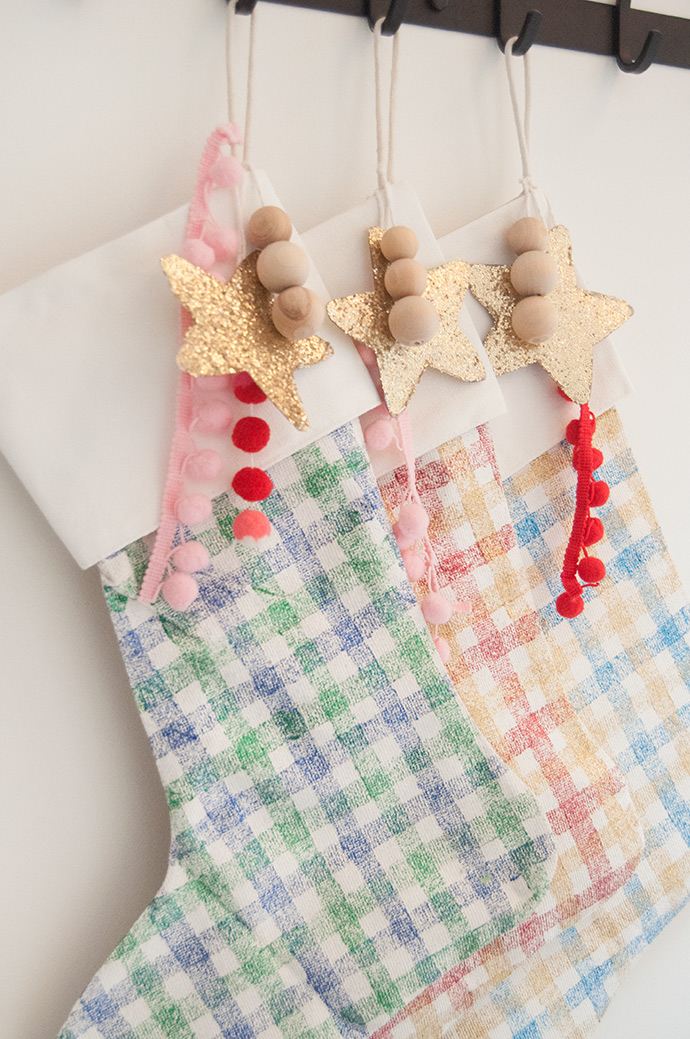
The stockings were hung by the chimney with care, in hopes that St. Nicholas soon would be there … and these stockings are extra special ones because they were crafted with care, too! Is it really the holiday season if there isn’t any glitter around? We don’t think so! And the great thing about Tulip’s Dazzling Glitter Brush-On Paints is that they are so easy to work with. Sometimes glitter can seem like a bit of an ordeal, but all these sparkles are locked into the paint so you don’t have to worry about any big holiday messes!
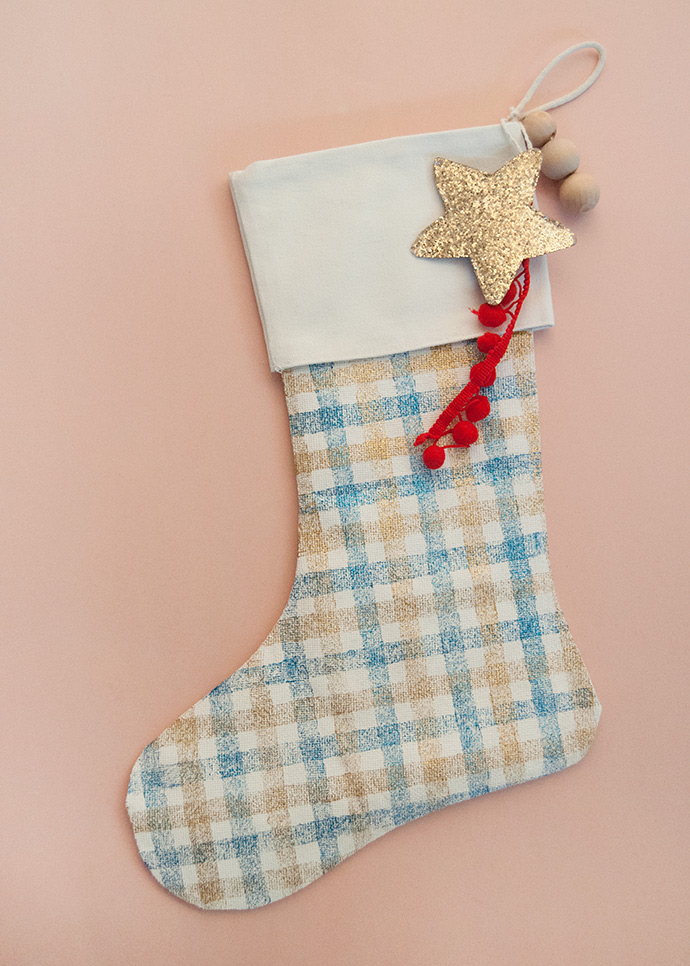
These DIY stockings are a fun way to make matching yet unique stockings for your whole family. Since the pattern is the same simple plaid, they all look great together but you can mix and match a whole bunch of glittery colors! Read on for the full instructions on how to make your own!
what you need:
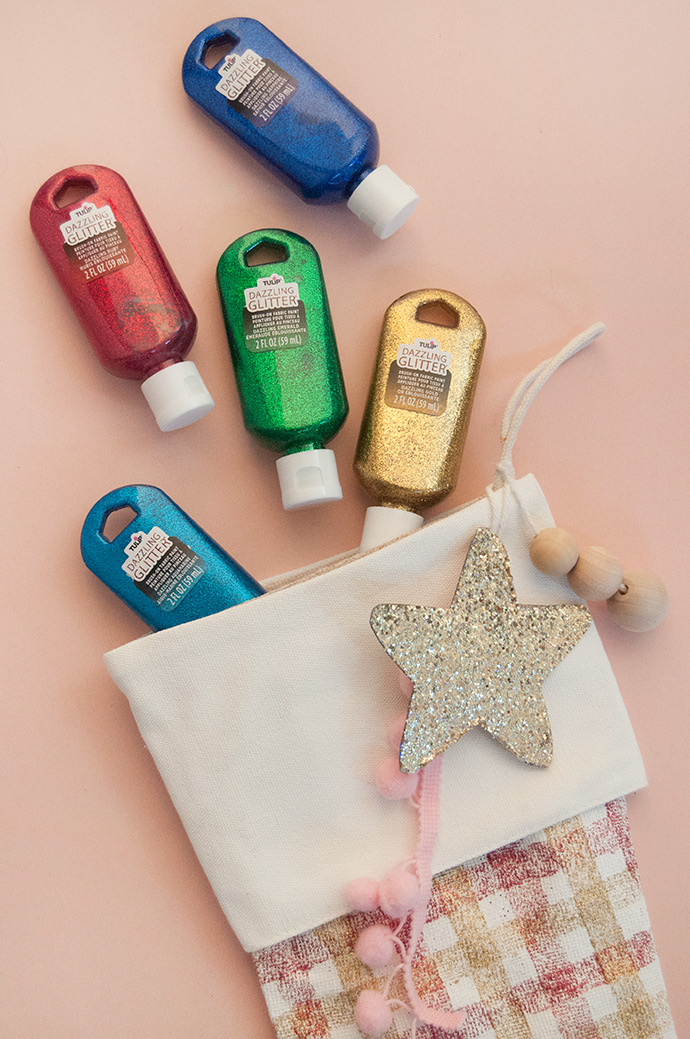
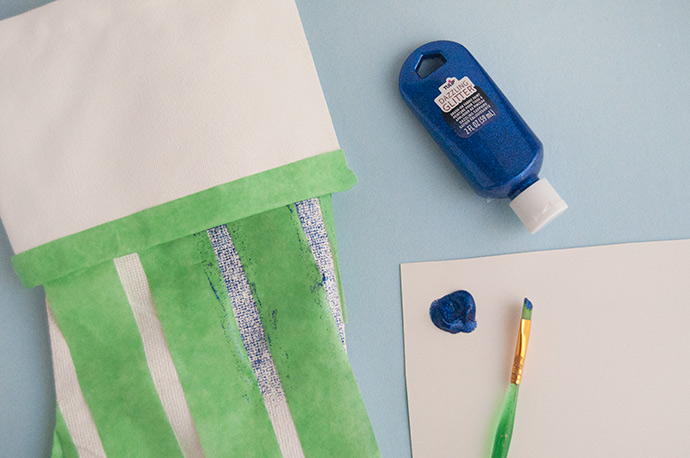
- Tulip Dazzling Glitter Brush-On Fabric Paint
- White canvas Christmas stockings
- Paintbrushes
- Painter’s tape
how-to:
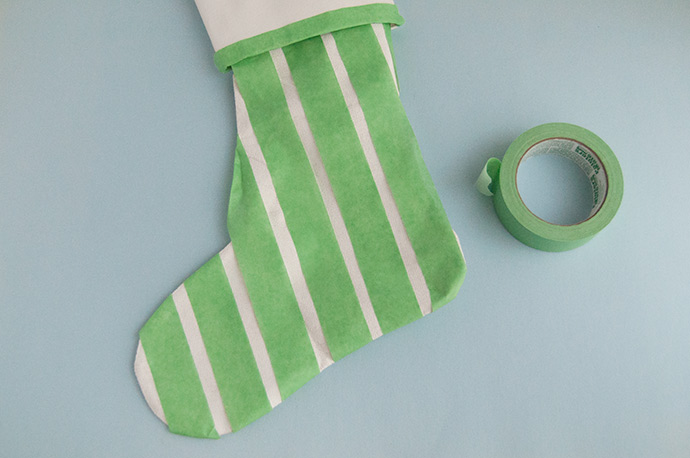
Step 1
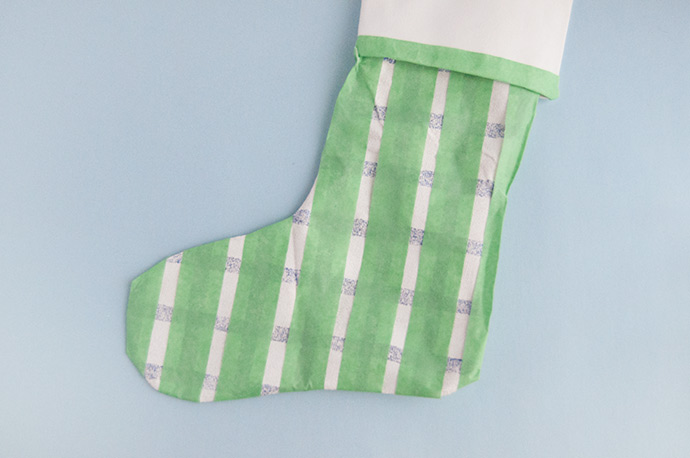
Apply painters tape at the bottom of the cuff of the stocking so that it doesn’t get any paint on it. Then apply the tape in vertical lines about a finger-width apart. Wrap the excess tape to the back of the stocking and keep the lines of tape perpendicular to the cuff, so that it forms a 90 degree angle with it.
Step 2
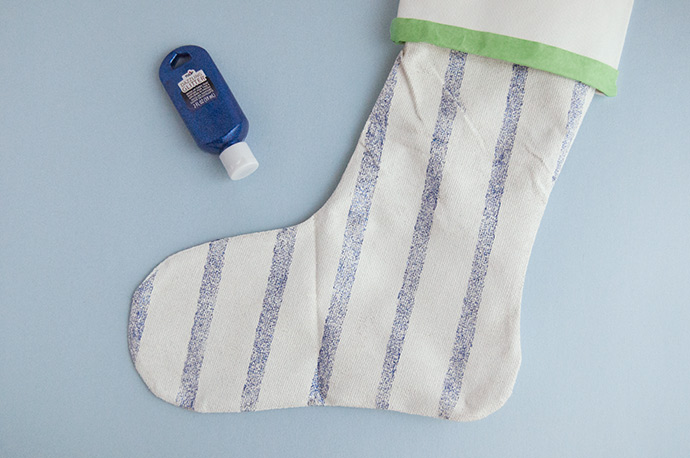
Apply the paint within the tape lines! Make sure that the tape is securely attached to the stocking so that your lines are nice and neat. Depending on the tape you’re using, you may need to press and hold it down as you paint. It also helps to apply the Dazzling Glitter paint moving the brush strokes over the tape edges carefully. Repeat for all the stripes.
Step 3
Remove the tape while the paint is still wet. If there are any little messy spots, use a cotton swab to carefully remove any unwanted paint. Let dry.
Step 4
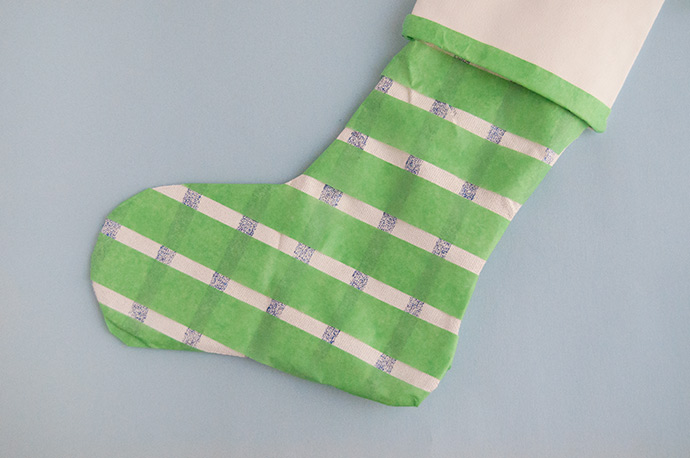
Apply tape in the same way as before but this time horizontally. Keep the spacing the same for a nice square grid.
Step 5
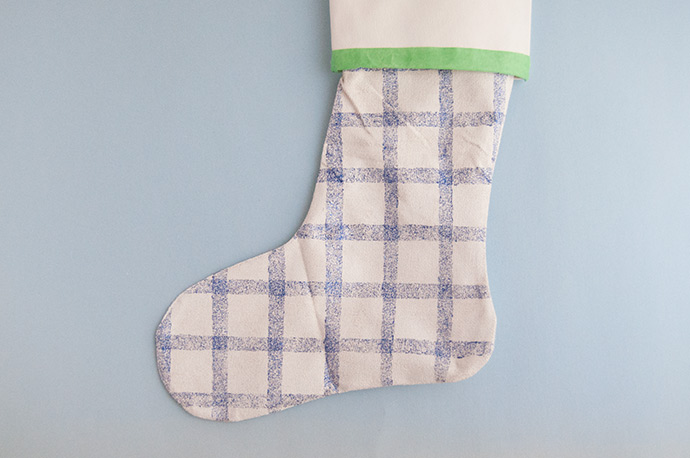
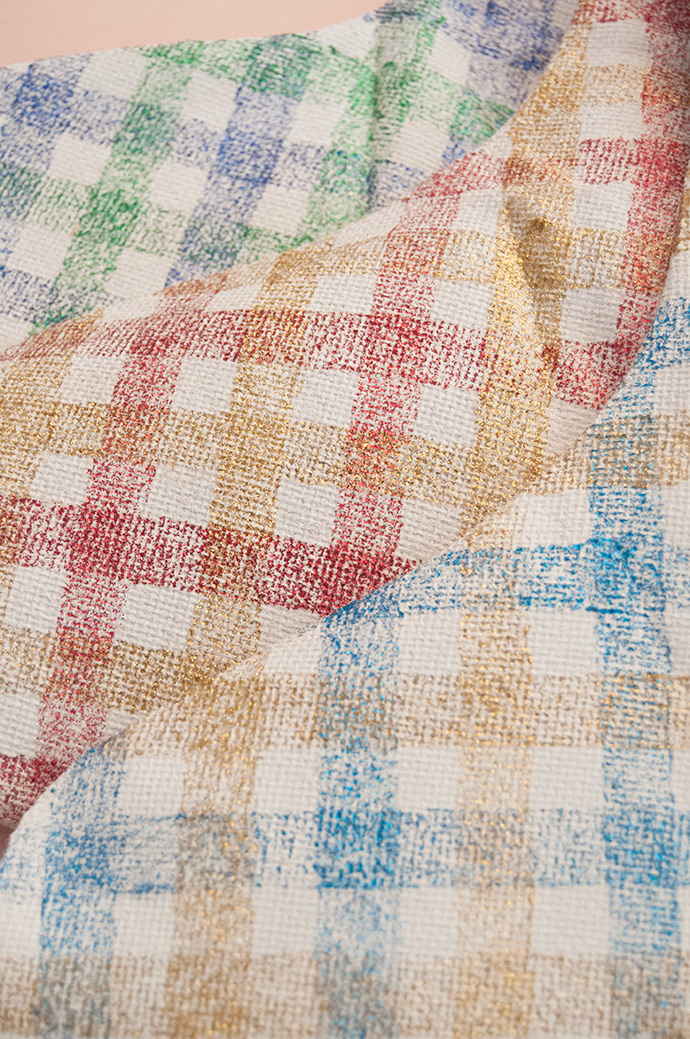
Paint in the same color and remove the tape as you did before. Your stocking should look like this! Let dry.
Step 6
To make the plaid pattern more detailed, apply more vertical pieces of tape so that they are centered over the first vertical stripes of the plaid. Use another color to fill in these lines exactly as before, remove tape, and let dry. Do the same for the horizontal stripes. Let dry and your stocking is ready to hang!
Happy crafting!