This post is sponsored by Mixbook.
Now that the holiday season is upon us, you know what that means: Christmas cards! Getting happy mail is the best any time of year, but it’s especially fun around the holidays. We love finding simple but beautiful ways to display cards from our friends & family, so today we’re sharing how to make Christmas card displays.
Funnily enough, we realized all three ways all start with the letter P: pegboard, Putz houses, and pajaki! Depending on what space you’re using to display your Christmas cards, each of these three projects has a different benefit. The pegboard is great if you have a larger spot to fill right on the wall, or cut it smaller and set it on a shelf ledge. The mini Putz houses can be arranged all together on a windowsill as a group, or spread out on multiple surfaces around the house. And the pajaki is great if you’re looking for a statement piece to hang over a table, or anywhere really.
We’ve teamed up with Mixbook to share a look at their brand new holiday cards this year! Completely customizable, designing your family’s cards has never been easier. Take a look for yourself at Mixbook’s Christmas card designs. We had so much fun browsing their selection and it really gets you in the holiday spirit!
Keep reading for the instructions for each of the holiday card displays below.
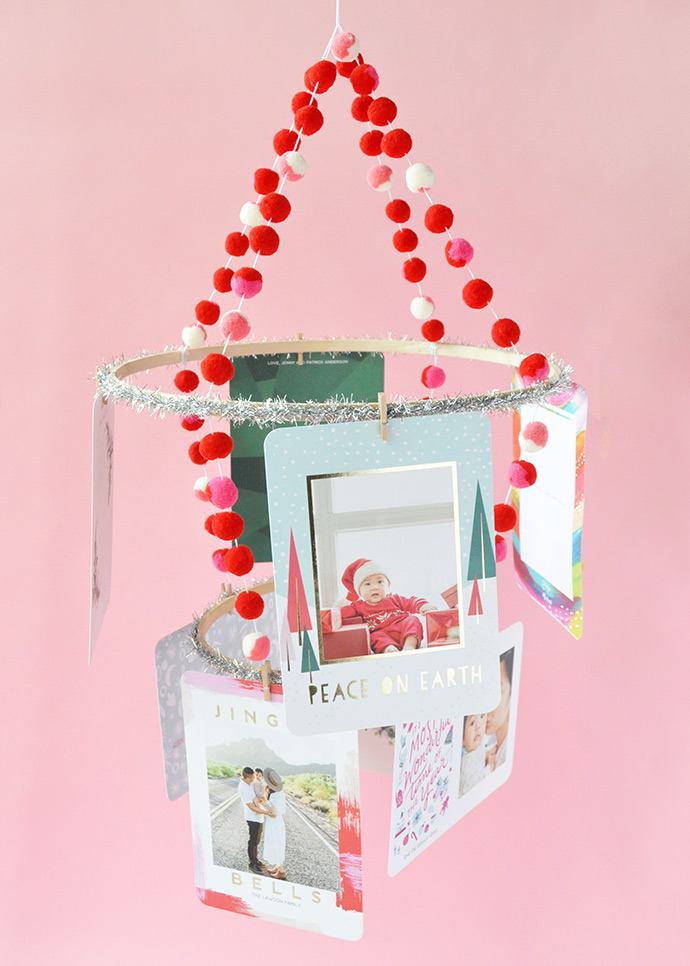
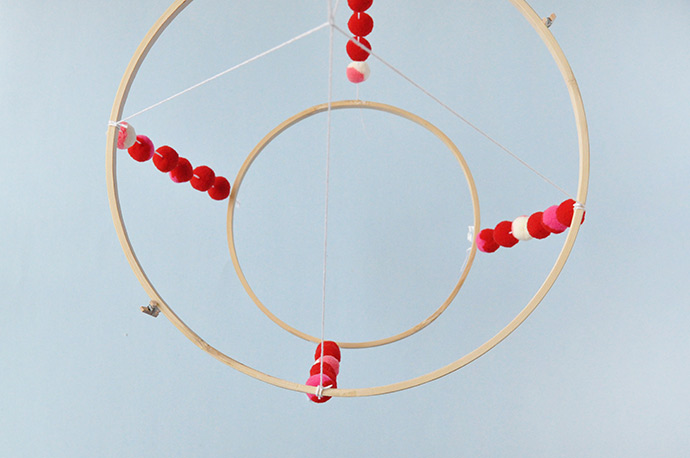
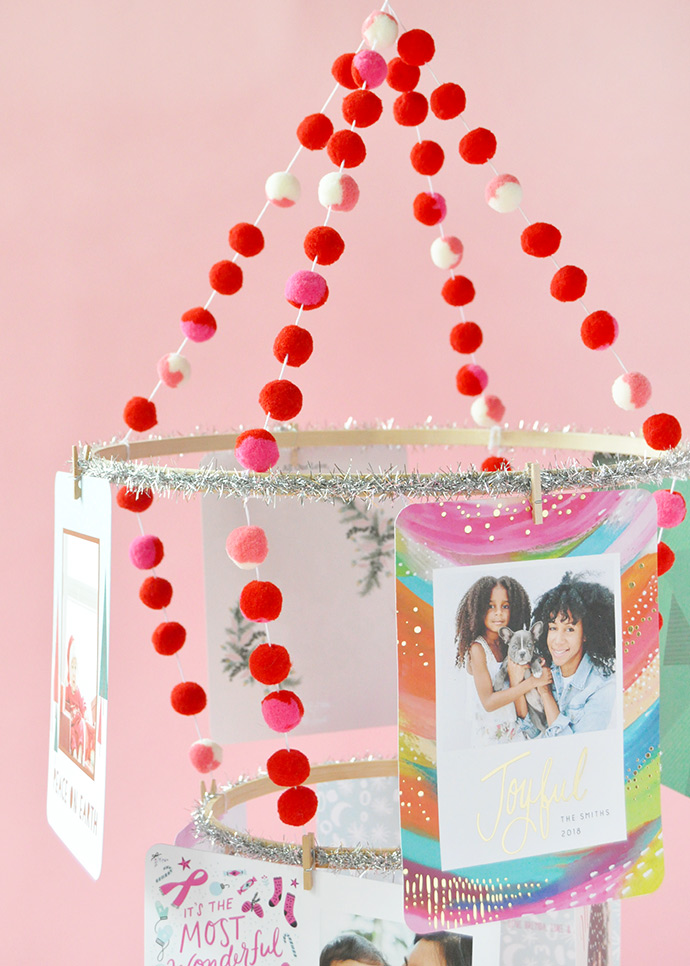
Pajaki-Inspired Card Display
what you need: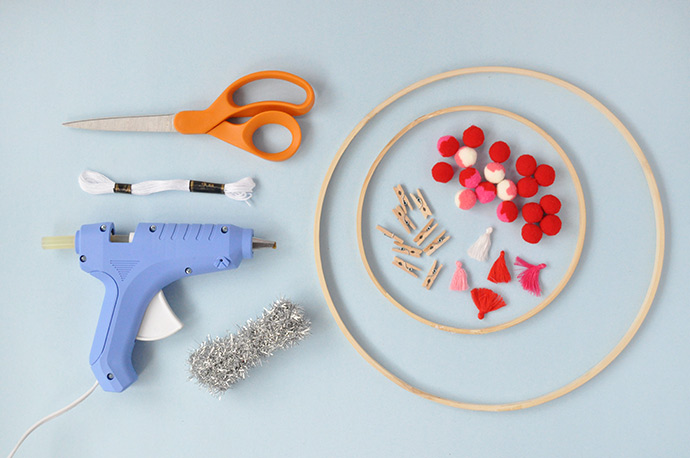
- Two wooden embroidery hoops (12” and 8”)
- Pom poms
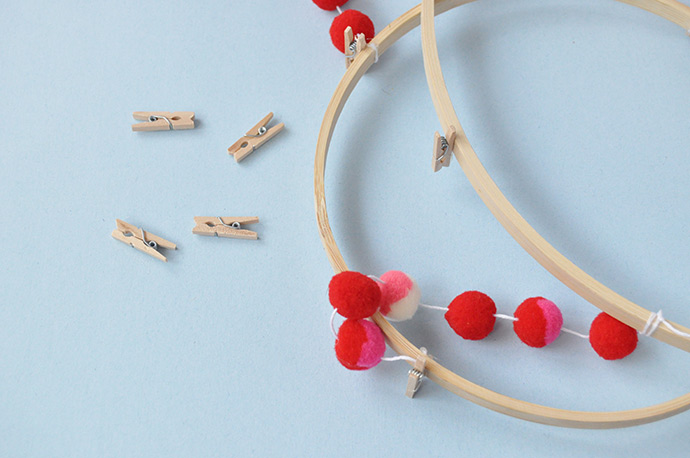
- Miniature clothespins
- Scissors
- Hot glue gun
- White embroidery thread
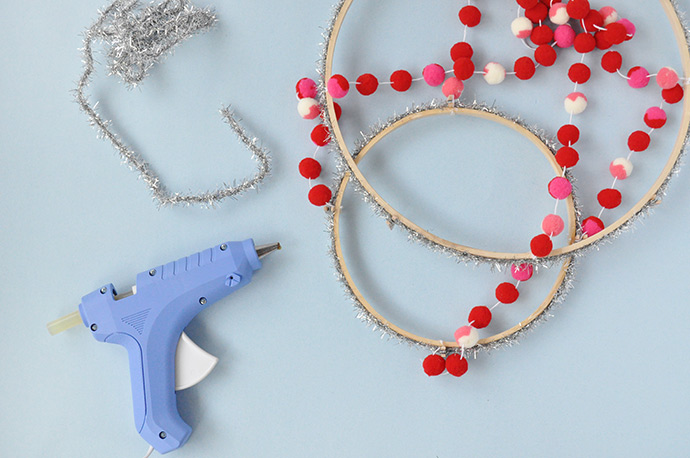
- Tinsel, tassels, & misc accessories
- Tape (optional)
how-to:
Step 1
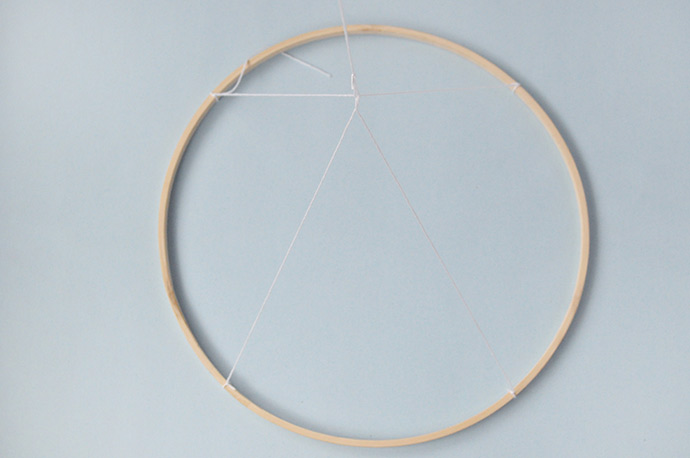
Begin by setting the outer hoops from both embroidery hoops aside – you won’t need them for this project – so that you’re just working with the smooth inner hoops. Cut two pieces of embroidery thread each about 24” long. Tie each of the four ends to the larger hoop at the 12, 3, 6, and 9 o’clock positions.
Take another piece of thread (length depending on where you’ll be hanging your pajaki) and tie one end of it around the point where the other two threads cross. If you keep this knot a little loose, then you’ll be able to easily adjust the hoop and strings so that everything hangs nice and straight.
Note: We ended up doing this step using pom pom garland for an even more festive look – see below for instructions on how to make this.
Step 2
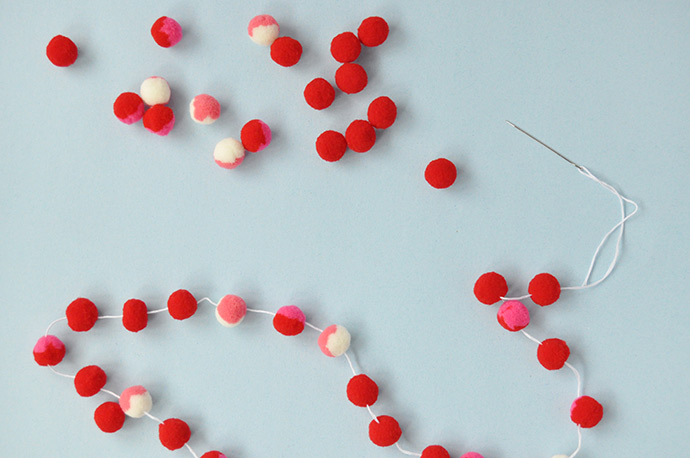
On another piece of embroidery thread, use a needle to pierce through pom poms, forming a sort of garland. We used a mix of red and pink ones for a festive look, but you can use whatever colors you like. This pom pom garland will be used to connect the smaller hoop to the larger one, so you’ll need about 40” total which you can cut into four 10” pieces.
Step 3
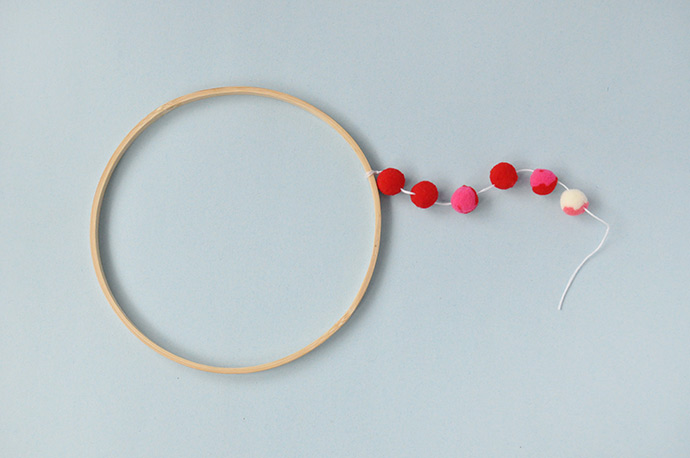
Tie the end of one pom pom garland to the smaller hoop. Do the same with the other three pieces, again tying to the 12, 3, 6, and 9 o’clock positions.
Step 4
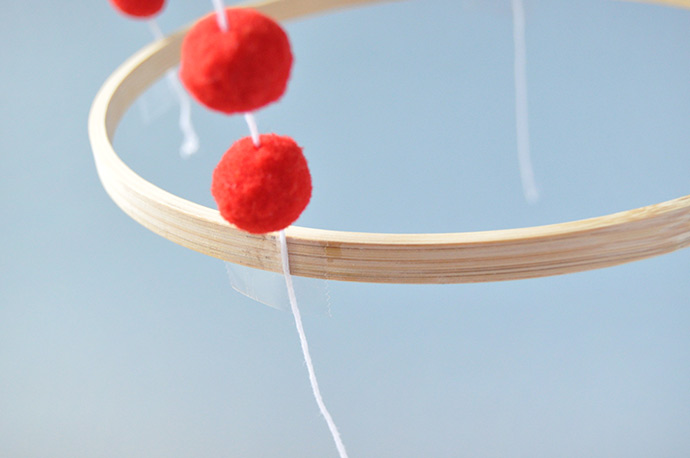
Tie the other ends of each of the four pom pom garlands to the larger hoop, lining them up with the existing threads on it. If you’re having trouble keeping everything even at this step, we recommend hanging the pajaki so that you can work with it off the table. You can also use tape to temporarily attach the garlands and adjust everything to make it as even as possible before tying.
Step 5
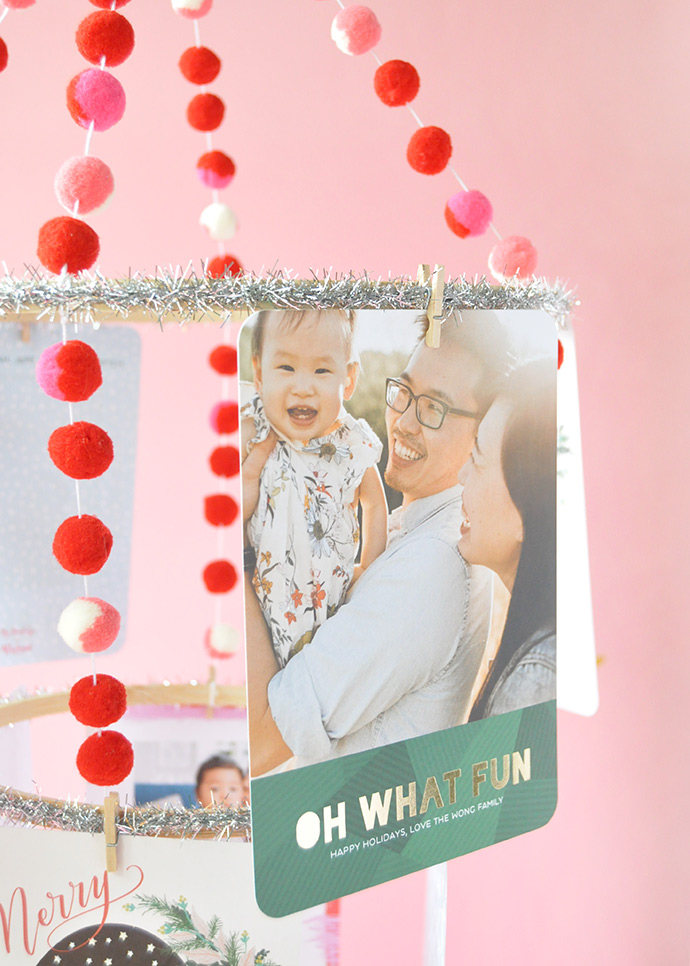
Once everything is tied, it’s time to glue on the mini clothespins. We used 8 in total for our pajaki – on the larger hoop, we placed them evenly between each of the knots, and then on the smaller hoop we hot glued them right onto the knots. This way, the cards will be staggered when you attach them.
Step 6
Time to decorate! We used a glue gun to attach this silver tinsel trim along the outside of each hoop. You can get creative with this and use more pom poms, tassels, jingle bells, or whatever you like, to dress up the hoops.

Your pajaki is all ready to hang!
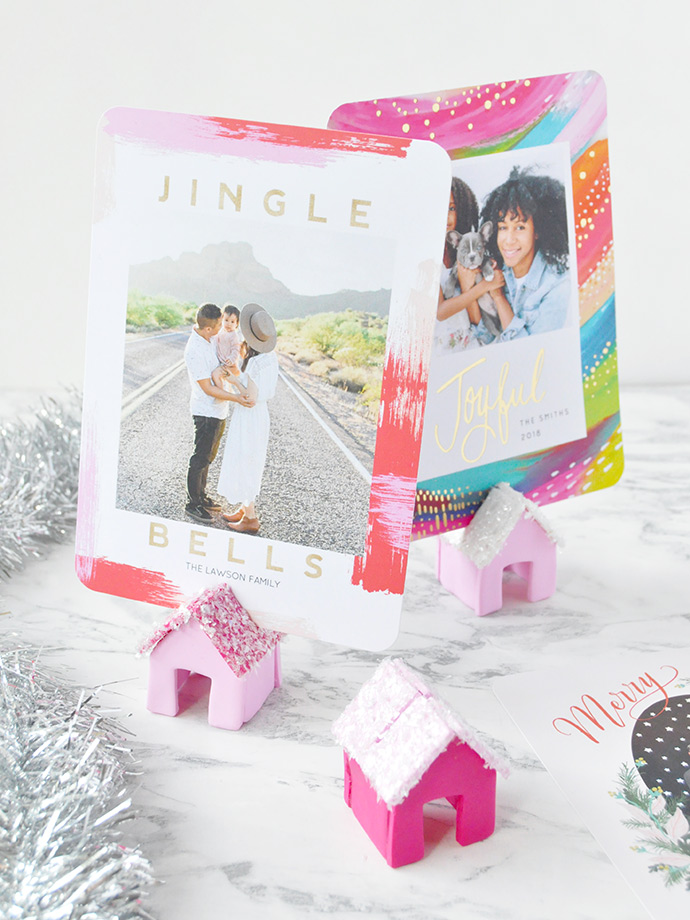
Putz House Card Display
what you need: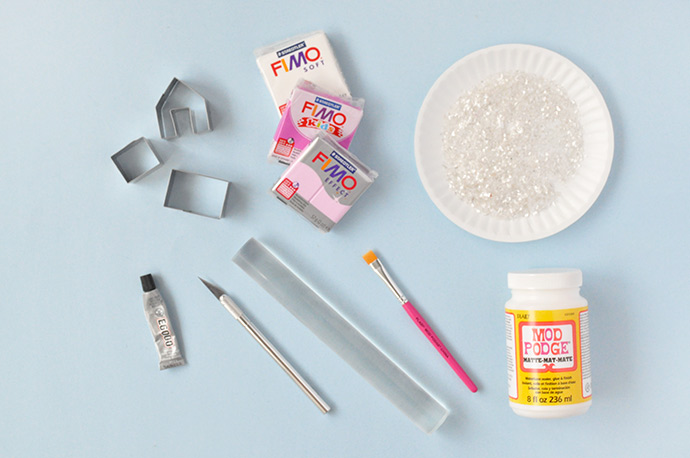
- Miniature gingerbread house cookie cutters
- FIMO Clay
- Acrylic roller
- Craft knife
- Mod Podge
- Paintbrush
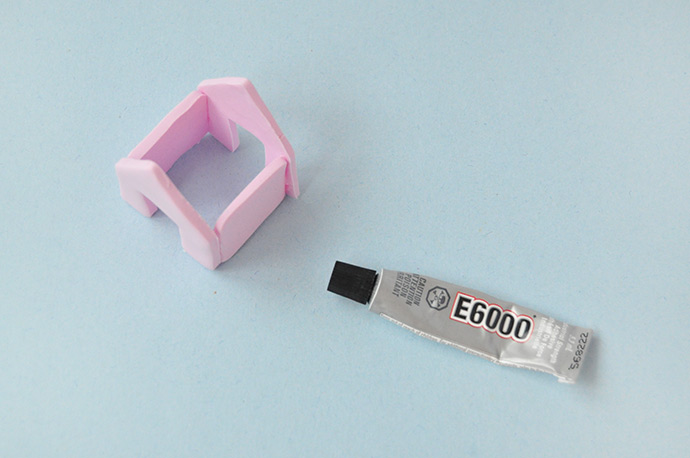
- E6000 glue
- Fake snow or jumbo glitter
how-to:
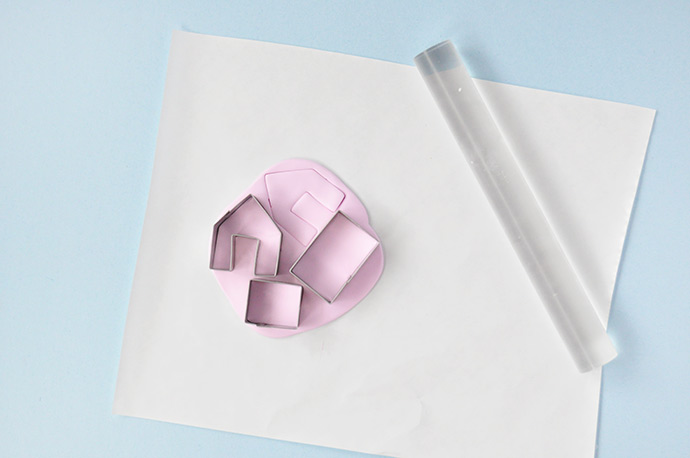
Step 1
Begin by warming the FIMO clay in your hands and rolling it out on your work surface. We like to work on the shiny side of freezer paper for this to reduce dust, but you could also work on a ceramic tile or similar. Roll the clay so that it’s about ¼” thick and cut out two of each of the gingerbread house shapes. One package of FIMO clay should be enough for two complete houses, so cut out as many as you like.
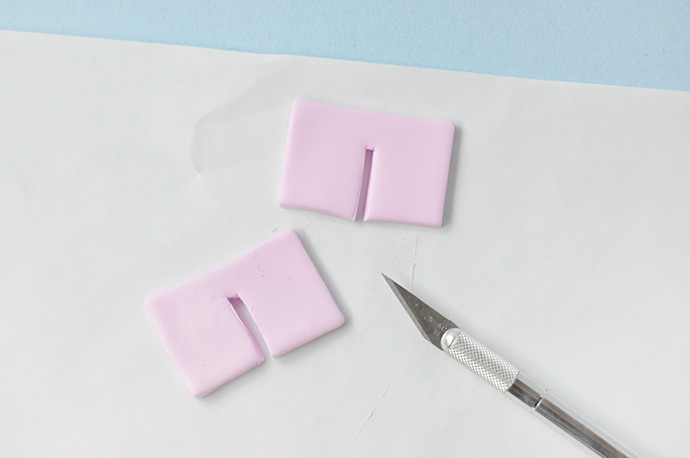
Step 2
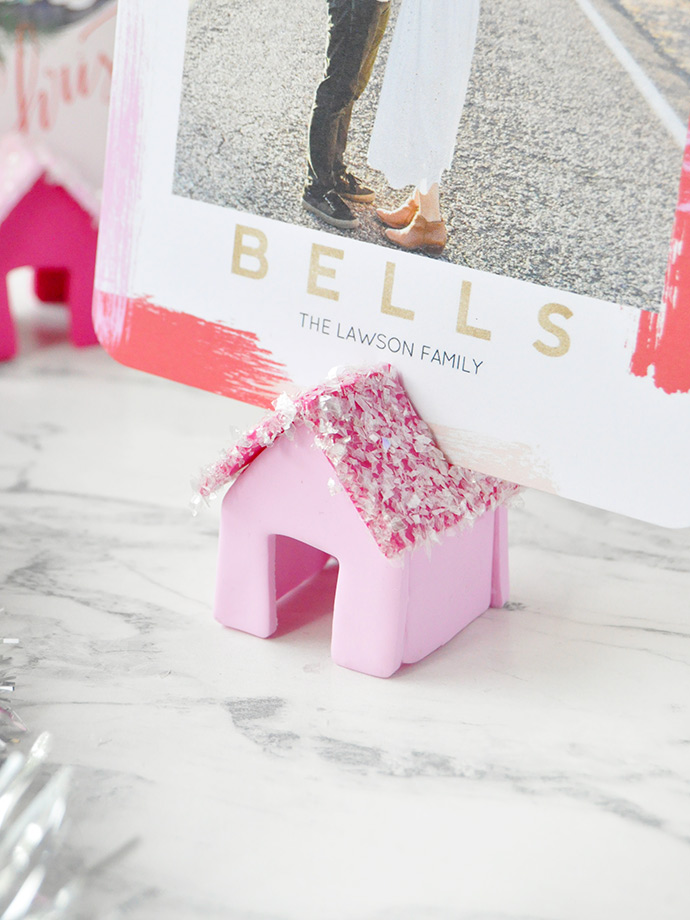
To adapt this gingerbread house into a card holder, you’ll need to cut a slit into the two roof panels as shown.
Put all your clay shapes onto a foil-lined pan and following the directions on the package, bake the shapes in the oven until done. Let cool completely.
Step 3
Once cool, assemble the bottoms of the houses using E6000 glue. Make sure to do this in a well-ventilated area, again following all directions on the glue’s package.
Note: Regular hot glue, white glue, or similar don’t work well with FIMO clay, especially for structural pieces like these but E6000 or a similar super glue are a good bet.
Step 4
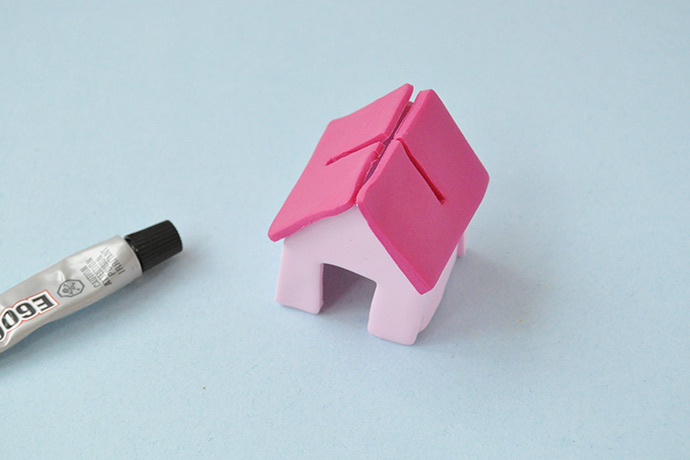
In the same way that you assembled the base of each house, assemble the roofs as well – we mixed and matched the colors. When gluing these in place, make sure that the slot on the top lines up nicely. Let glue dry.
Step 5
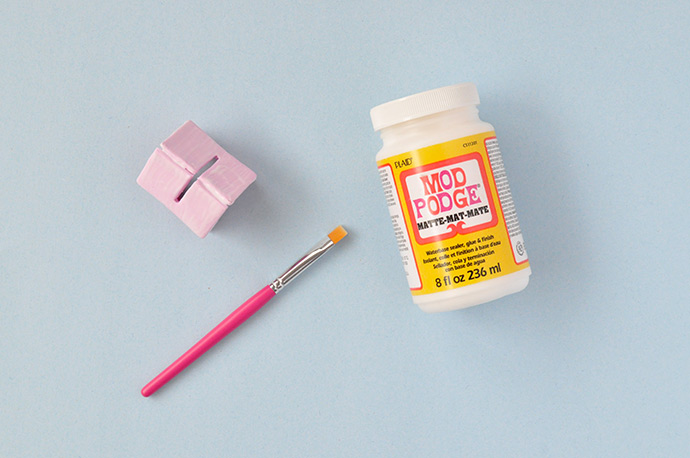
If you’d like to add snow onto the roofs, we brushed on a coat of Mod Podge making sure to get top and sides of the roof.
Step 6
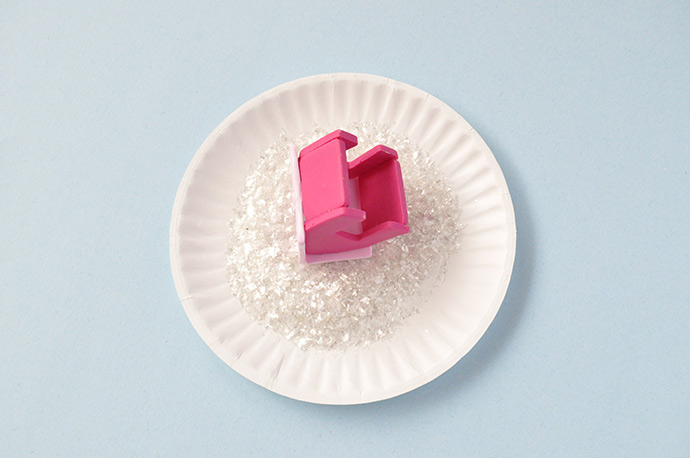
Press the roof into the fake snow or jumbo glitter so that all sides of the roof are covered. Let dry.
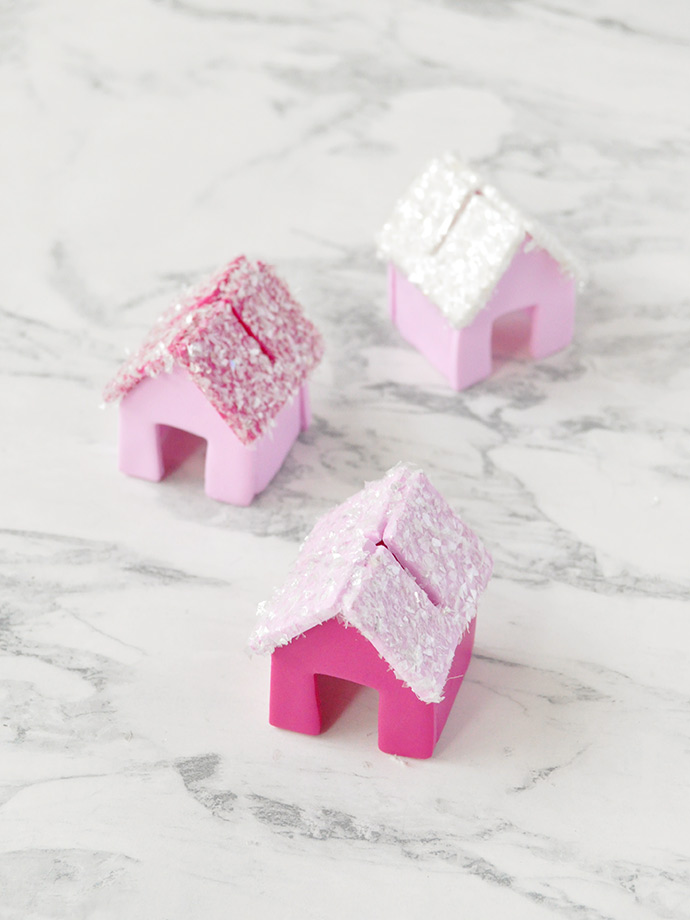
Arrange your miniature Putz houses into a little neighborhood and place a card into each one.

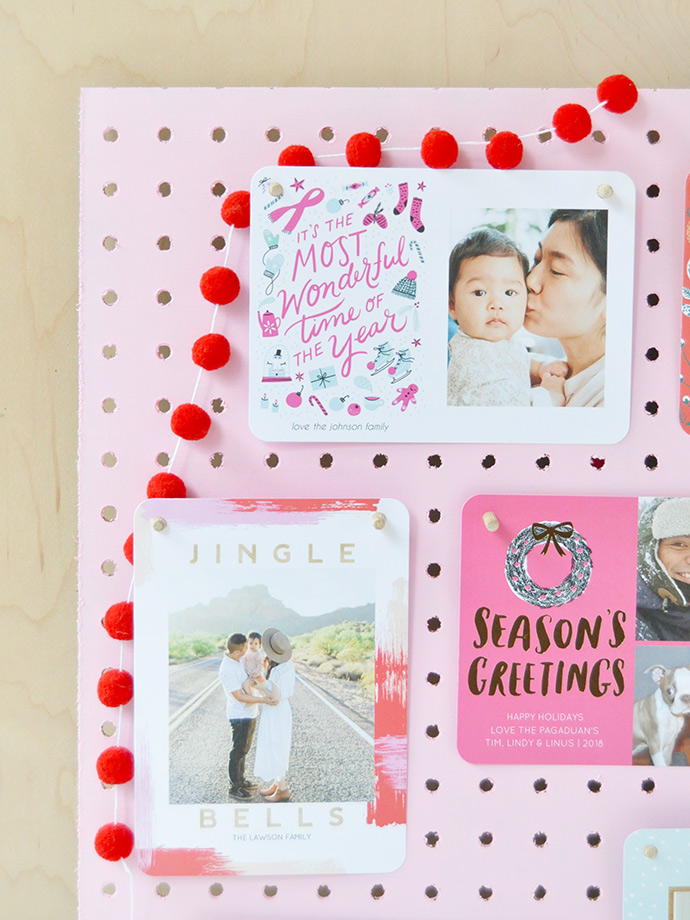
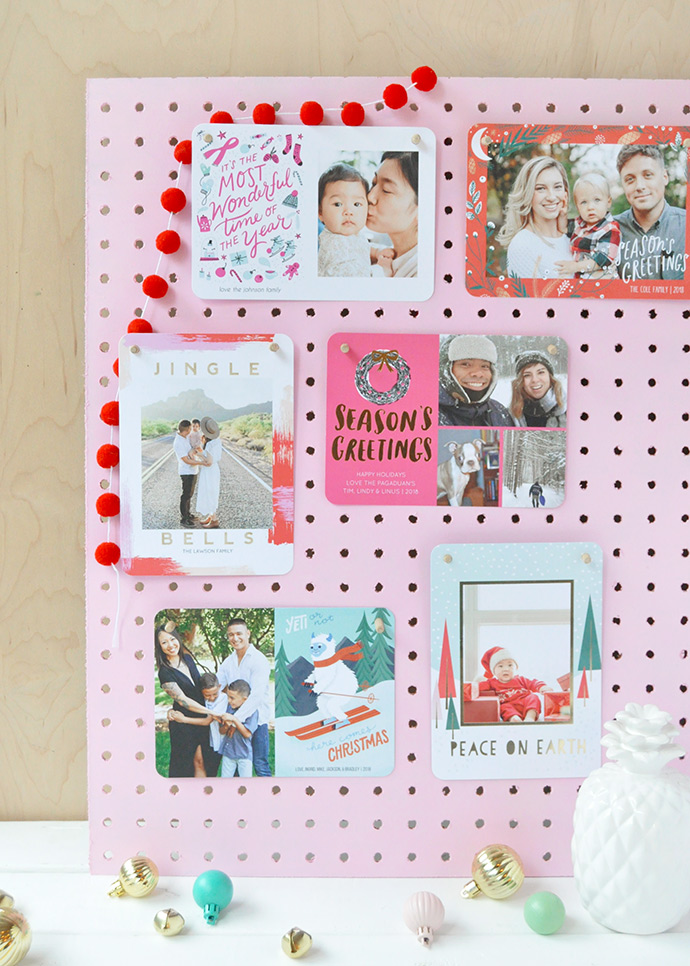
Painted Pegboard Card Display
what you need: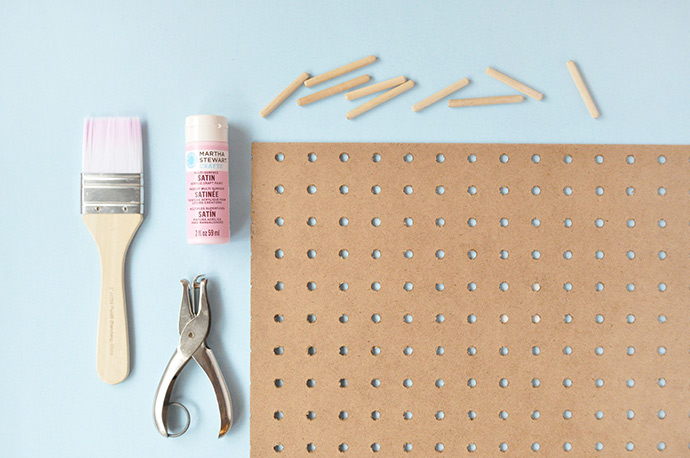
- Unfinished pegboard (cut to size)
- Wooden pegs
- Hole punch
- Martha Stewart Crafts Multi-Surface Satin Acrylic Paint
- Paintbrush
how-to:
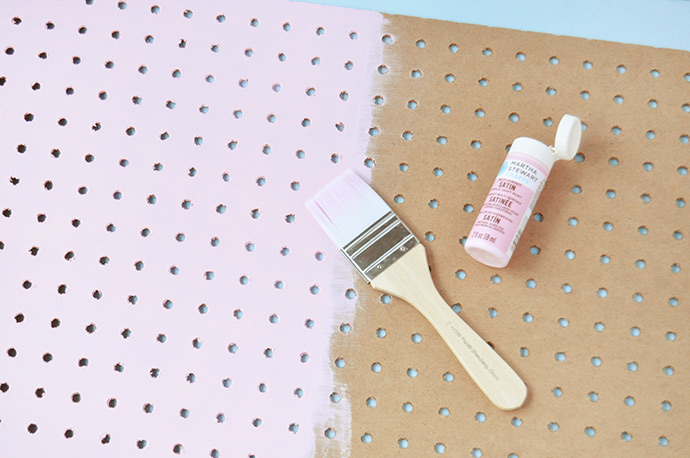
Step 1
Squeeze some paint onto a paper plate and apply onto the front side of the pegboard. Make sure to cover your work surface because the paint may leak through the pegboard holes. Use a small brush to get the inside of the holes if you like, or simply to prevent drips from forming blocking the holes. Let dry.

Step 2
Use a hole punch to make holes in the corner of each card. The simplest way to do this is to simply punch a hole on one side and let the card hang that way. If you’d like a more tidy and square look, as shown in the photos, punch the first hole in one corner and then hold the card up to the pegboard. With a pencil (or your finger) mark the spot where the second hole should be so that it matches the pegboard holes. Punch the hole and repeat on the remaining cards.
Arrange the pegs into the board and hang your cards!

Which of these three methods is your favorite? Let us know in the comments below! Don’t forget to check out the beautiful holiday card designs Mixbook has to offer this holiday season.
Happy crafting!