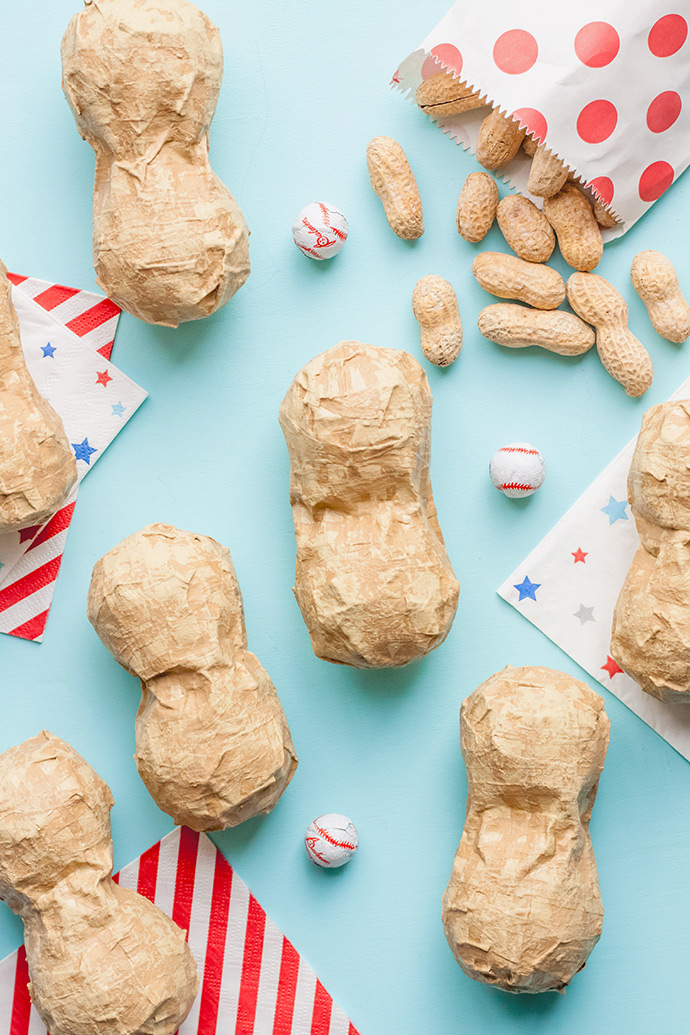
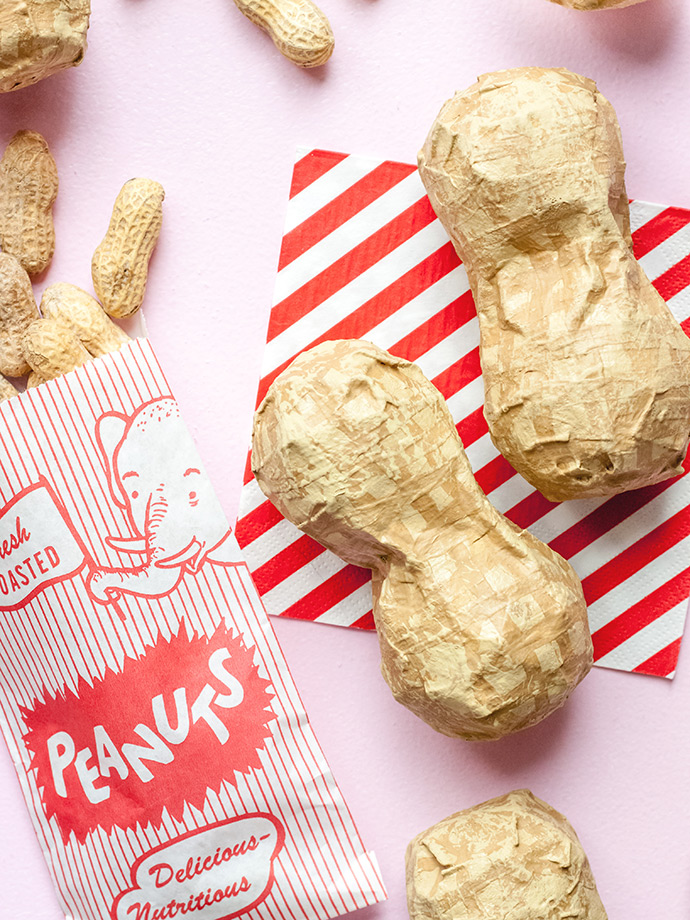
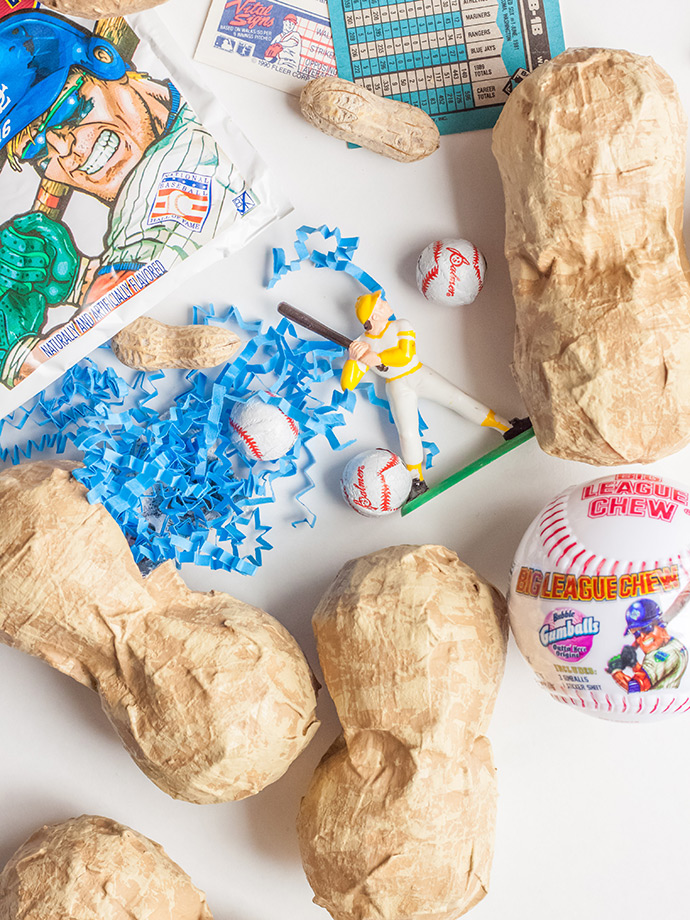
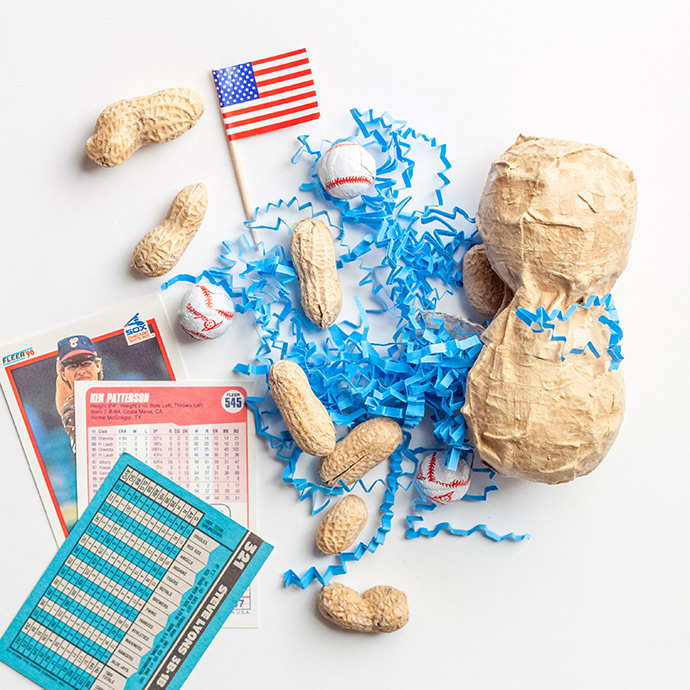
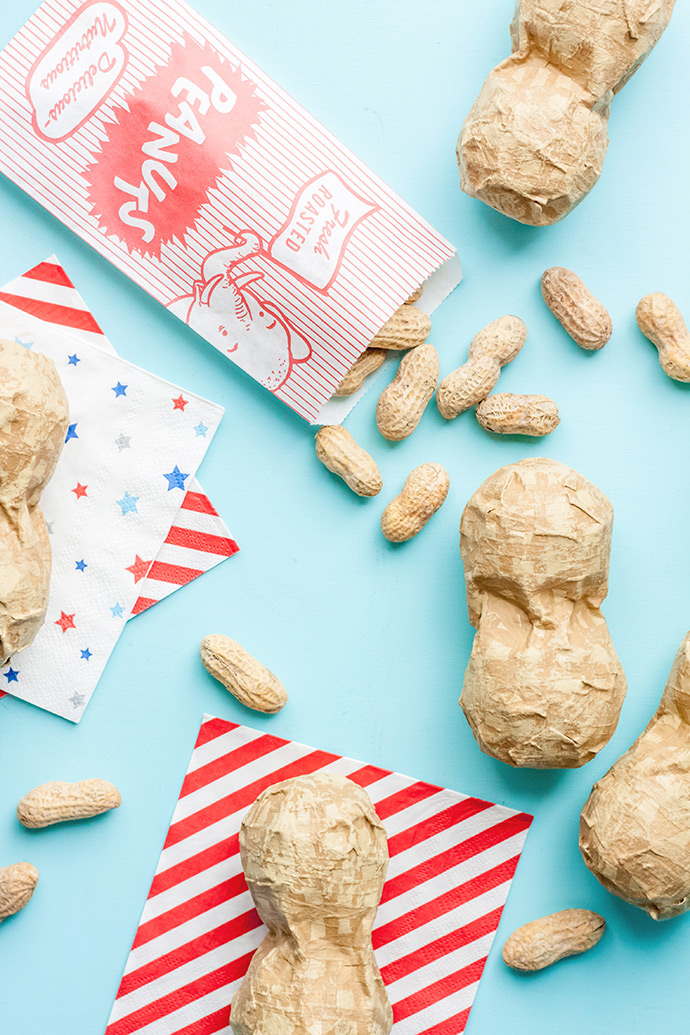
With baseball season approaching, and the constant reminders from my son about his baseball-themed eighth birthday “coming up” in November, I was inspired to make these peanut piñatas. I have never actually had peanuts at the stadium, but the good ol’ song “Take Me Out to the Ballgame” says “Buy me some peanuts…”, so I guess it’s safe to assume they qualify as baseball-food! These piñatas would also be adorable for a carnival or circus party.
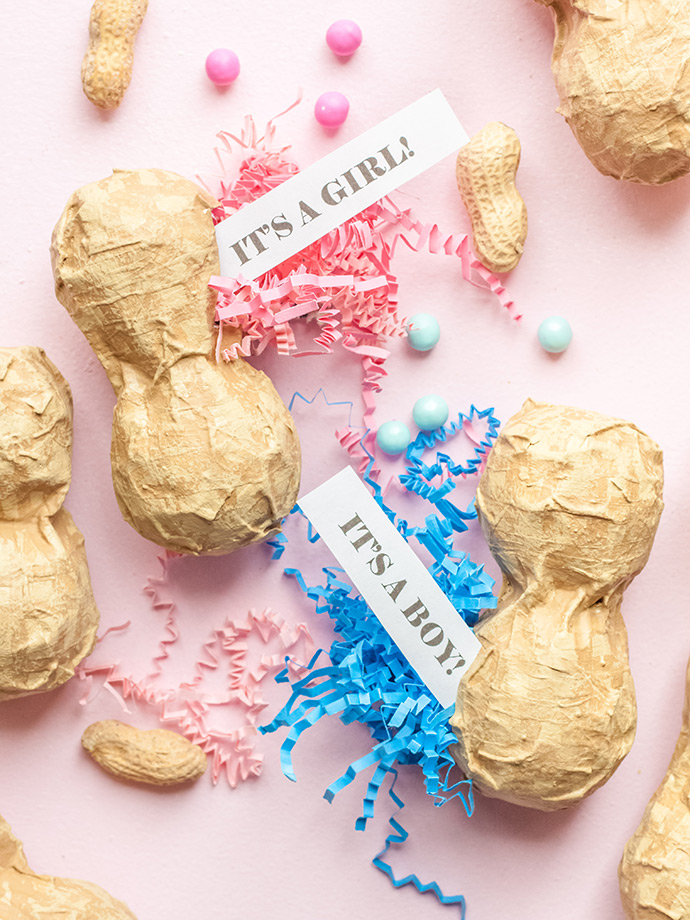
We always called my daughter “our little peanut”, since that’s exactly what she looked like in our first ultrasound. “Little Peanut” would be a precious theme for a baby shower, or even a gender-reveal party. Fill the peanut(s) with pink crinkle shreds and candies for a girl, or blue for a boy, and have the mom and dad (…or grandparents, friends, etc.) open them to reveal baby’s gender. If your family lives too far for a party, stick one in the mail!
Here are a few ideas for each theme:
Baseball – Fill the piñatas with chocolate baseballs, peanuts, small baseball cards, Big League Chew (bubble gum), Cracker Jacks, and crinkle shreds. If you’re surprising someone with tickets to a game, it would be awesome to stick them in a peanut piñata! It wouldn’t necessarily give away the surprise, and it would be a fun way to present them to your husband, kids, or friends. Just make sure they open the little door, rather than ripping the tickets in half with the piñata!
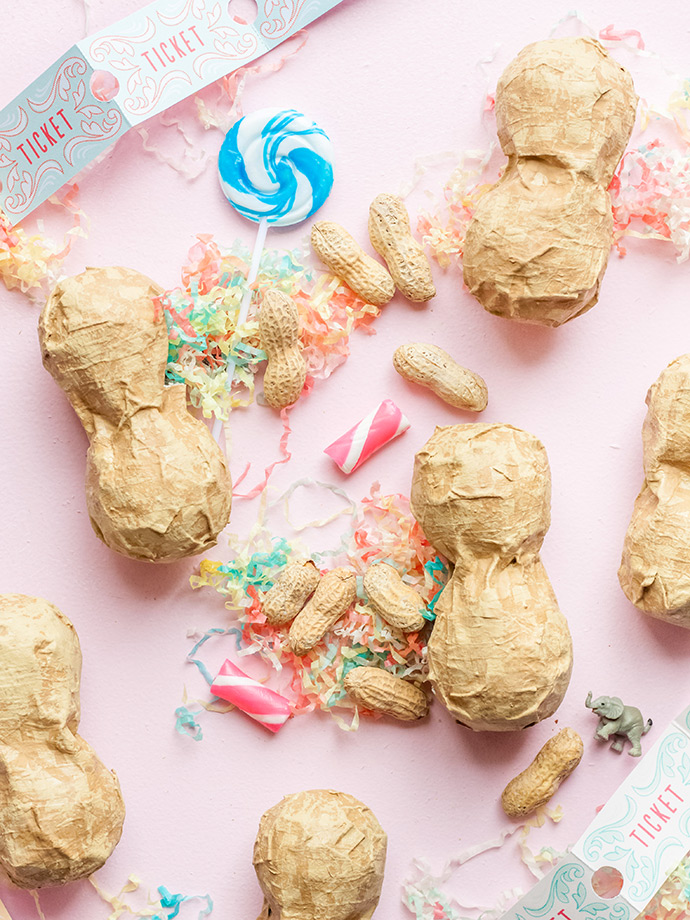
Carnival or Circus – Fill the peanuts with small candies, lollipops, plastic circus animals, tickets, peanuts, animal crackers, and crinkle shreds! Again, this would be an awesome way to present tickets to your kids for the circus or carnival!
Baby Shower – Fill the peanuts with crinkle shreds, candies, a coffee pod, peanuts, and any other good baby shower favors! You could even put guests’ names on them, and use them for place cards that they will then take home as favors. Dual-purpose peanuts!
what you need:
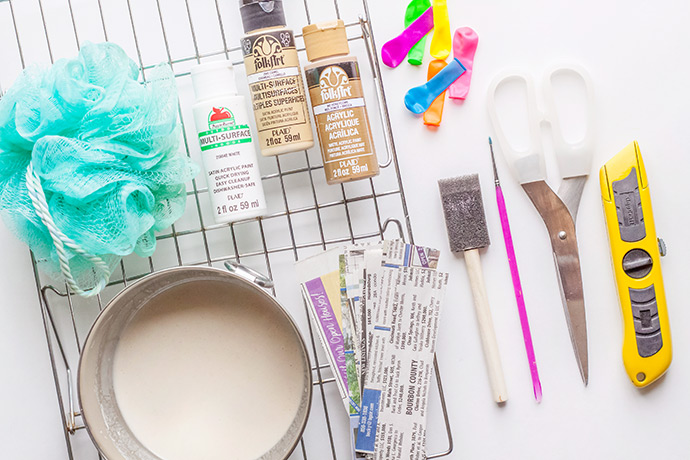
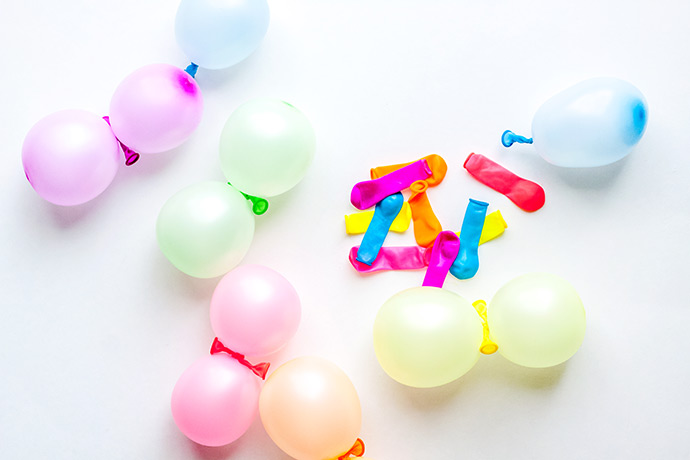
• 2 water balloons (per piñata)
• Balloon pump (not pictured)
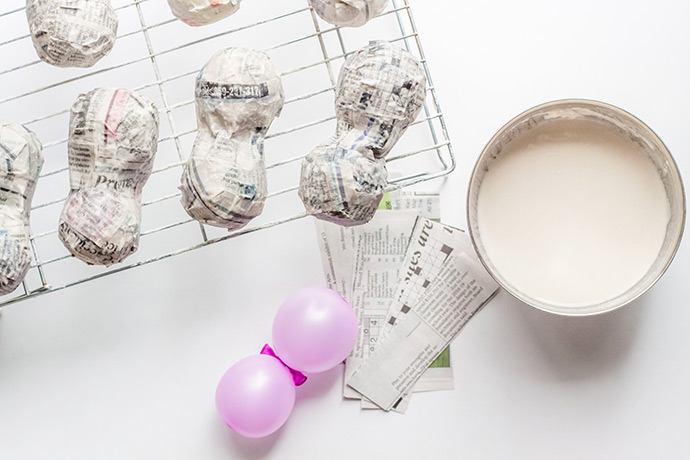
• Newspaper strips
• Scissors
• Paper mache paste (1 c flour, 1 c water)
• Wax paper
• Cooling rack
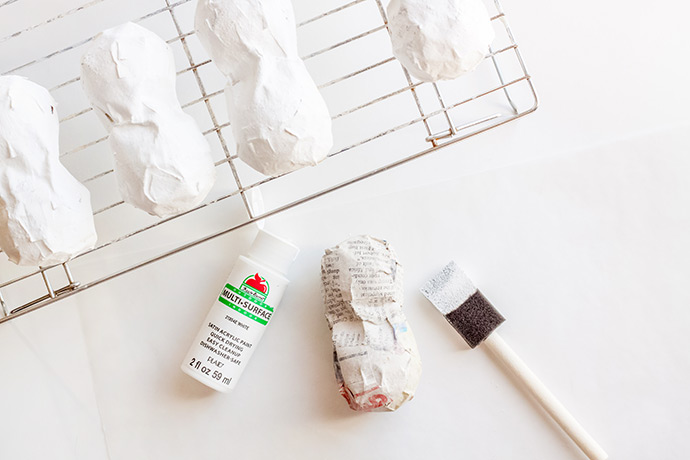
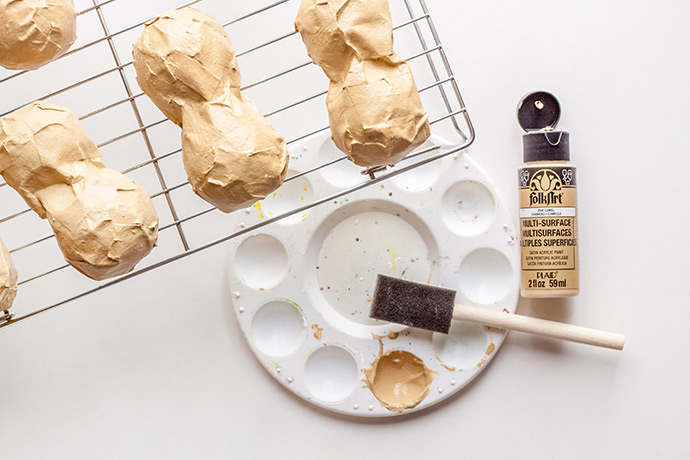
• Folk Art Acrylic Paint (white, camel & honeycomb)
• Sponge brush
• Paintbrush
• Box cutter
• Small treats and prizes
• Paper shreds (optional)
• Bath pouf
how-to:
Step 1
After using your balloon pump to blow up two water balloons, tie them together at the ends. Pull them as close together as possible, and make a double knot.
Step 2
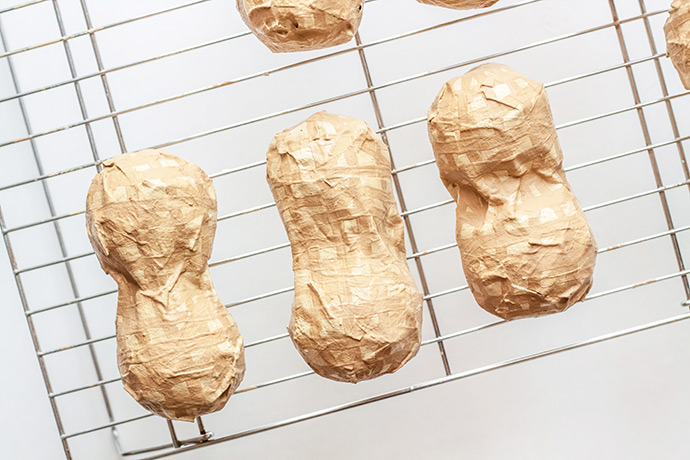
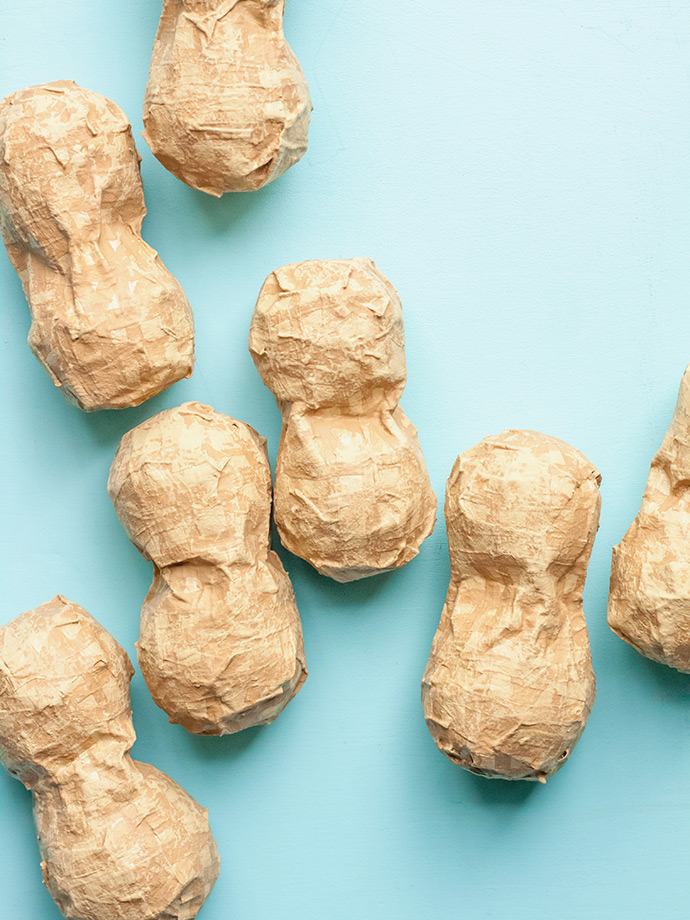
Cut your newspaper into 1-2” strips. Dip a piece in your paper mache paste, and make sure it is fully coated, but wipe off the excess by sliding two fingers from top to bottom. Place the strip on your balloon peanut, and repeat this step until the balloons are completely covered. Add a second layer, and plaster the pieces of newspaper down as much as possible, smoothing out any air pockets or lumps. Once the peanut is looking as smooth as possible, lay it on a cooling rack. Allow to dry completely. (May take up to 24 hours)
Step 3
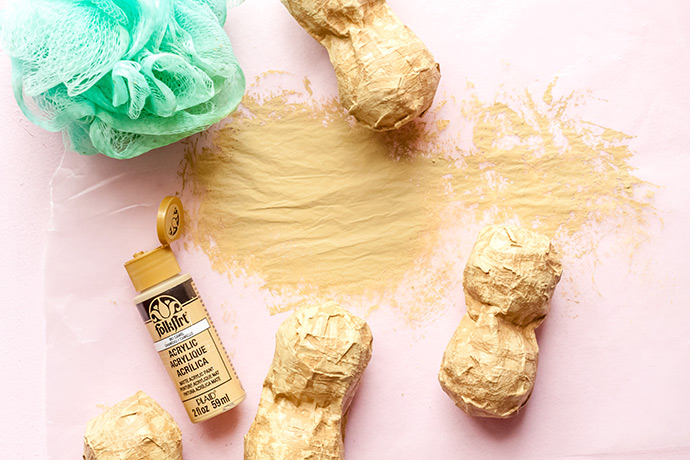
Use your sponge brush to prime the peanuts with white acrylic paint. Allow to dry.
Step 4
Paint the peanuts light brown (camel), and allow to dry again.

Step 5
Mix 1 part honeycomb and 1 part camel to get desired paint color. Use your paintbrush to paint vertical lines on the peanut. Leave about ¼” between each line, but have the lines meet at the top of each end. Allow to dry between sides.
Step 6
Now paint horizontal lines around the peanut, about ¼” apart, but not as evenly spaced as the vertical lines. You don’t want the grid to look like gingham, so changing the spacing and even angle, will look best. Also, paint some extra diagonal lines to make the grid more imperfect.
Step 7
Pour a small puddle of light brown (camel) paint on a piece of wax paper. Dab your bath pouf in the paint, and dab the pouf on the wax paper to get off the excess paint. You only want a small amount on the pouf. Now randomly dab the pouf on the peanut, leaving little splotchy patches of paint. This will help eliminate the gingham-look as well, and will look like “peanut dust”.
Step 8
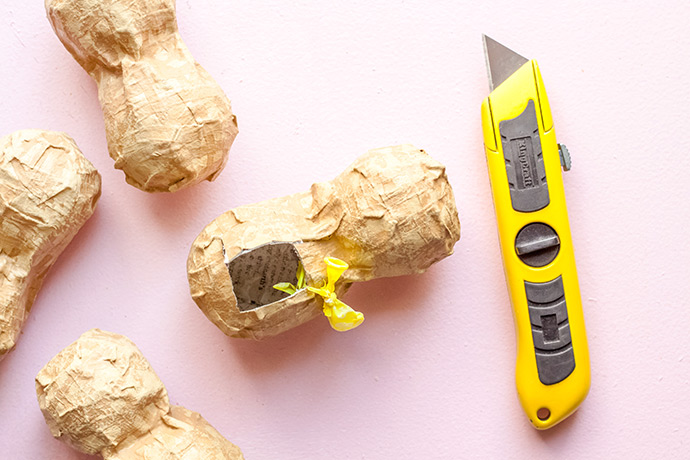
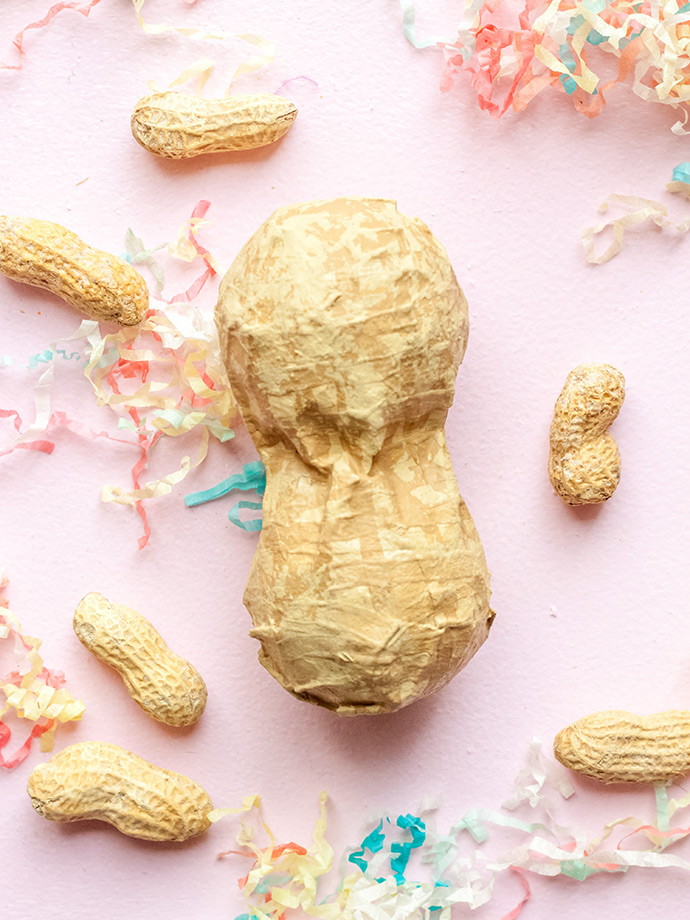
Use a box cutter to cut three sides of a rectangle into one side of the peanut, creating a small door. Carefully pull out the balloons, and fill the peanut with small treats, prizes, and crinkle shreds.
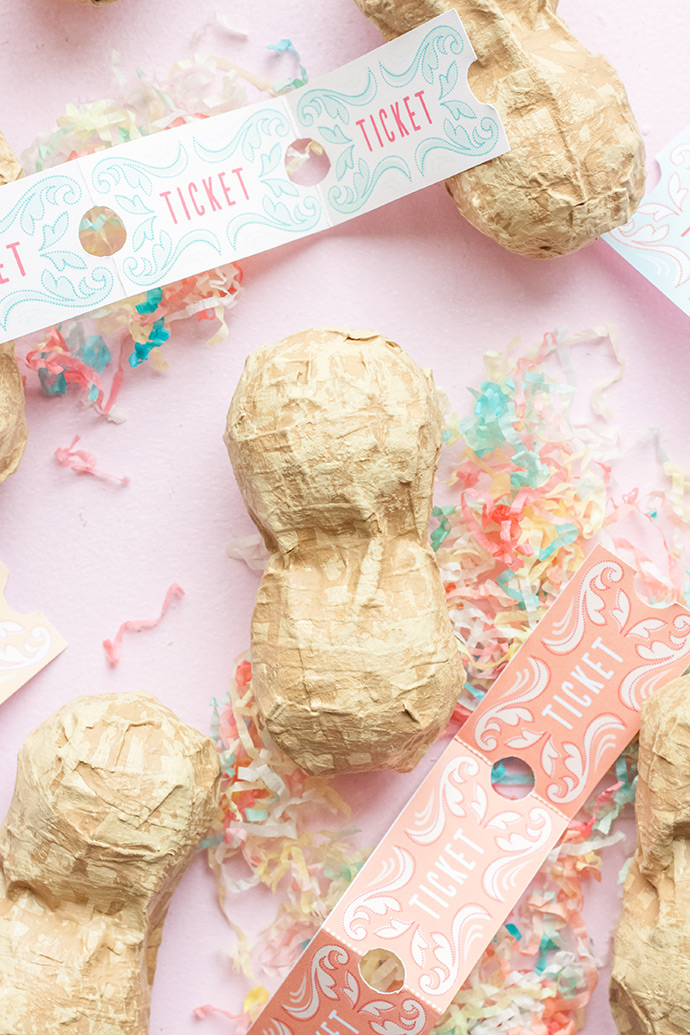
And in case you’re wondering, I got these adorable carnival ticket printables from Julep.
Your piñatas are ready to go! Happy crafting!