This post is sponsored by Plaid Enterprises.
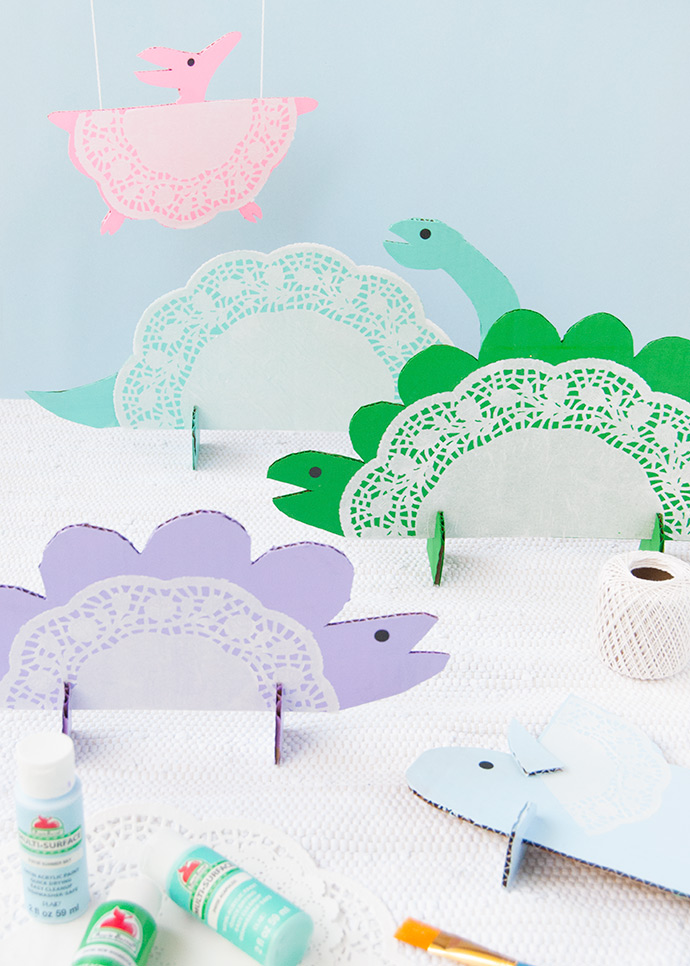
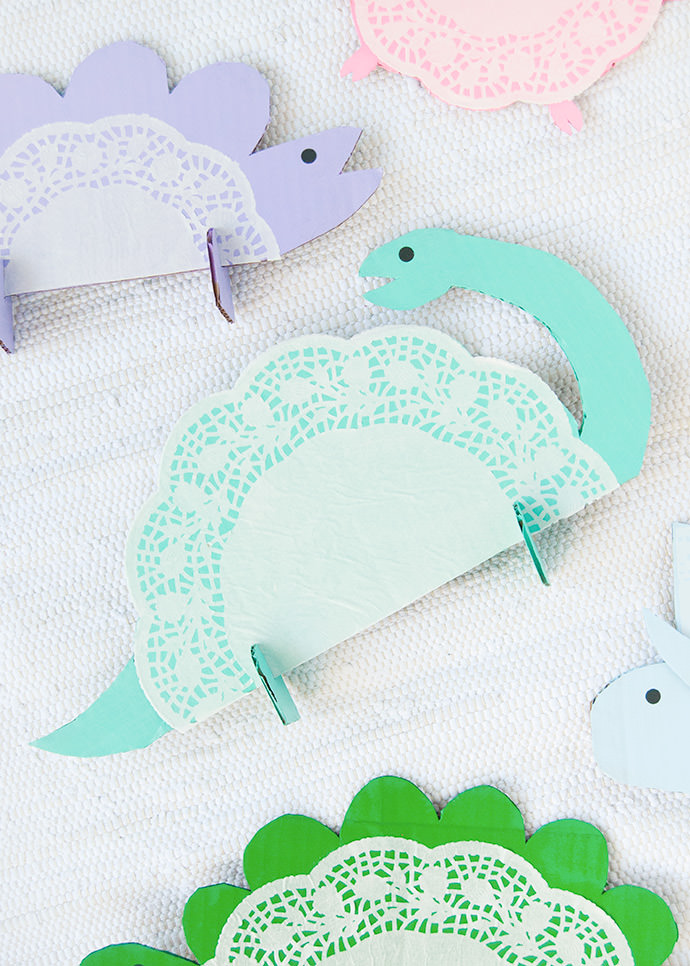
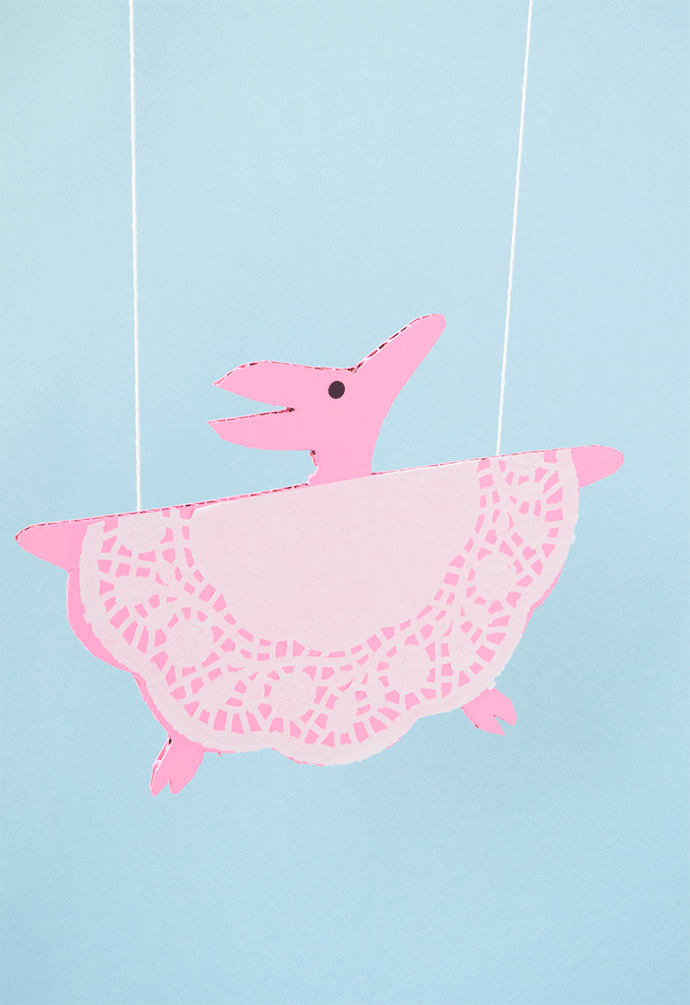
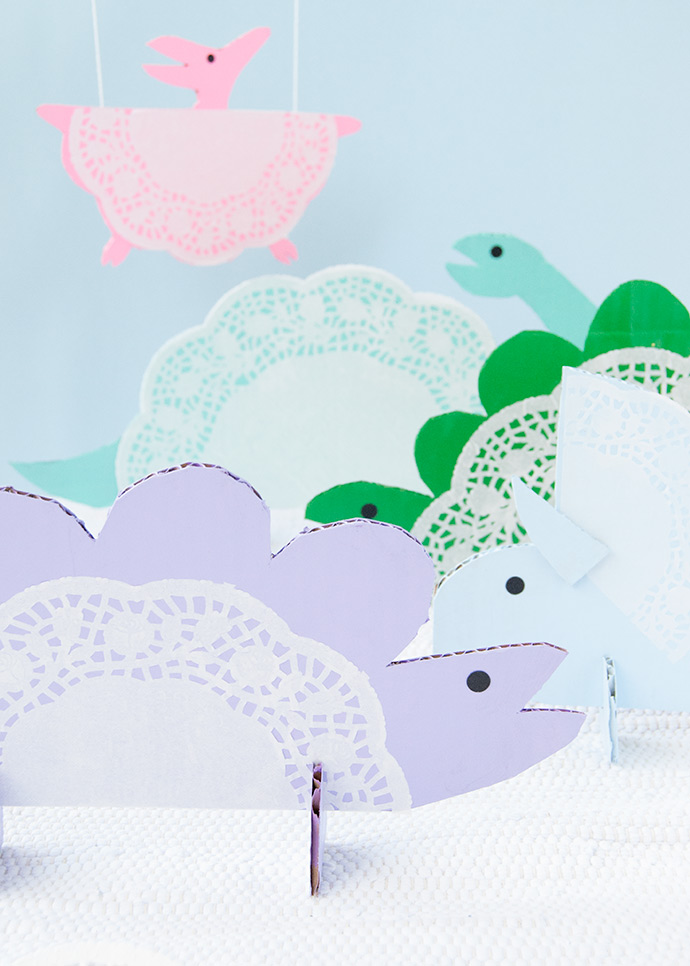
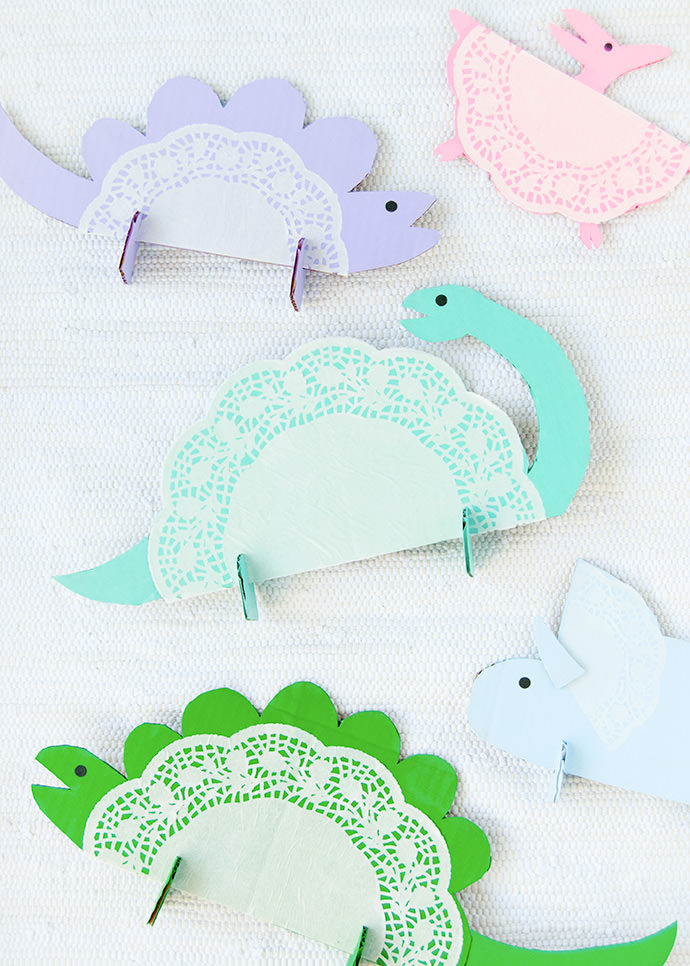
Who says dinosaurs have to be scary? Not us! Use bright colors and doilies to make the friendliest crew of dinosaurs that you’ve ever laid eyes on! We used recycled corrugated cardboard for the main structure of these guys, but you could swap in thinner cereal box cardboard or even paper plates instead.
We definitely took a few liberties with the shapes and colors of these dinos to make them as fun as possible, but spend some time researching different dinosaurs with your kids as inspiration for your own set! Look at the shape and features on each and think of different ways to include doilies in each. If you’re like us, you’ll go for some bright shades of Apple Barrel Acrylic Paint too instead of the duller shades normally used with dinosaurs. Keep reading for the full instructions below!
what you need:
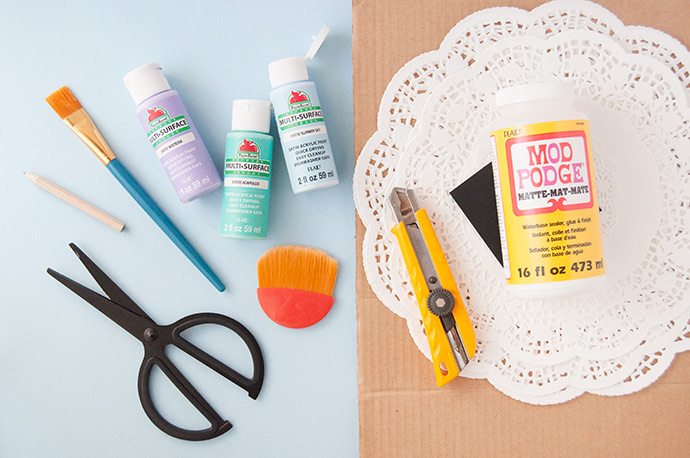
- Apple Barrel Acrylic Paint Set
- Paintbrush
- Mod Podge
- Decoupage brush
- Recycled corrugated cardboard
- Doilies (various sizes)
- Scissors
- Pencil
- Black paper
- Hole punch
- Craft knife
- Cutting mat
how-to:
Step 1
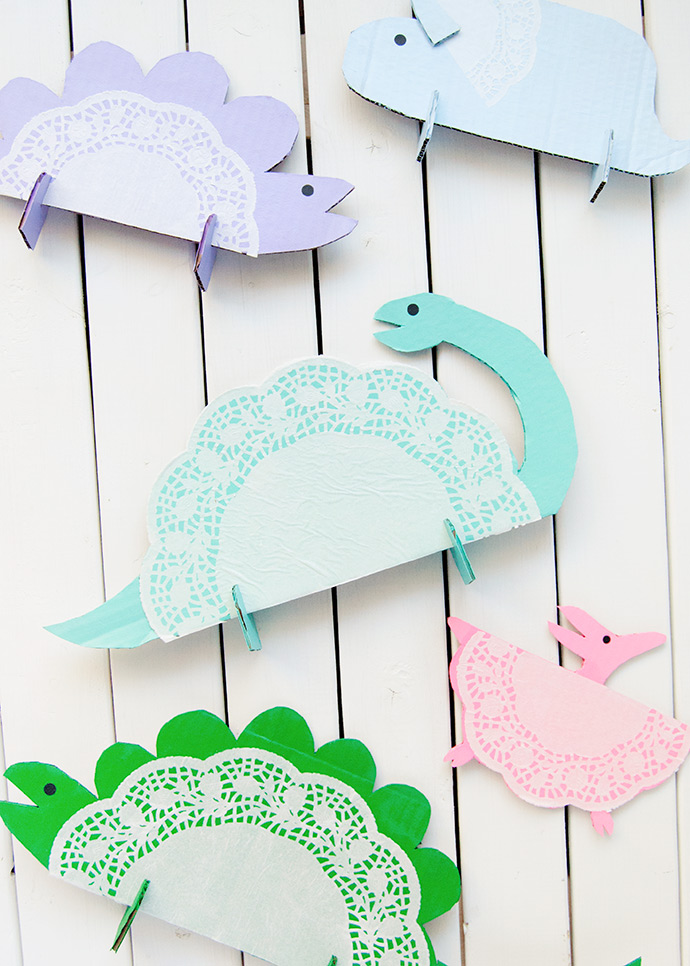
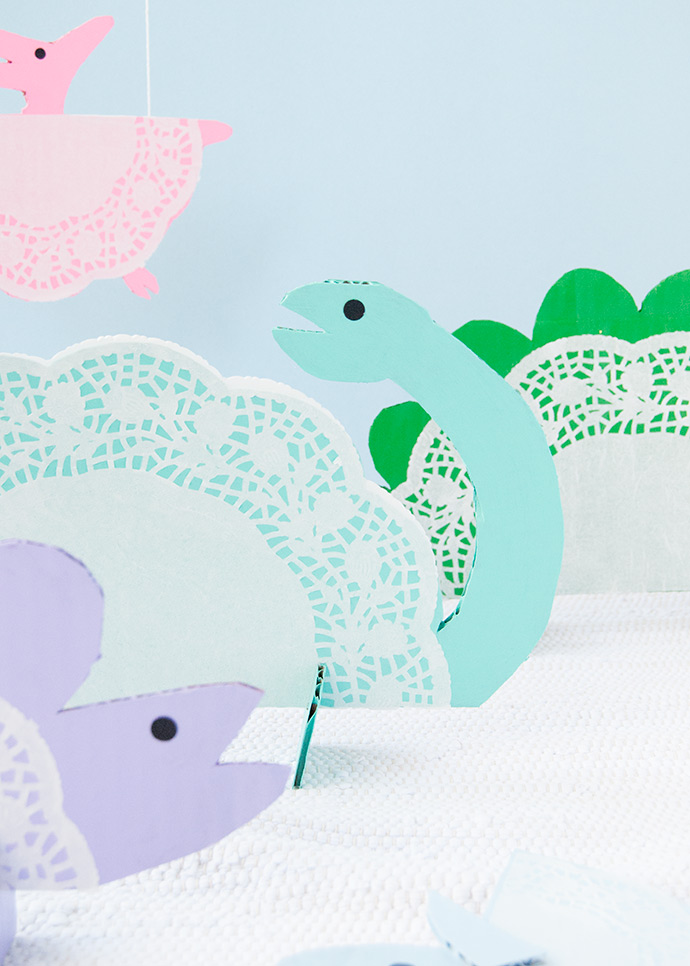
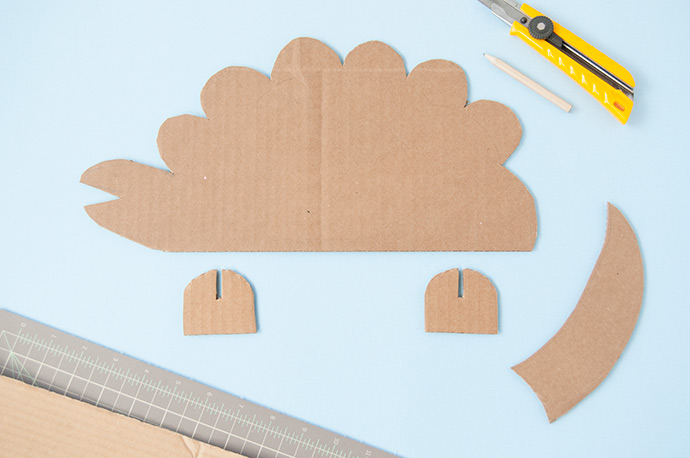
Gather up some plain corrugated cardboard and lay it flat on your work surface. We like to start by cutting a doily in half to use as the dinosaur’s body. Place the doily half onto the cardboard and trace/draw around it, forming a head and back details. Our cardboard wasn’t quite long enough to include a tail, so we had to make that a separate piece, but you can draw that on now if it fits. Use a craft knife and cutting mat to carefully cut out, and use scissors to smooth any edges or make smaller details and snips.
For the legs, we drew two upside-down U shapes with a pencil and cut them out. Then cut two narrow slots in the curved side so that the legs fit snugly and securely onto the dinosaur body.
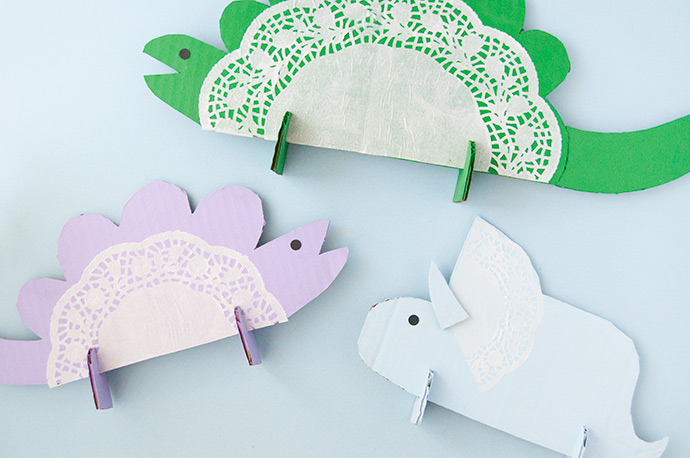
Repeat this process for different dinosaurs. Do a search on Pinterest for dinosaur inspiration and don’t forget to mix and match different sizes of doilies for smaller and larger dinos.

Step 2
Give the cardboard cut-outs a quick coat of paint – we used a few different shades for a super colorful dino bunch. Paint each side, and let dry – don’t forget the legs!
Step 3
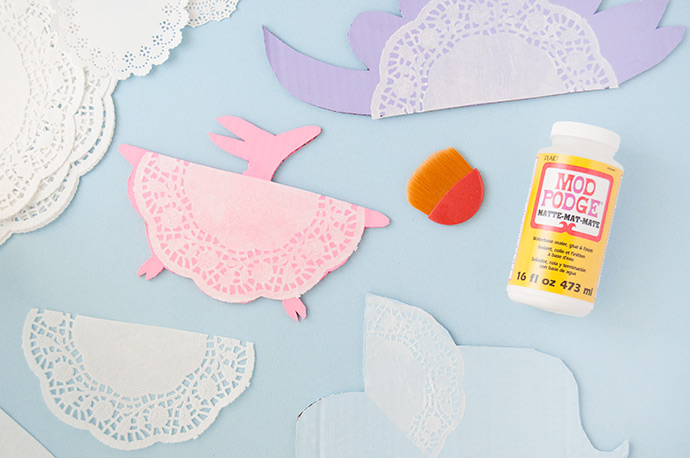
Once the paint is completely dry, apply a thin coat of Mod Podge onto the main body area that will be covered with the doily. Gently set the doily in place, and apply another coat of Mod Podge on top to seal it. Let dry.
Note: before attaching the doily down, make sure you’ve got only one and not multiples stuck together.
Step 4
Use a hole punch on black paper to cut out perfectly round eyes and use more Mod Podge to attach, as well as any other details like horns.
Once the Mod Podge is all dry, slide the legs onto the bodies and voila! Your doily dinos are ready to play.