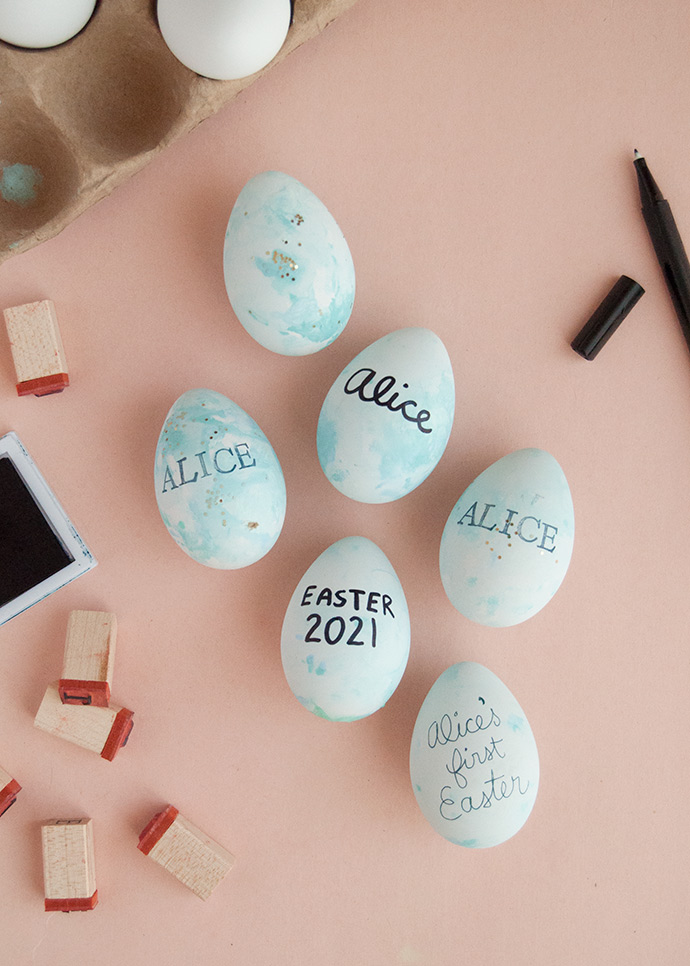
This coming Easter will be my daughter’s first, so lately I’ve been thinking of what traditions we might like to start. She isn’t quite old enough for dying eggs yet, but I thought it would be fun to have her help decorate some eggs that we can put out on display as decoration and have as keepsakes. Each year I thought we could make a new one to add to the collection! I used paintable plastic eggs that you can find at the dollar store or supermarket, but I think it would be so lovely to use wooden eggs here as well. Next year when she’s maybe old enough to do some fingerprint art on a keepsake egg, we might do that on a wooden egg but for this technique, the white plastic ones worked perfectly.
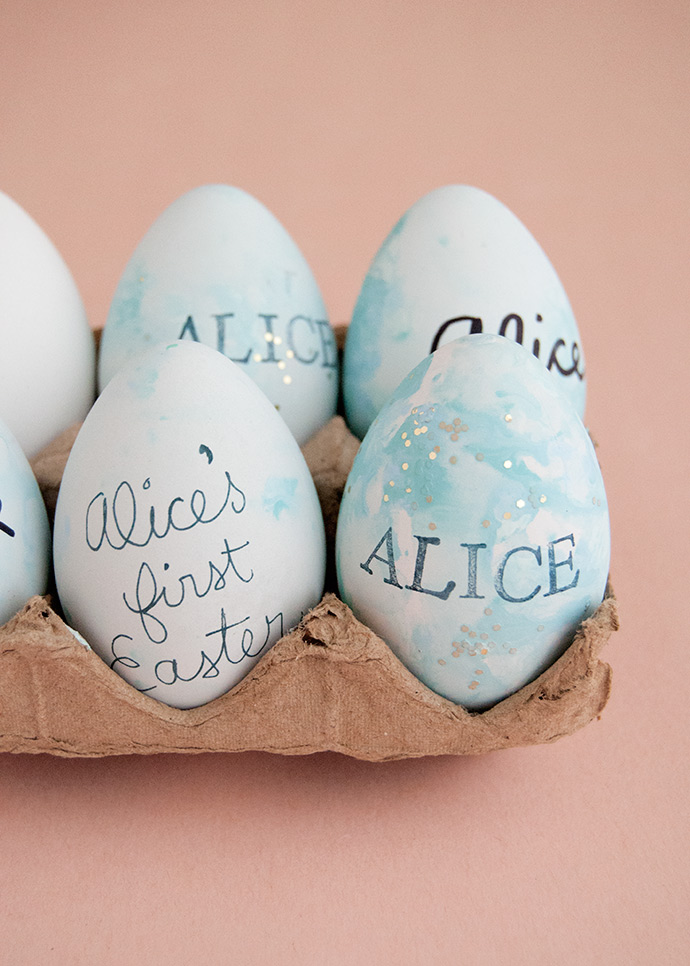
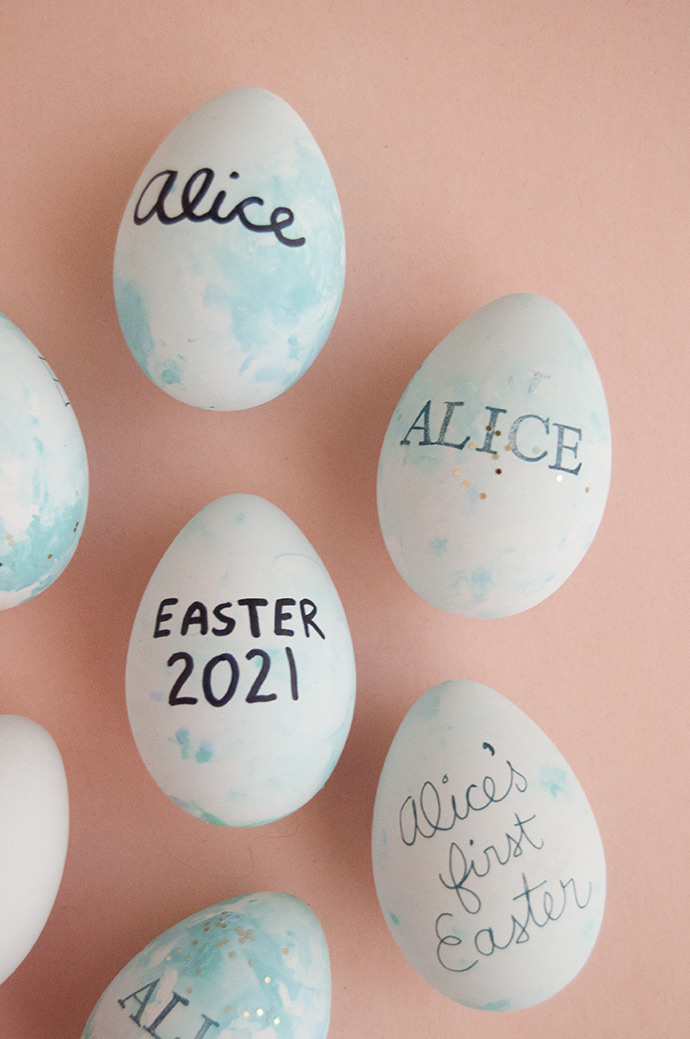
If you have a little one who isn’t ready to actually handle paint or craft supplies quite yet, this is a super simple project that gives you a really nice looking finished craft too. We used shades of pale blue and aqua for a robin’s egg look, but you can of course use whatever colors you like best! Add a little sprinkle of glitter and some stamped messages and your eggs are ready to display. And while you’re at it, make a few extras to give to friends and family too!

what you need:
- Empty plastic jar
- Paint (multiple colors)
- Glitter
- Paintable plastic (or wooden) eggs
how-to:
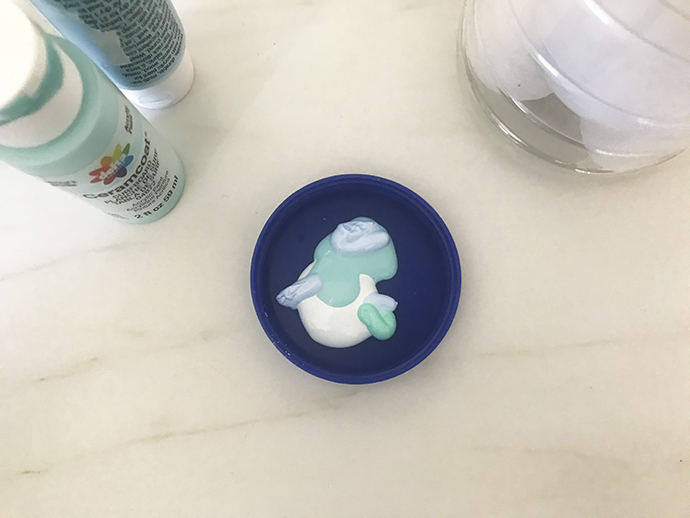
Apply spurts of paint into the inside of the lid from the plastic jar. Before doing this, you’ll want to be sure that the jar is big enough to fit the eggs inside with room to shake them around – we did three at a time, but if your jar is smaller you can do them one at a time. If you don’t have a clear plastic jar on hand, you can also do this same technique using a cardboard carton (like what you get hot chocolate powder in) or modify slightly and use a plastic ziploc bag. If using a cardboard carton where the lid is easier to remove, make sure your kids are old enough to know not to remove the lid, or try sealing the container in a ziploc bag to be sure the paint stays inside. Older kids can also use a glass jar if that’s what you have at home.
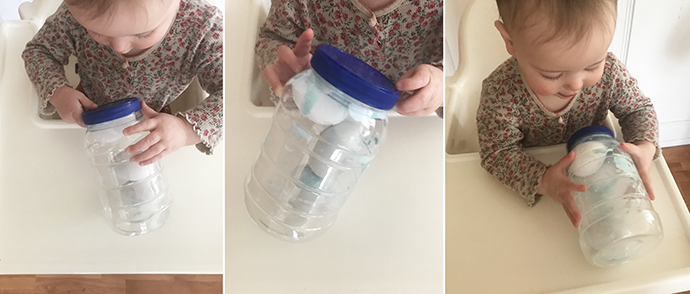
Put the plastic eggs into the jar and screw the lid on securely. Hand over the jar to your little one and let them shake it around to see the paint coat the eggs! Depending on what paint you use, you may find that it isn’t covering the eggs as much as you’d like. If so, just add a tiny splash of water into the jar and that will help get the paint moving and create an almost watercolor look on the eggs. You can also add a sprinkle of glitter into the jar if you like!
Once the eggs are all covered and/or your little one has lost interest, remove the lid of the jar and carefully remove the eggs. Set them aside to dry completely – we rested them atop an egg carton to let them dry while have as few contact points on the carton as possible.
Once dry, use stamps, a marker, or pen to write your messages on the eggs.