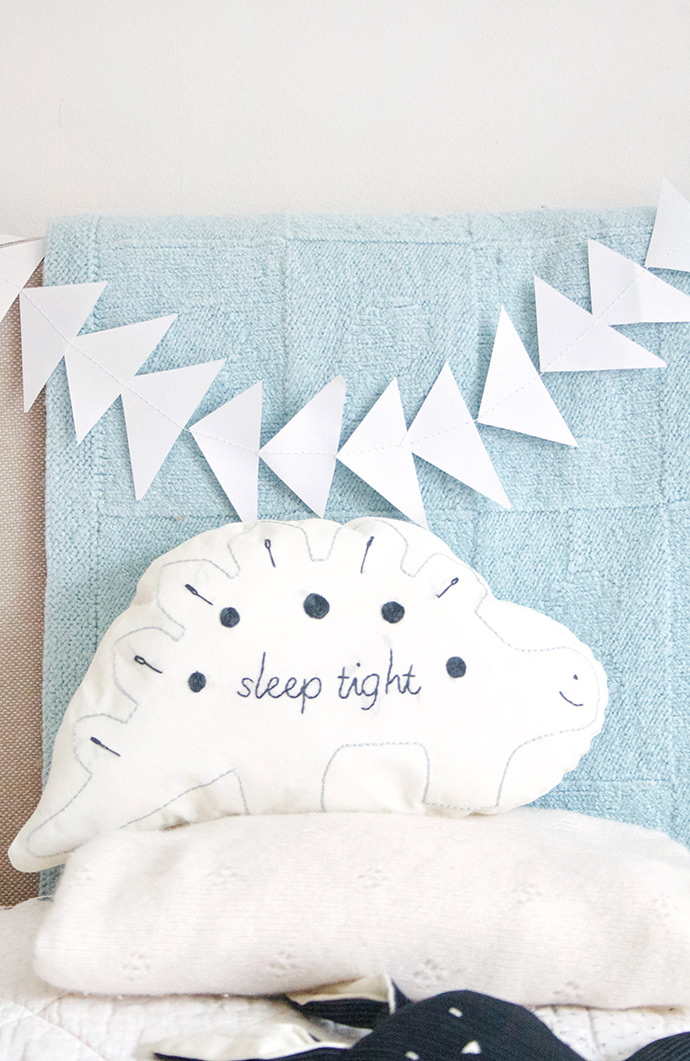
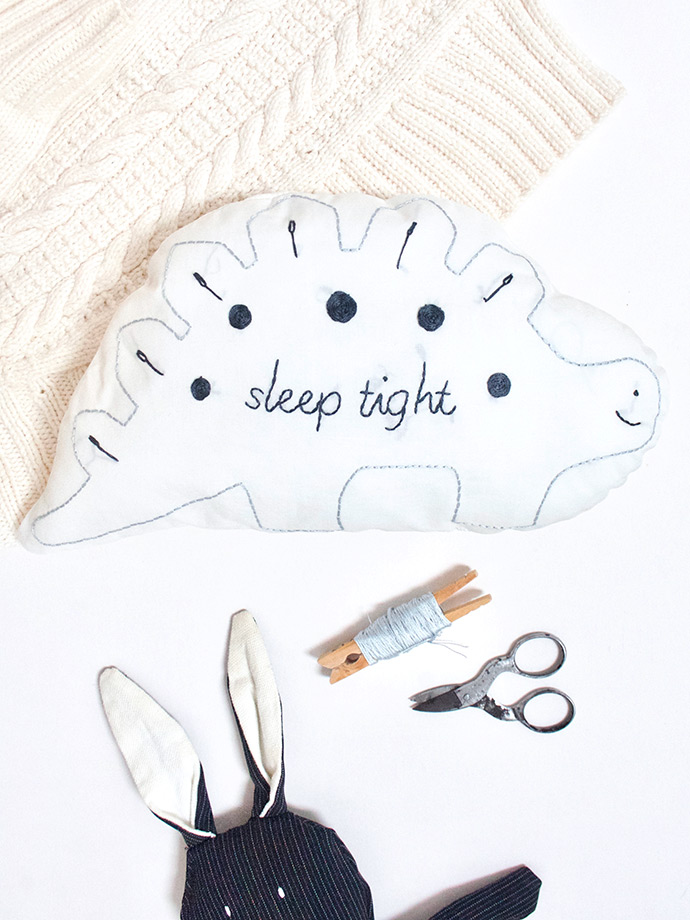
Monochrome is a huge trend in kids decor and perfect for newborn eyes to start taking in the world around them. This simple embroidery and sewing tutorial makes a lovely soft toy, adding a modern, handmade twist to any nursery. Simply download the pattern and use easy embroidery stitches to create baby’s first toy with a personal touch!
what you need:
- Fabric scissors
- Small, sharp scissors
- Air erasable fabric pen or sharp, light pencil
- Needle
- 1 rectangle of calico or cotton approx. 16” x 18”
- 8” embroidery hoop
- Embroidery thread (dark grey and light grey)
- Washable polyester stuffing
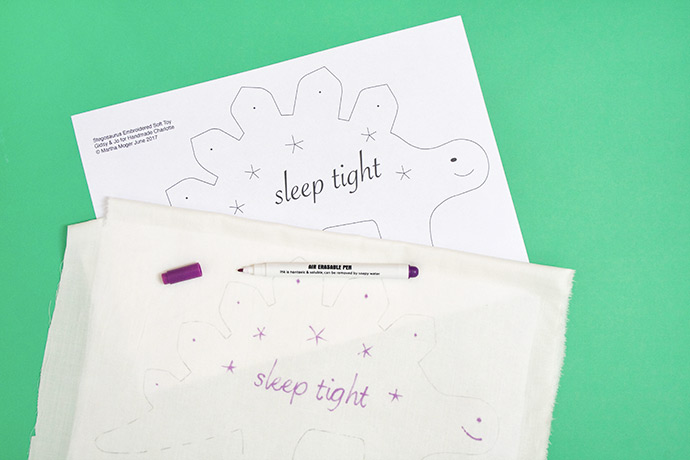
- Downloadable embroidery pattern
- Sewing machine (or needle and white cotton thread)
how-to:
Step 1
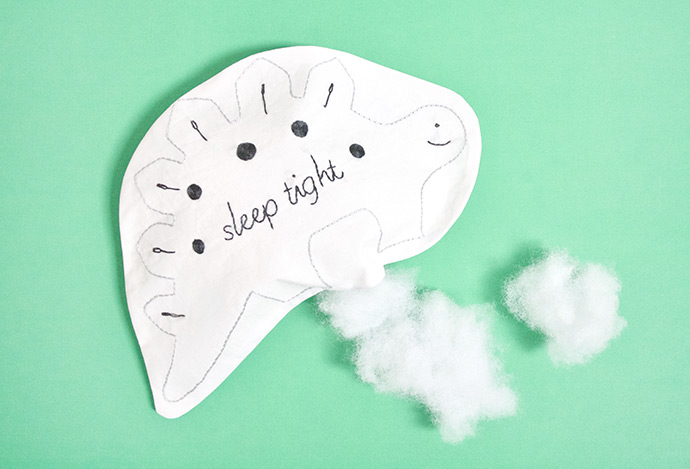
Download the paper pattern and iron your fabric to make sure it’s crease free. Using masking or washi tape, stick the pattern to a window with your fabric taped in place over the top. Let the natural light guide you to trace the pattern onto the fabric with a sharp pencil or air erasable pen. Make sure you position your dinosaur in the bottom half of your fabric rectangle, with at least 1.5” of fabric excess around the edge of the design.

Step 2
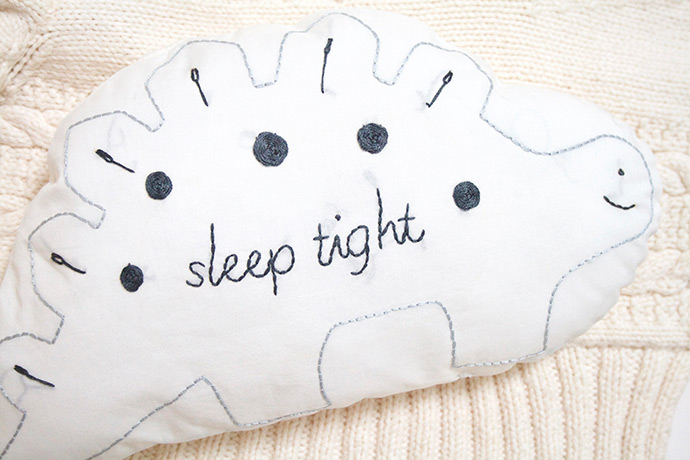
Next, fasten your fabric into the hoop. This pattern uses three easy stitches which are back stitch, woven wheel stitch and long-tailed daisy stitch. Use back stitch to work all the way around the dino outline, woven wheel stitch to make the five circle motifs and long-tailed detached chain stitch to make the line motifs in the plates along the dino’s back.
To do back stitch
Go up through your fabric and then back down through the fabric to the left of where you first came up. Then go up through the fabric again, but this time to the right of that first stitch. Then, go back down through the exact spot of the first stitch and keep going on in this way, going back on yourself.
To do woven wheel stitch
First make five simple stitches of equal length, like spokes in a wheel. Then weave your needle under and over the spokes, without picking up any of the base fabric, until they are full.
To do long-tailed daisy stitch
This is actually an isolated chain stitch with a long tail. Push your needle up through the fabric and then back down again close to where you started. Don’t pull the thread fully tight but leave a small loop on top of the fabric. Now tack it down with one long stitch (the “tail”).

Step 3
Once your embroidery is finished and you have cut off any loose threads from the back of your work, iron flat again on the wrong side. Now fold your fabric in half, right sides together and mark a simple line around the outline of your dinosaur with a pencil (you should be drawing on the wrong side of your work here!)

Step 4
Use a sewing machine (or sew by hand with a small back stitch) all the way along the pencil line you have drawn, leaving a gap of approx. 3” along the bottom straight edge to turn through. Trim the excess fabric about 1/2” from the stitch line.
Step 5
Turn your dinosaur right side out through the gap that you left and fill with your polyester stuffing. Sew the gap closed by hand.
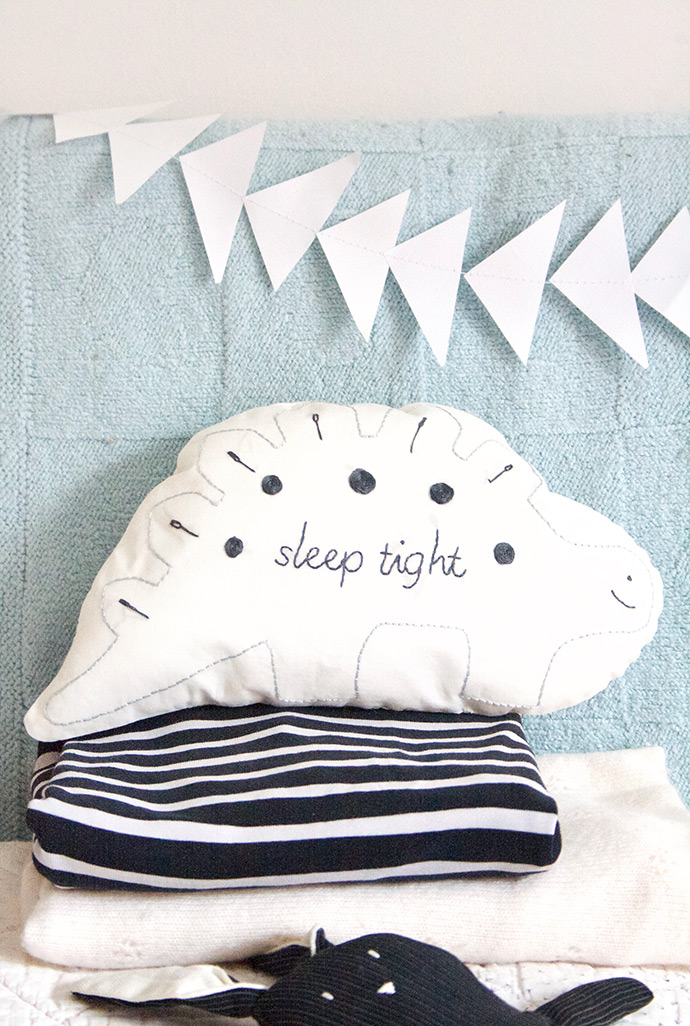
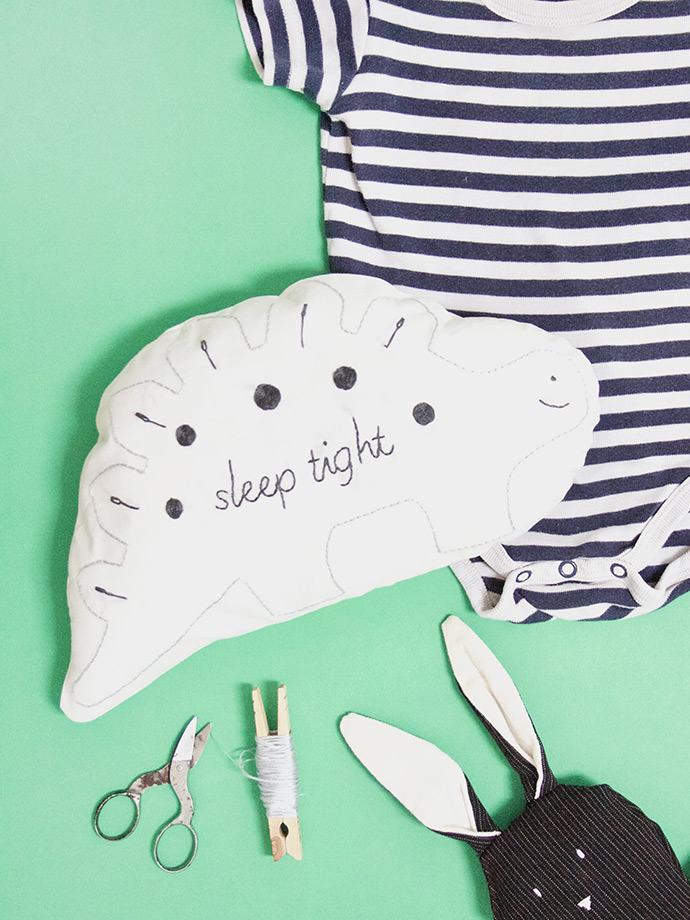
Now watch baby snuggle up with his or her new friend. You’ve created an heirloom toy by hand to remind you of this special time and special arrival!