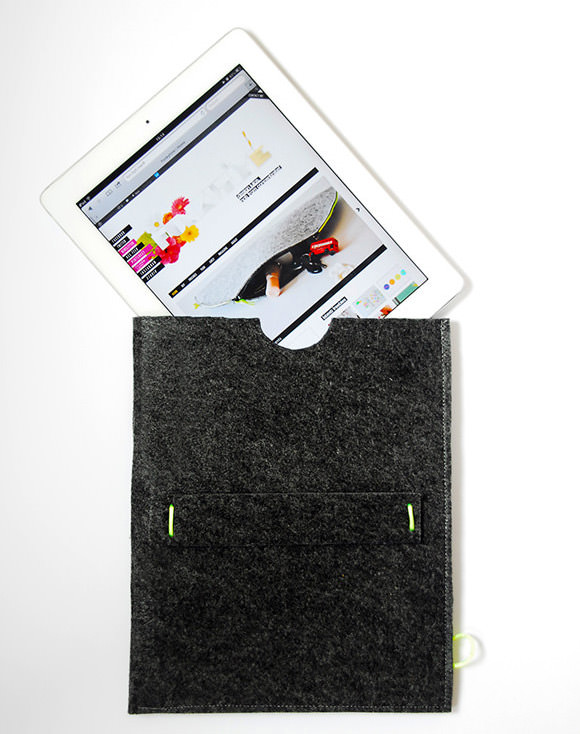
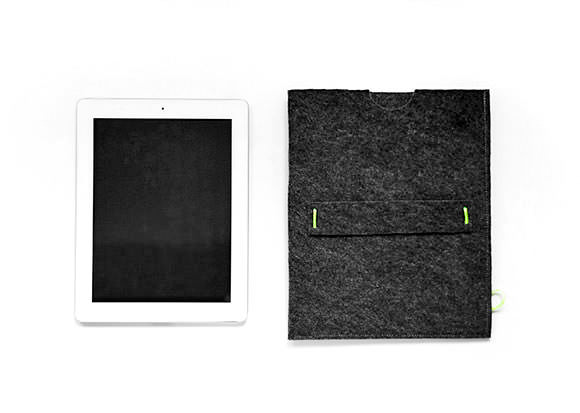
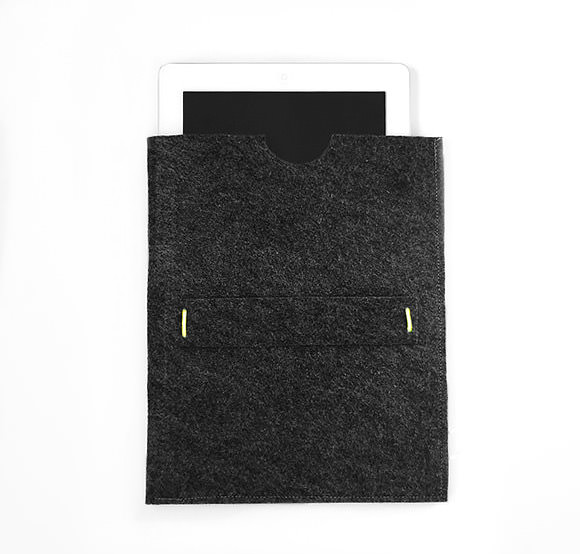
Make your own unique iPad sleeve with this simple tutorial! You might even have the materials you’ll need on hand already, which would make this a fabulous zero-dollar, 10-minute DIY craft project. You don’t have to spend a lot of money to protect your favorite gadget.
What You Need
- Felt placemat, about 1/4-inch thick
- Neon silk thread
- Scissors
- Sewing machine
Instructions
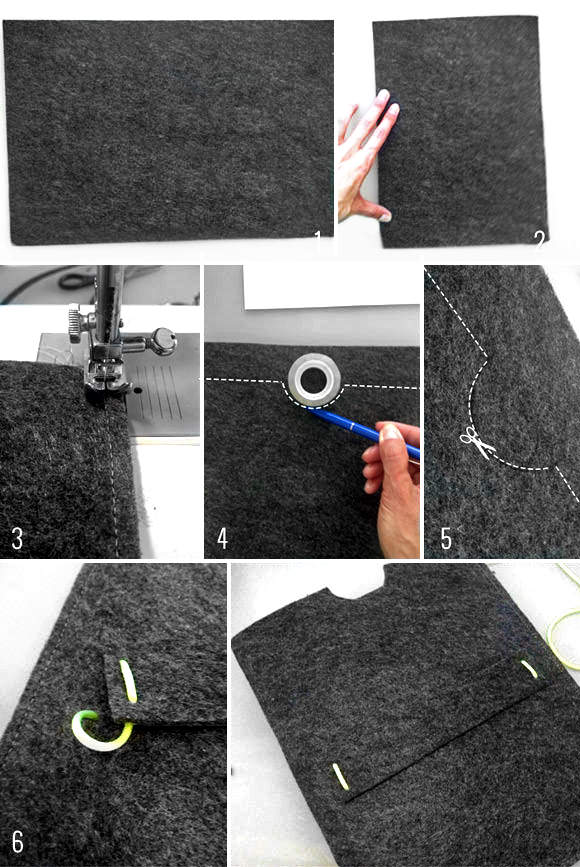
- I’m using a place mat I bought at the local department store. The felt is about 1/4 inch thick.
- Fold the place mat in half.
- Sew the long side (opposite of the fold) and one short side.
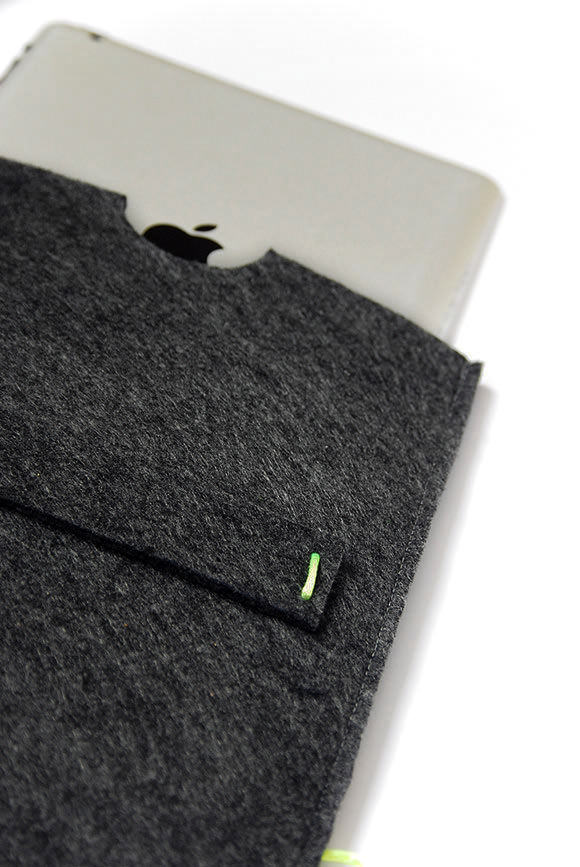
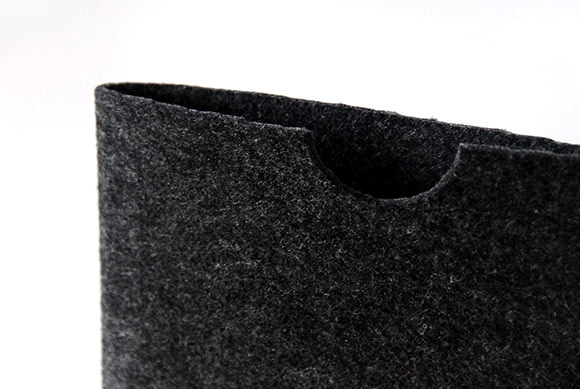
- Draw a line on the top side as shown. Draw a straight line on the bottom side. (The sleeve is currently a little bit too long; these lines indicate the dimensions that will make the iPad easy to remove.)
- Cut along the lines.
- Cut out a rectangular piece of felt (you can use the piece you just cut from the length). It should be a little less long than the width of the sleeve.
Finishing Touch
Use a piece of neon silk thread to sew both ends to the sleeve. This makes a little handle for easy carrying.
That’s all there is to it! Enjoy your new super stylish iPad sleeve :)