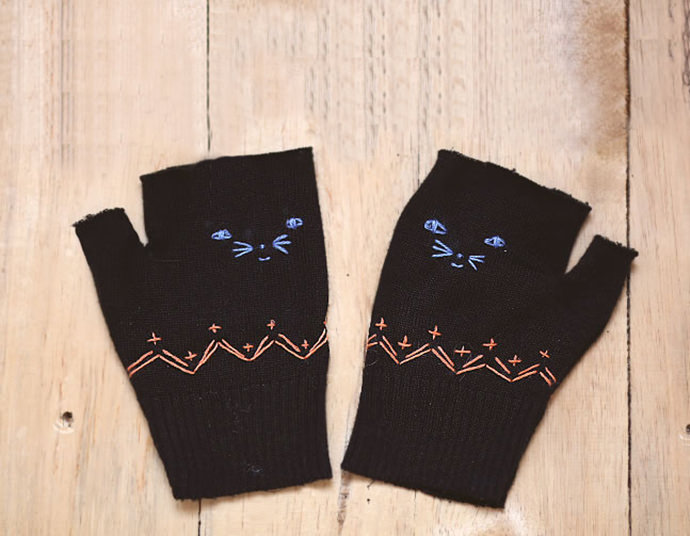
Yes yes, I know it’s the first day of Spring, but there is still snow on the ground in many parts of the country, so I thought I’d offer up a project to keep everyone warm until winter finishes melting. How about upcycling an old sweater into cute fingerless kitten mittens? Not only do they look super cool, but they’re also a great way to keep your hands toasty while still being able to use your fingers. It’s much easier than you think! You’ll whip these up no time at all and wear them every last day of this chilly weather.
Use any kind of sweater – wool sweaters are perfect because the edges won’t fray as easily, and you can wash and dry them. I used an acrylic knitted sweater. The edges frayed just a little, but I’ll admit, I love that look! Make all different sizes for friends, family, kids, and of course, yourself.
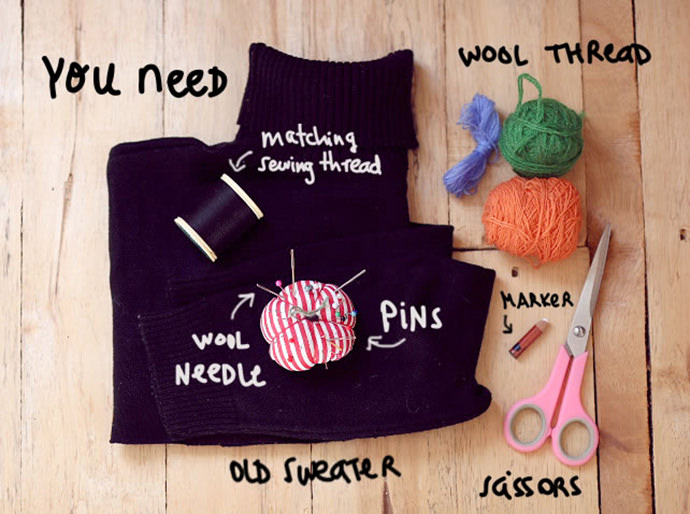
What You Need
- Mitten embroidery template
- Old sweater
- Wool thread
- Marker
- Scissors
- Pins
- Needle and coordinating thread
- Sewing machine (optional)
How-To
Step 1
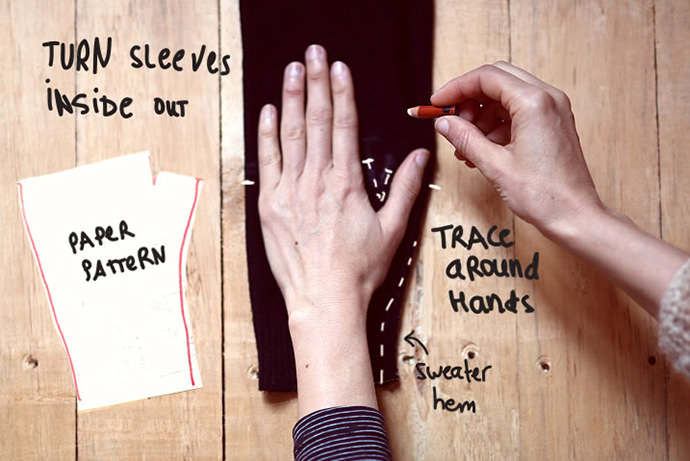
Turn your sweater inside out and lay one sleeve flat on the table. I made a pattern with the embroidery design. Download it here or make your own by tracing one of your hands onto a piece of paper (or onto the sleeve itself), holding your fingers together and your thumb out to the side.
The sleeve seam must be on the thumb-side when you trace/transfer the pattern onto the sweater. Line up bottom edge of the sleeve with the bottom edge of your mitten pattern. Trace around your hand, adding a half-inch for seams.
Step 2
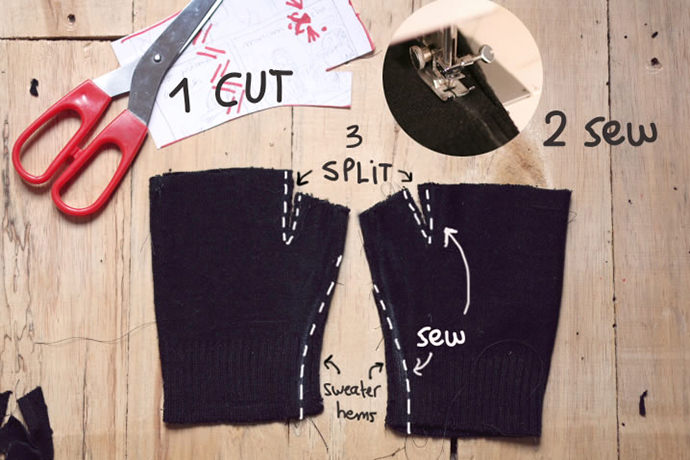
Cut off the bottom of the sleeve following the lines of the pattern. Then sew up the thumb-side to fit your hand, and sew a triangular seam between the thumb and the first finger. Trim.
Step 3
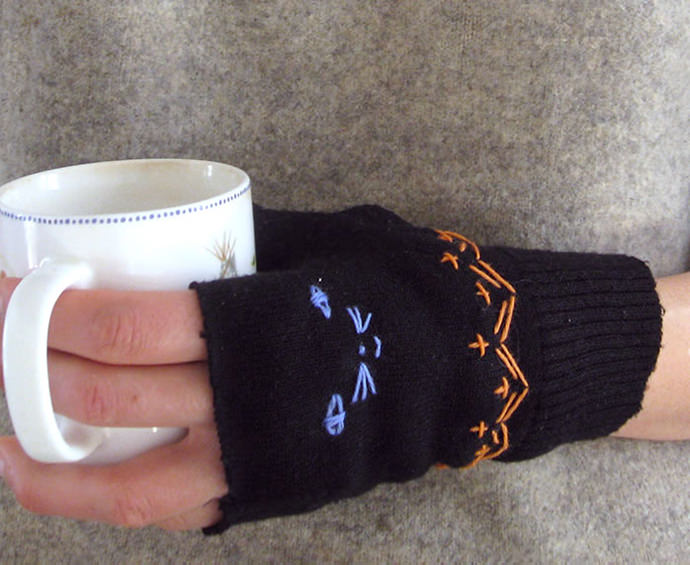
Turn your mittens right side out. Let the edges fray as I did, or finish off the borders with a seam or blanket stitches. It’s totally up to you! Trace the embroidery design following the pattern (notice that the face isn’t centered). You can transfer the design using tissue paper (click the link and see step 5).
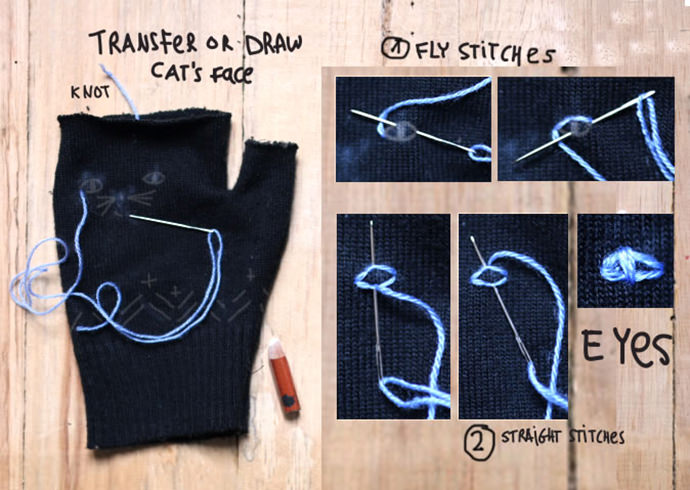
Decorate the front of the mittens with an embroidered smiling kitten face. Start stitching the eyes using fly stitches and three long straight stitches.
Step 4
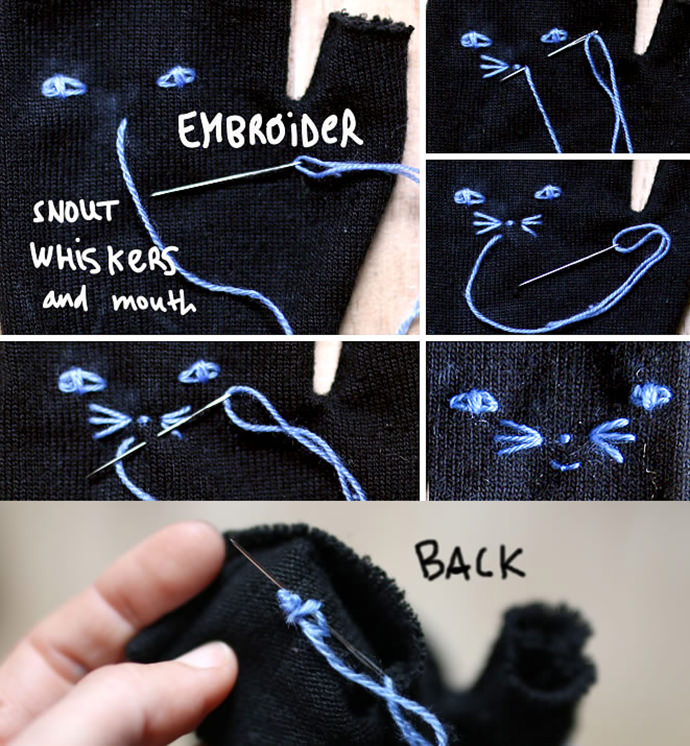
Now use two tiny horizontal straight stitches for the snout and three straight stitches for whiskers. Make the smiling mouth using another fly stitch. Finish the embroidery with some stitches on the inside of the mitten.
Step 5
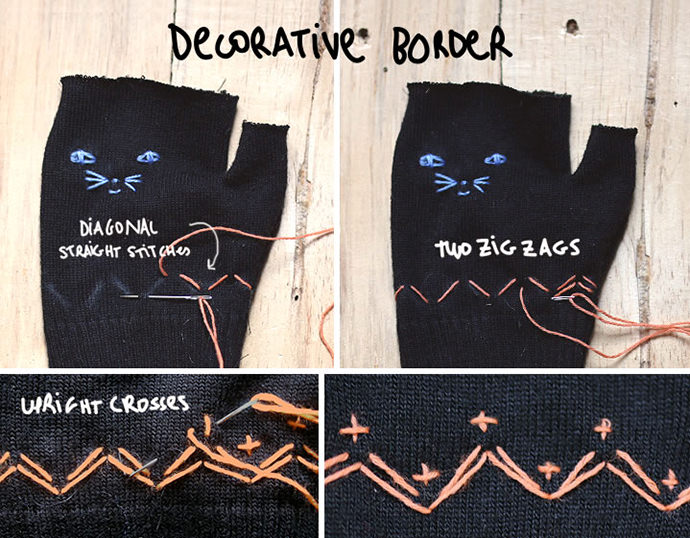
Stitch a decorative border around the top of the cuff. Work a row of separated diagonal straight stitches from right to left to make a zigzag pattern. Continue stitching on the backside of the mitten.
Work a second row of the same stitches (except this time the ends of the stitches will meet) to create a continuous zigzag line. Continue the border making upright cross stitches on the top and bottom of each zigzag.
Step 6
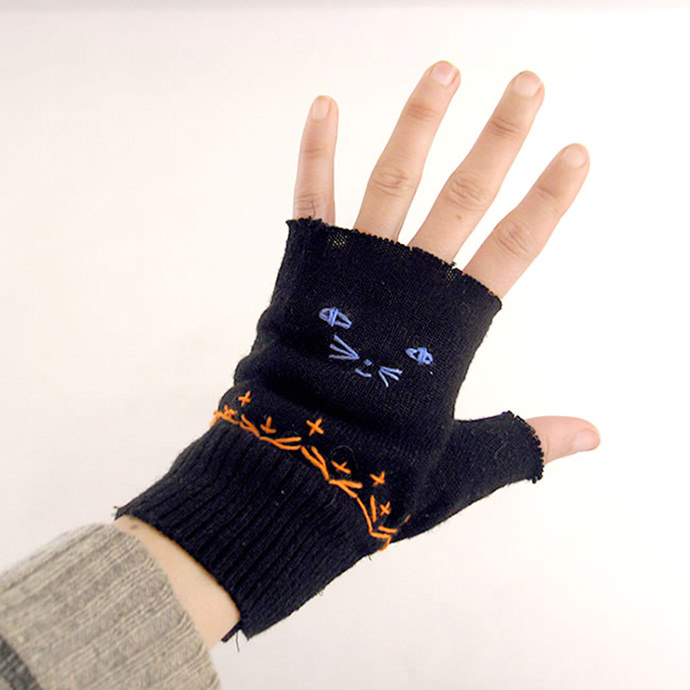
That’s it! Now slip on your new embroidered mittens and show them off around town.
Warm wishes and a happy Spring :)