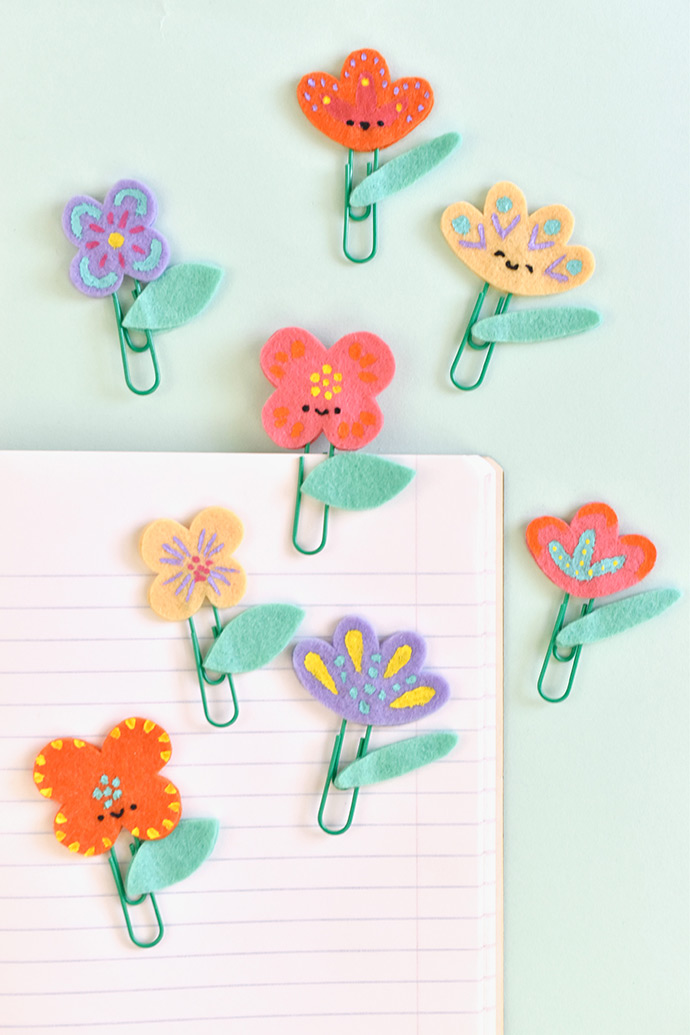
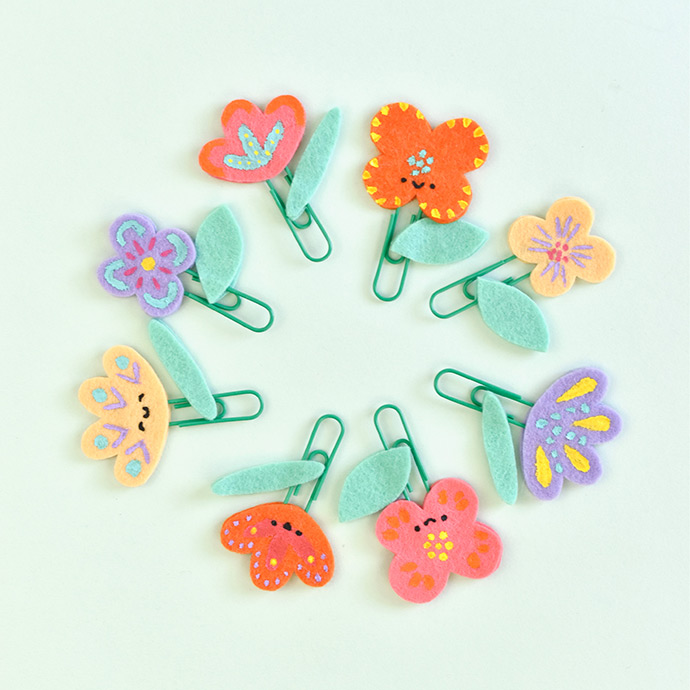
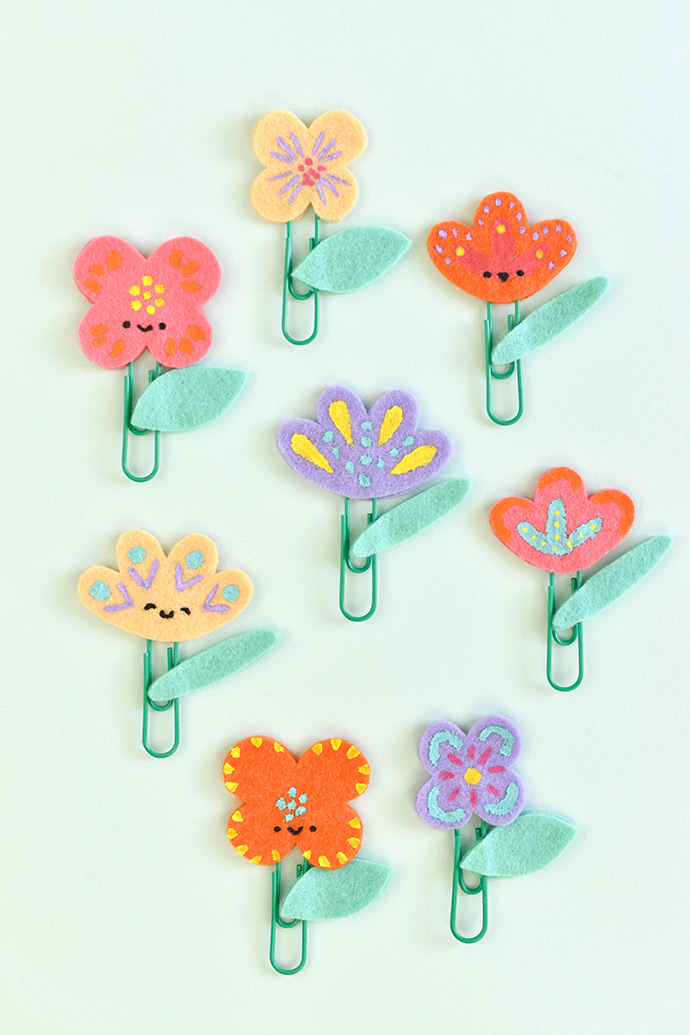
Staying organized is so much more fun when you have adorable accessories for your planner! These felt flowers clips are quick and easy to make, and you can decorate them in so many ways.
They’re perfect to clip on your notebook or calendar, and they also make great gifts for the stationery-loving people in your life.
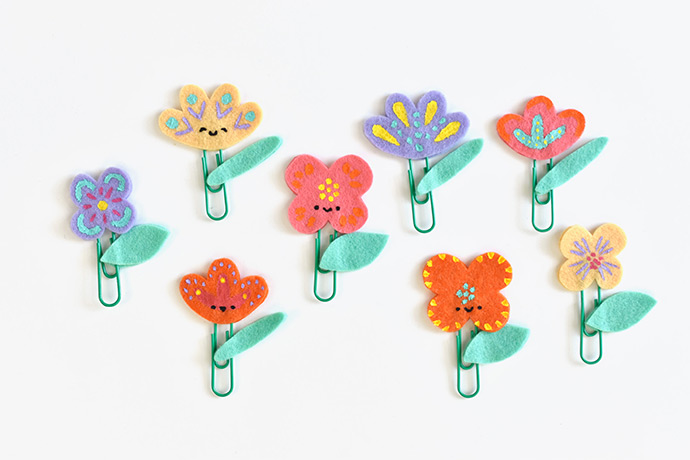
You can make a bunch of these flowers in a short amount of time, then give a bouquet of planner clips to your mom, your teacher, your friends…and yourself!
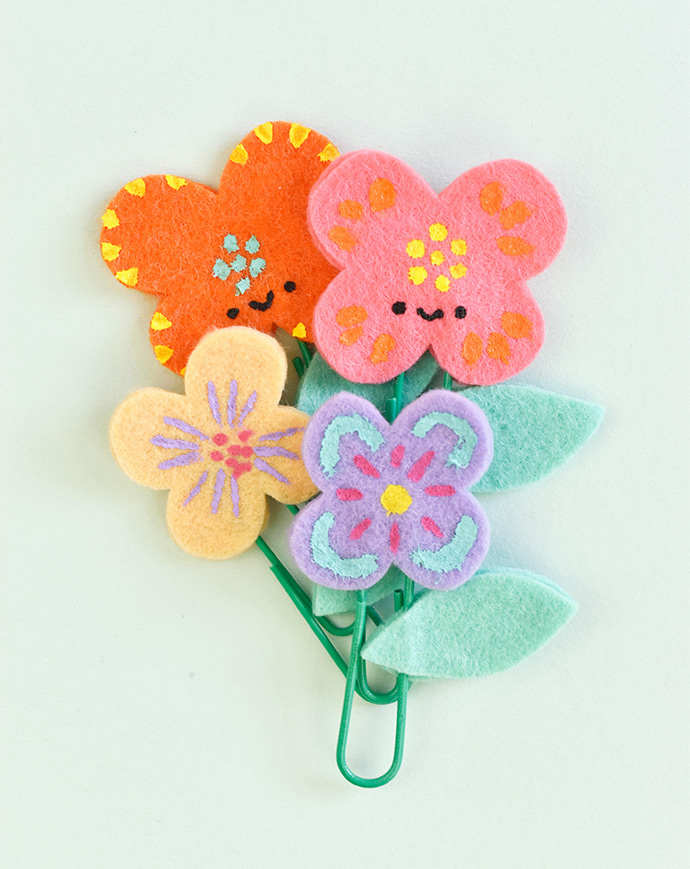
Make them with super cute faces, give them some folk flower styling, or try your hand at making them more realistic. The painted designs are up to you.
Ready to start your felt clip gardening? Let’s get “planting”!
what you need:
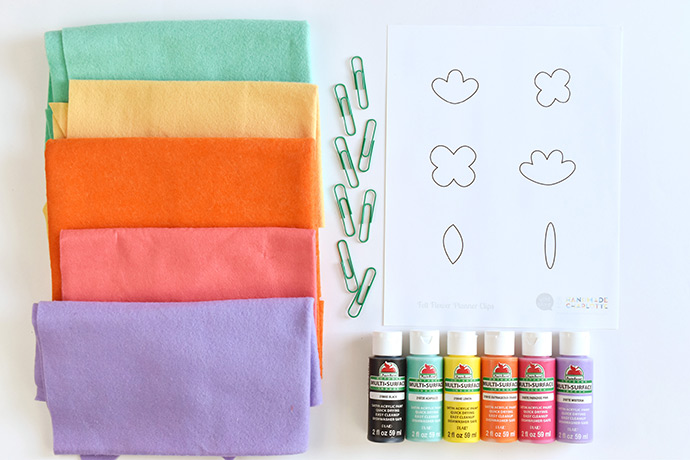
- Wool-Blend Felt
- Apple Barrel Acrylic Craft Paint
- Jumbo Paper Clips (green, if possible!)
- Freezer Paper
- Pencil
- Iron
- Scissors
- Paint Brush
- Craft Glue
- Printable flower template
how-to:
Step 1
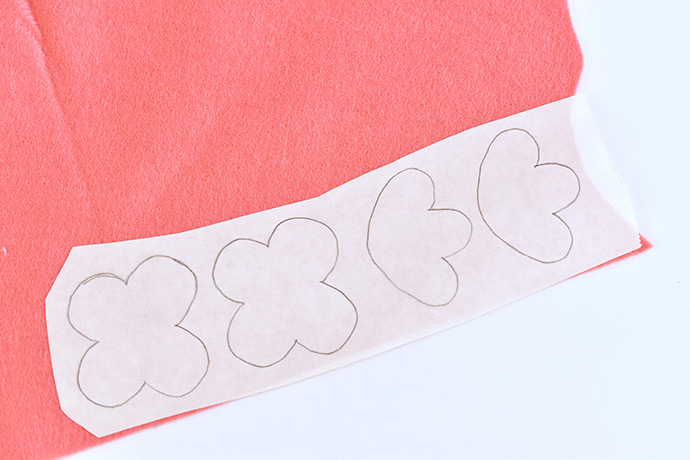
Trace the flower and leaf shapes on the paper side of the freezer paper. For each clip, you need two matching shapes for the flower and leaf. It’s easiest if you group the shapes by color, then cut the groups apart.
With the shiny side down, iron the freezer paper to the felt.
Step 2
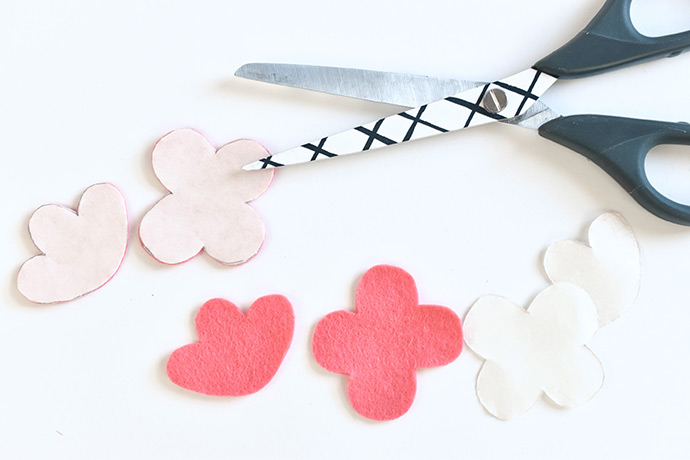
Cut out the shapes on the traced freezer paper lines. After you cut out the pieces, peel the paper off the felt.
Step 3
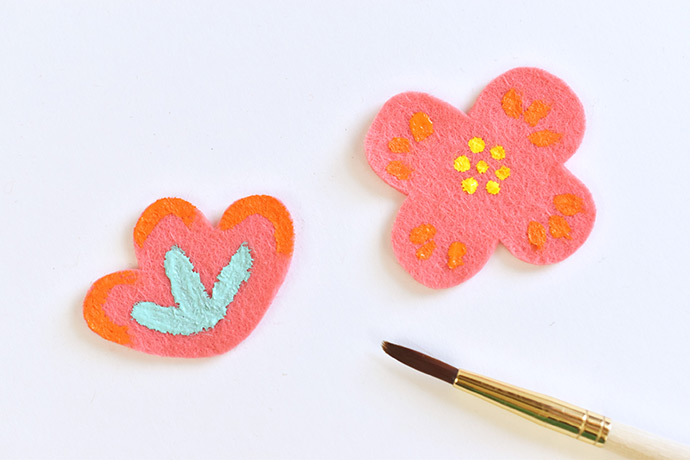
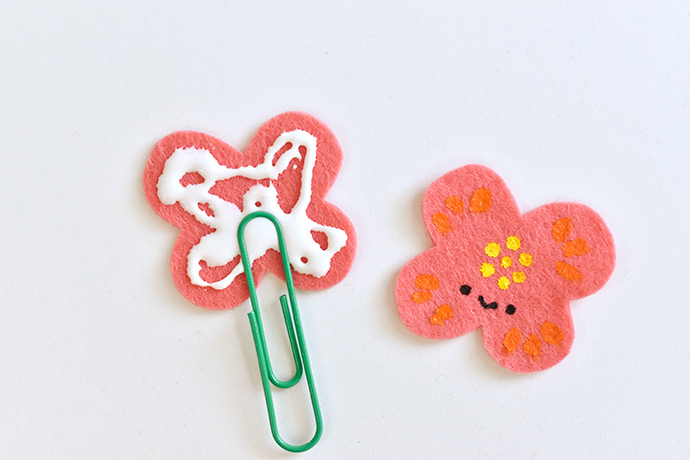
Decorate the flower pieces with paint. You can make the designs as realistic or whimsical as you want.
You should have a front and back of each flower shape. You can paint both pieces or just one. But if you want to decorate both, make sure that you paint the correct sides of the felt so they still match up with the non-painted sides touching.
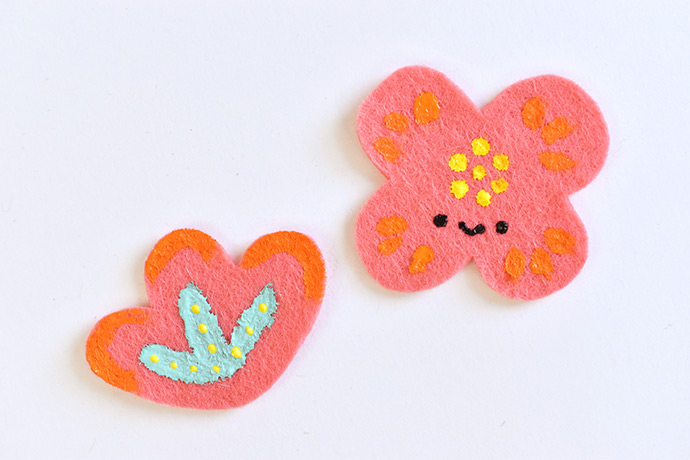
After a first layer of paint, you can add more details, including a face if you want!
Step 4
Once the paint is dry, run a line of craft glue around the edge of the back flower piece. Add a little extra to the middle.
Press the non-clip side of a jumbo paper clip into the glue. The non-clip side is the end with just one loop. Place the front flower piece on top.
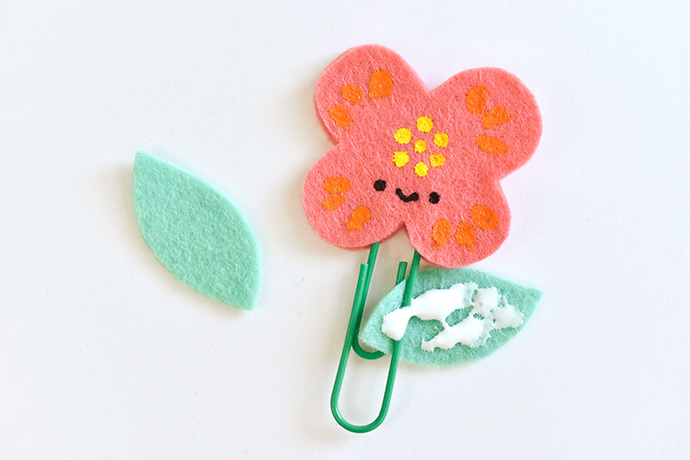
Slip one end of a leaf piece between the clip side of the paper clip. Push it up about half way and angle it however you like. Apply glue to the felt leaf, covering paper clip. Gently press the second leaf piece onto the glue.
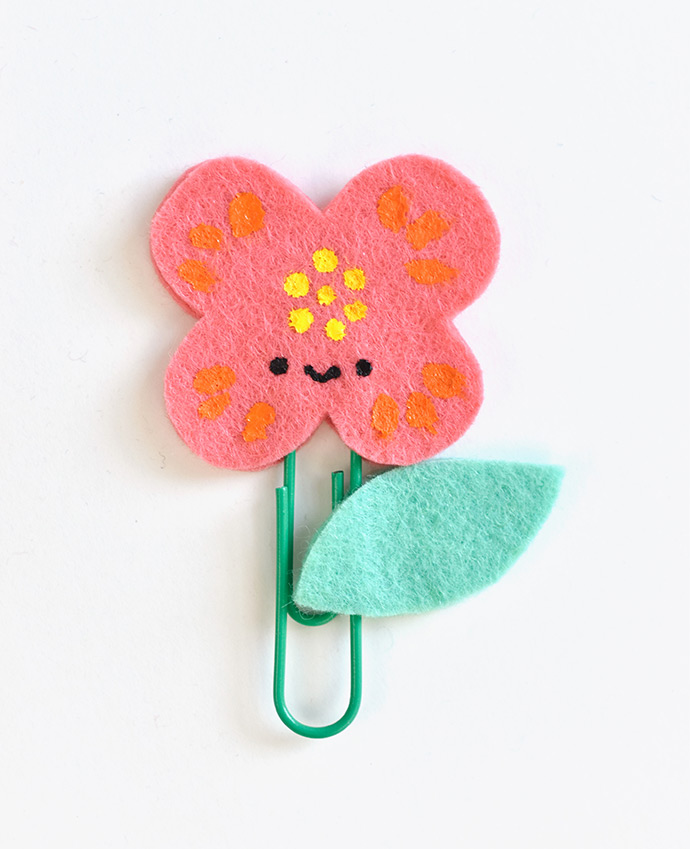
After the glue is dry, your planner clip is all ready!
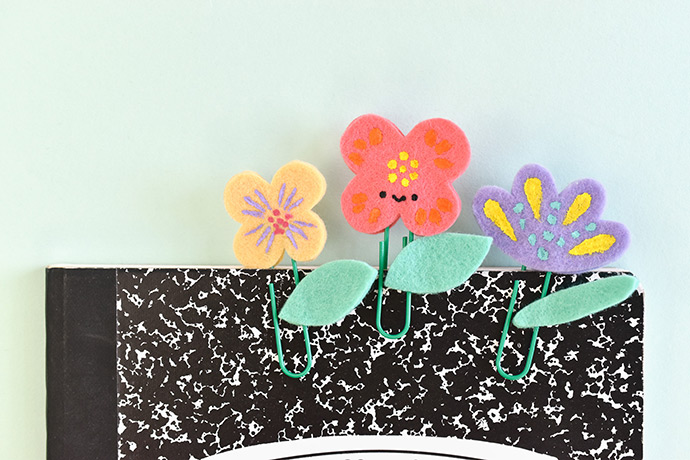
Use the clips on your calendar or planner, to hold pages in your favorite notebook or journal, as a bookmark, or simply to hold a few papers together. They’re such a fun and happy way to keep your spot and stay organized!
If you want to make a bunch of felt flower planner clips, you can do all the gluing first. Then while the glue is still drying, add the painted details. The drawback to making these in this order is that if you make a mistake on the painting, you have to start over and it wastes some materials. But if you’re confident with your painting skills, it saves some time!
Make a few clips for yourself and then keep making them for all your flower loving friends!
Happy crafting!