This post is sponsored by Plaid Enterprises.
While wandering through the bulk food store recently, we came across a bin of holiday mixed nuts. Normally, this wouldn’t be the most interesting bin for us (hello mini candy canes and anything chocolate!) but after looking at their shapes, we were immediately reminded of our painted pine cone ornaments from last year. The shapes are so simple but can be use in so many ways to create DIY ornaments, so that’s what we’ve done!
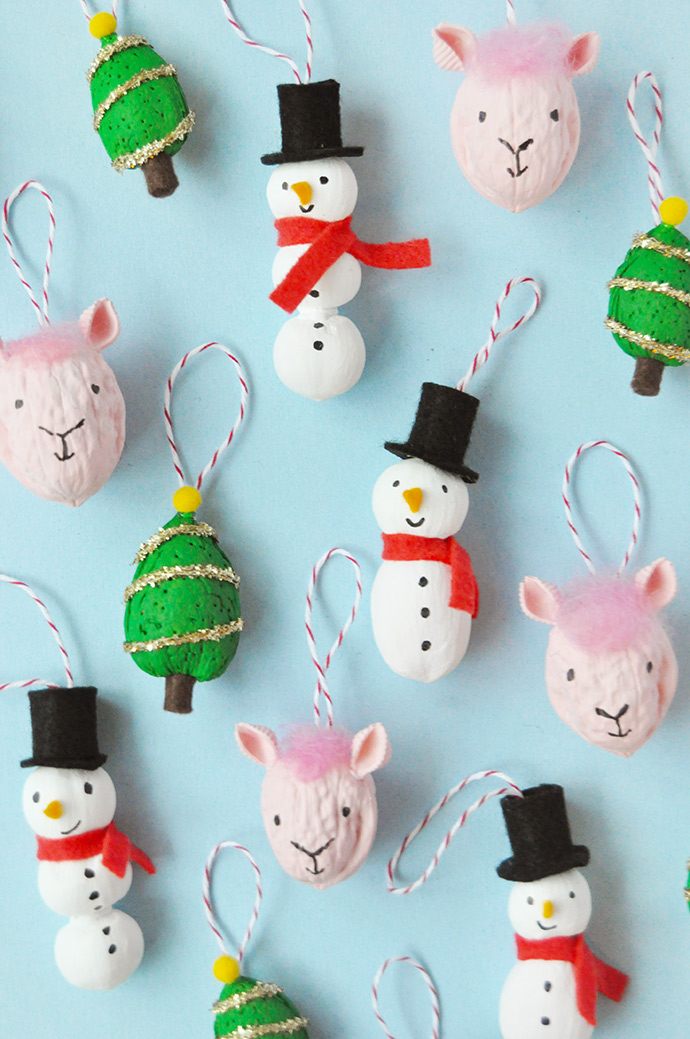
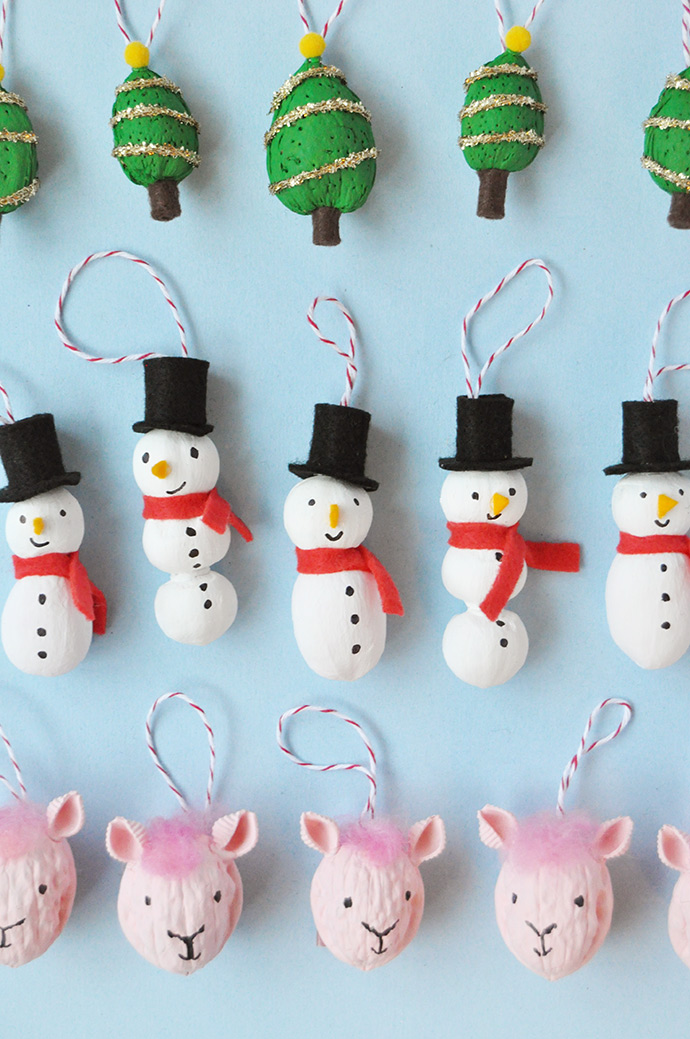
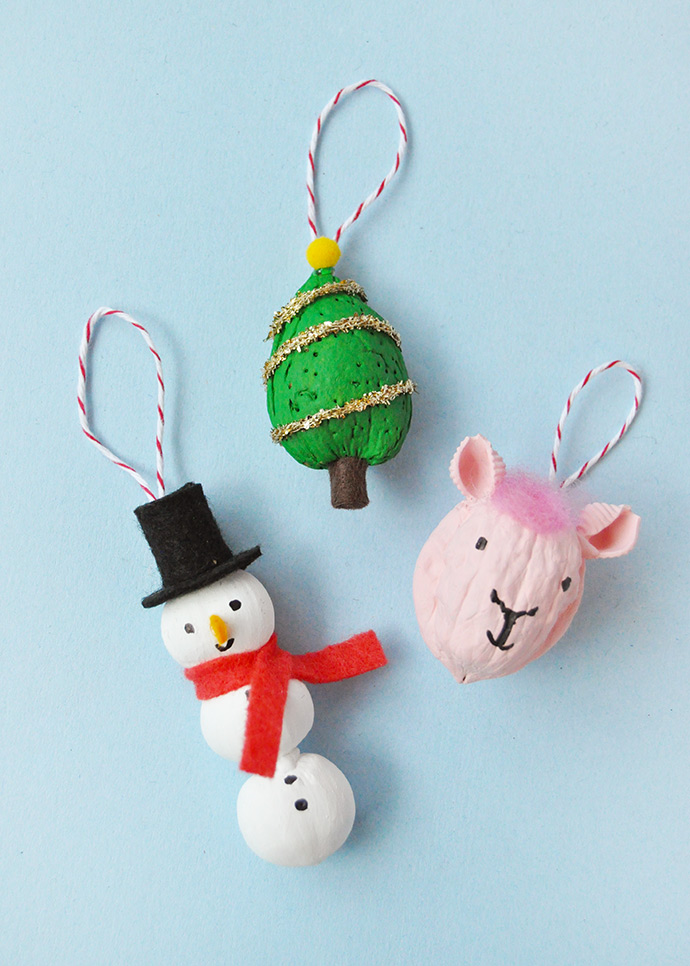
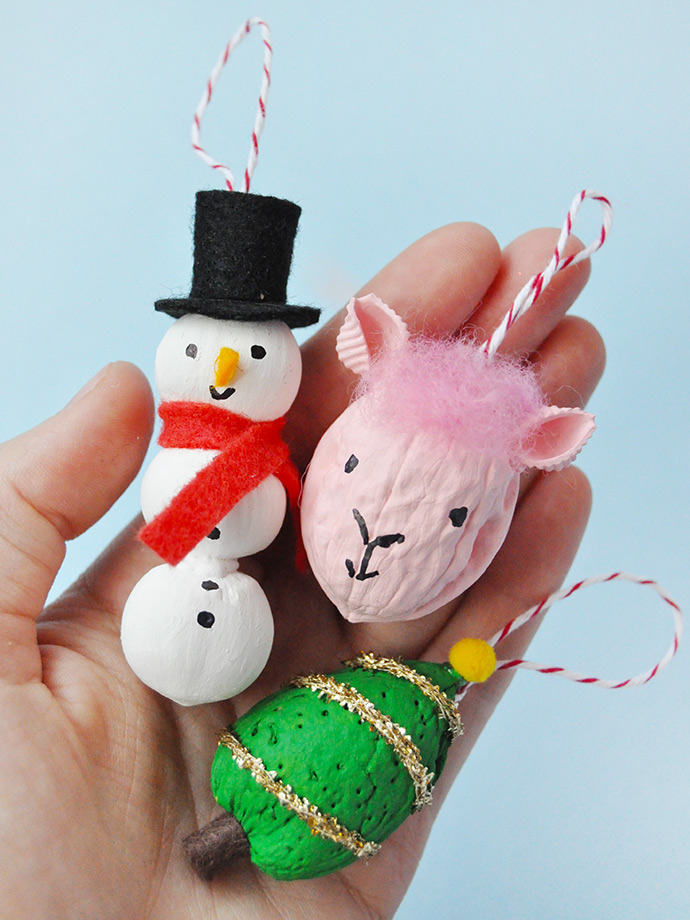
We had so much fun crafting this little ornament crew – the snowmen are quite possibly our favorites, but the mini Christmas trees and llama faces have a special place in our hearts too! Making these ornaments is a great winter activity to do with kids this holiday season – make sets of ornaments for your own tree, or to give as holiday gifts for friends and family! See below for the full tutorial.
what you need:
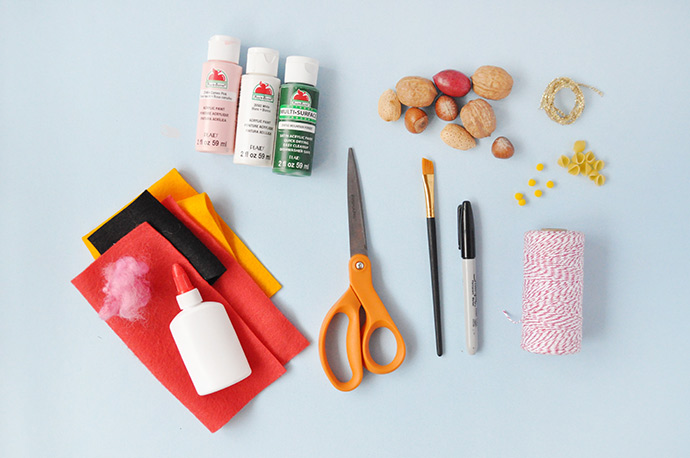
- Apple Barrel Satin Acrylic Craft Paint (white, pink, and green)
- Paintbrush
- Mixed nuts in shells (walnuts, pecans, hazelnuts, and almonds)
- Scissors
- Glue
- Felt (black, orange, brown, and red)
- Pink wool roving
- Mini pasta shells
- Mini yellow pom poms
- Gold trim
- String
- Black permanent marker
how-to:
Step 1
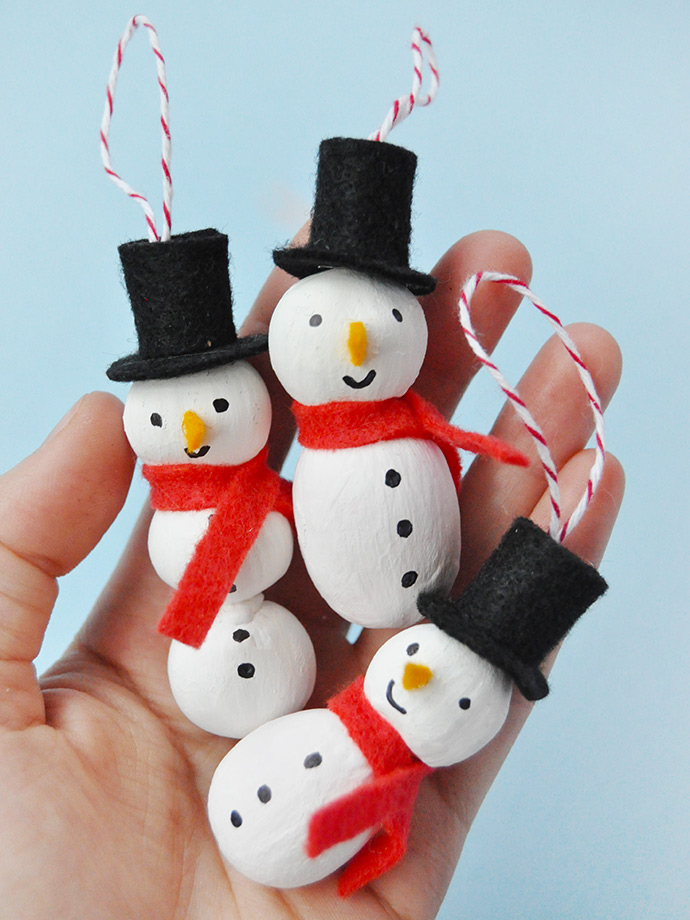
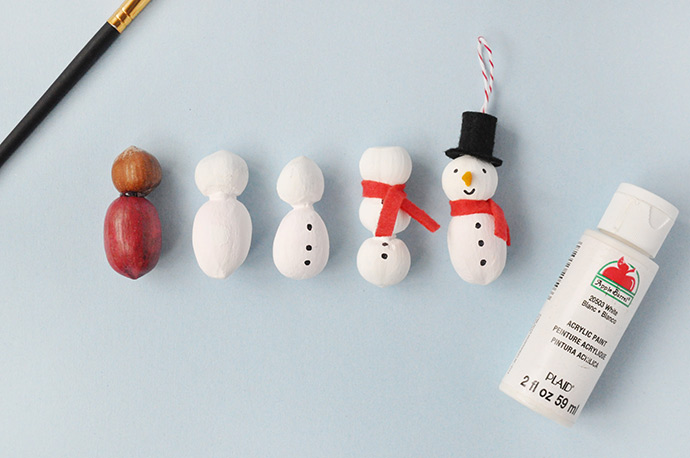
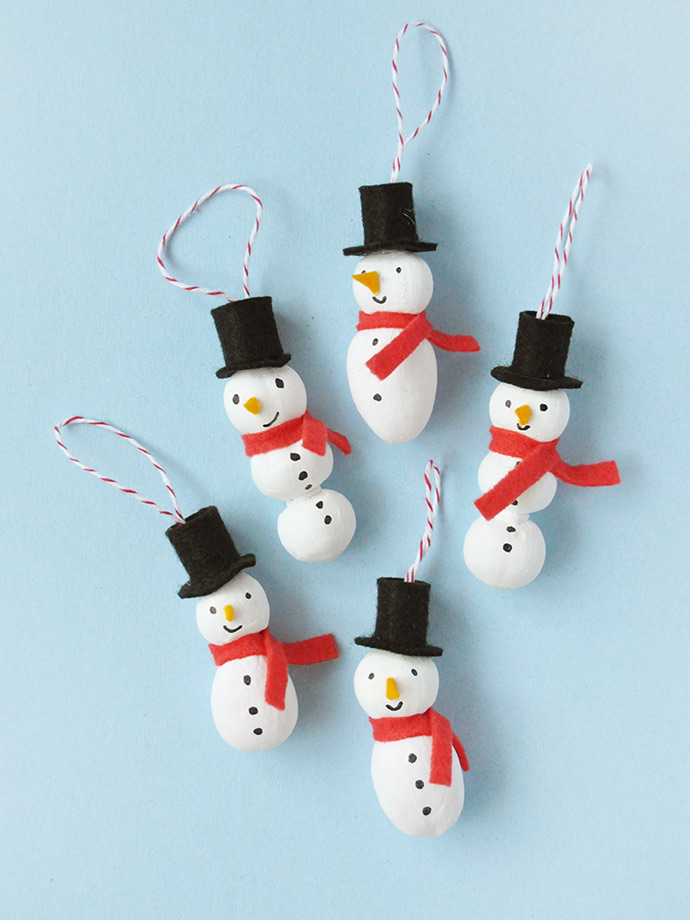
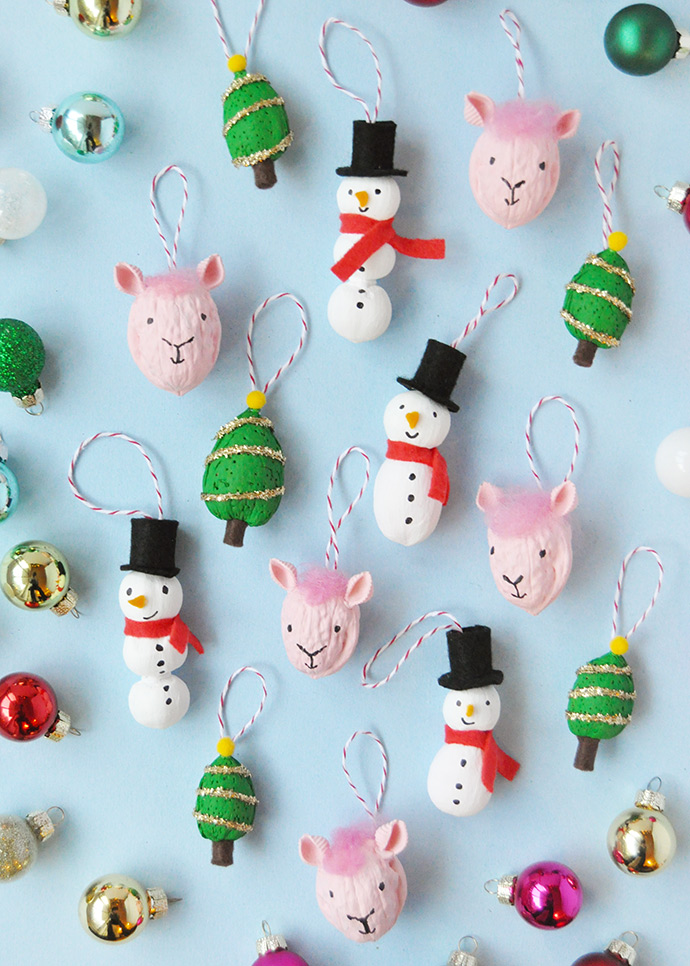
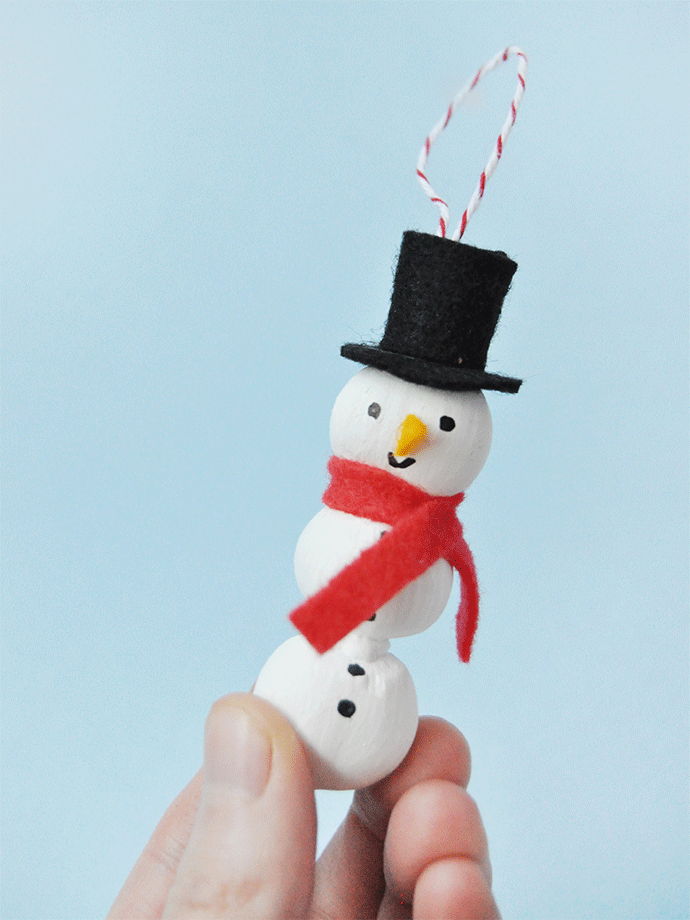
For the snowman, we used both hazelnuts and pecans – you can either glue three hazelnuts together and one hazelnut on top of a pecan. Paint the whole thing white and let dry. Use a black marker to draw on the buttons onto the body. Cut a red scarf out of felt and glue around the snowman’s neck. Draw the face on and cut a tiny triangle carrot nose out of orange felt, gluing that on to. For that hat, roll a black felt rectangle into a tube and glue on top of a black felt circle. Glue the whole thing onto the snowman’s head and then glue a loop of string into the hat for hanging on the tree.

Step 2
For the Christmas tree, begin by painting your almond green. Let dry and glue a mini pom pom on top. Then make the tree’s base by rolling a piece of brown felt and gluing to the bottom of the painted almond. Wrap gold trim around the tree, gluing on the black to hold in place, and then finally make a loop of string and glue that onto the back too.
Step 3
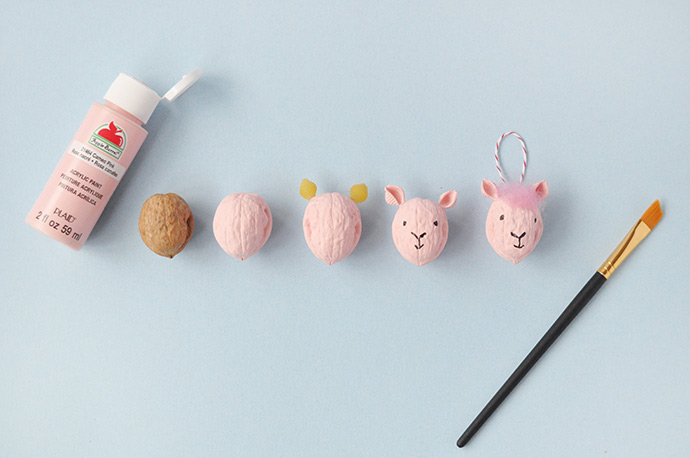
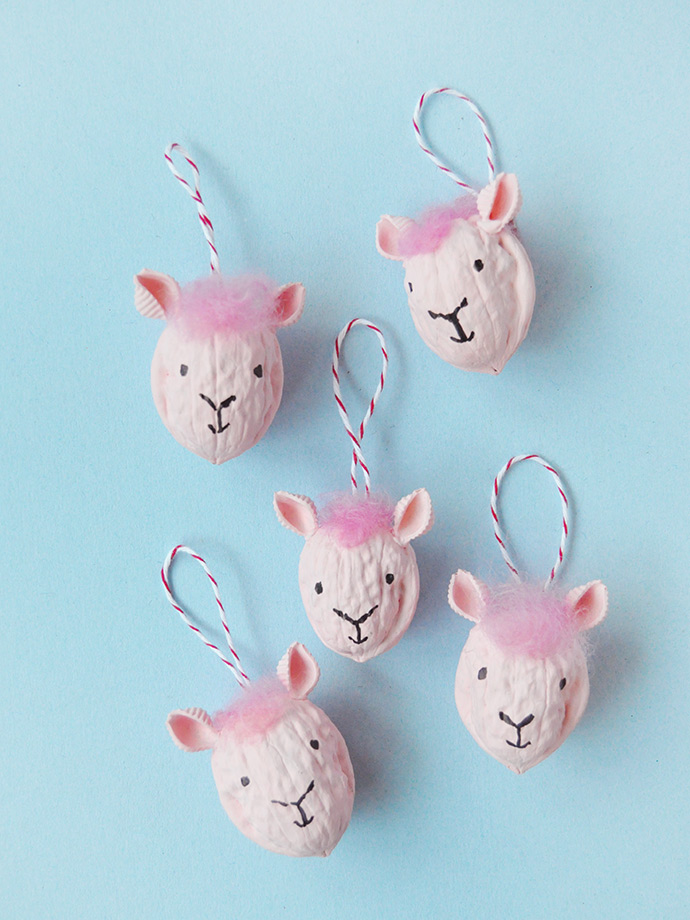
For the llama face, start with a walnut and paint it pink. Glue two mini pasta shells on top to be the ears and give them a coat of pink paint too. Use a black marker to draw on the llama’s face. Take a small tuft of wool roving and shape into a small pile, gluing it on top of the llama’s head. Make a loop of string and glue that on top.


Aren’t they adorable? We love the idea of making sets to give as gifts this holiday season. Needless to say, if you have family or friends with any nut allergies, these are of course not a good option – we suggest you check out the blog archives for other DIY ornaments instead!

Happy holidays!!