This post is sponsored by Plaid Enterprises.
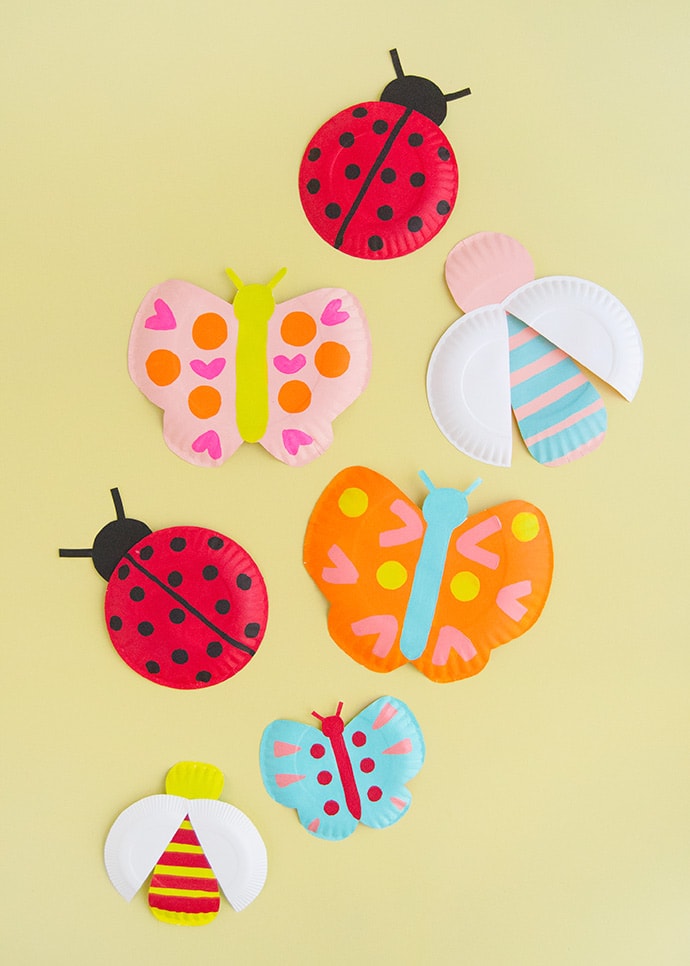
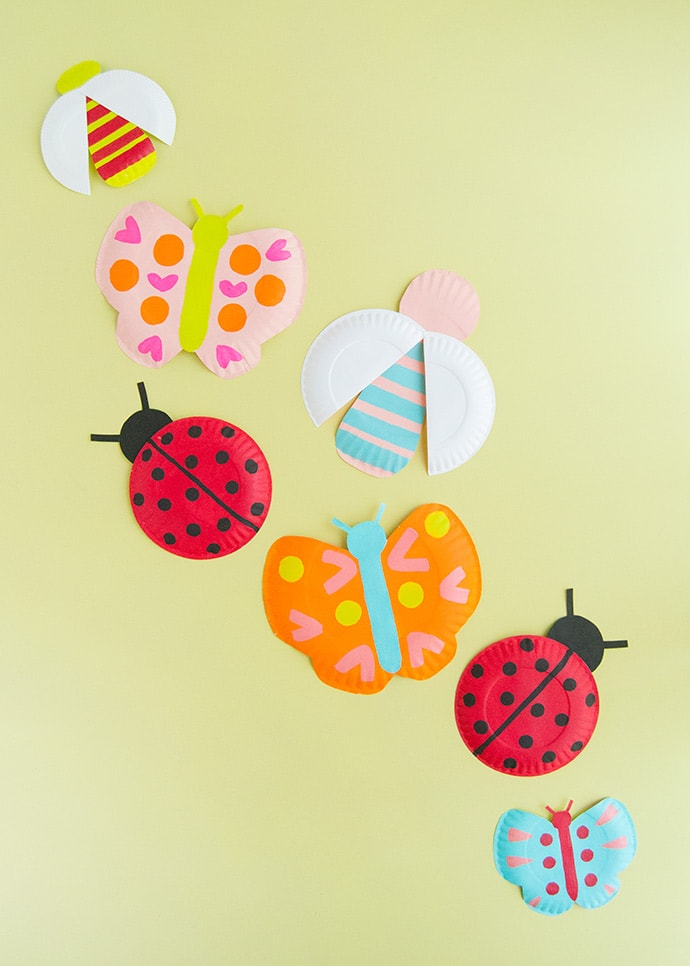
With the warmer weather finally here, we’ve been loving spending more and more time outside in the sunshine and fresh air – and we’re not the only ones! We’ve been spotting more birds, animals, and bugs everywhere. And who says bugs have to be icky? Some are so beautiful and they all play an important part in our ecosystem. Today we’ve decided to celebrate the little critters with this simple craft!
Paper plates are one of our favorite things to craft with because they are so versatile. With a little bit of FolkArt Acrylic paint, you can turn a plain white plate into almost anything! Picking color schemes for these butterflies and beetles is half the fun! Keep reading for the full instructions below.
what you need:
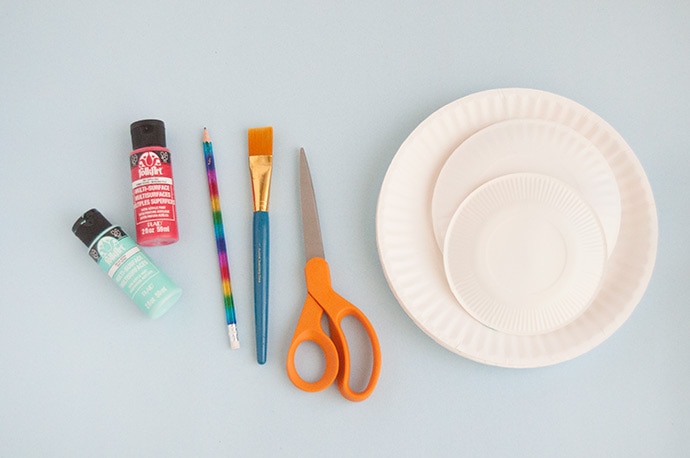
- FolkArt Acrylic Craft Paint
- Paintbrushes
- Paper plates (in various sizes)
- Pencil
- Glue
- Scissors
how-to:

For the butterflies:
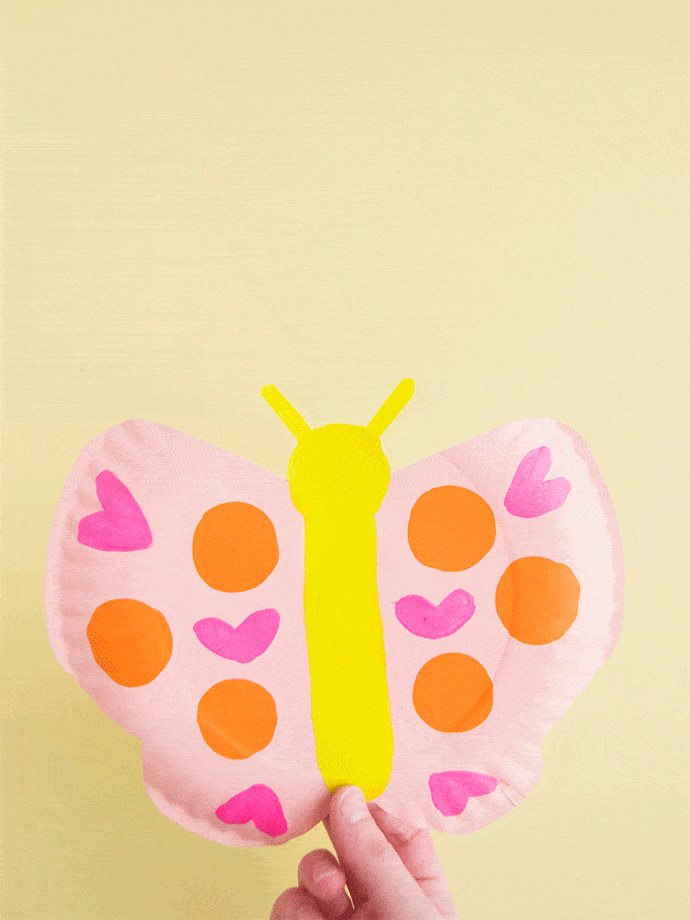
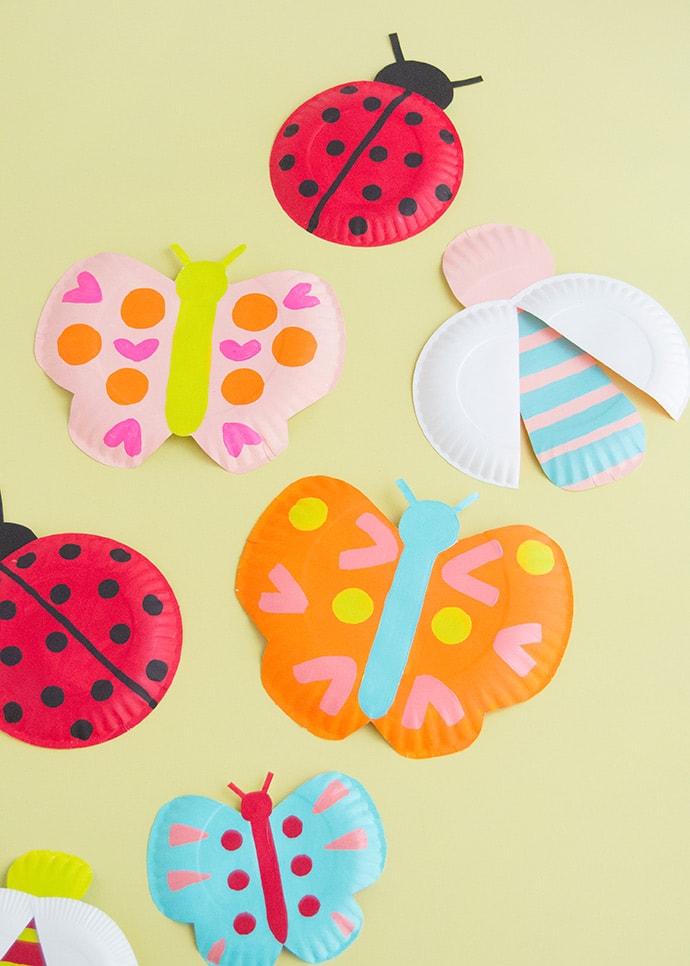
Use a pencil to draw a simple butterfly shape onto the back of a paper plate. Our favorite paper plates to use for this are the super-thin ones that aren’t coated with plastic on either side. They’re the ones that aren’t to eat off of, but they’re absolutely perfect for crafting with! Draw butterflies on small and large plates, but don’t cut out yet. Choose two paint colors: one for the butterfly’s body and the other for the wings. Paint each and let dry completely and then cut out along the pencil lines. Now use contrasting colors to paint designs and patterns onto the wings. We made ours symmetrical, but you don’t have to if you don’t want! Let dry completely.
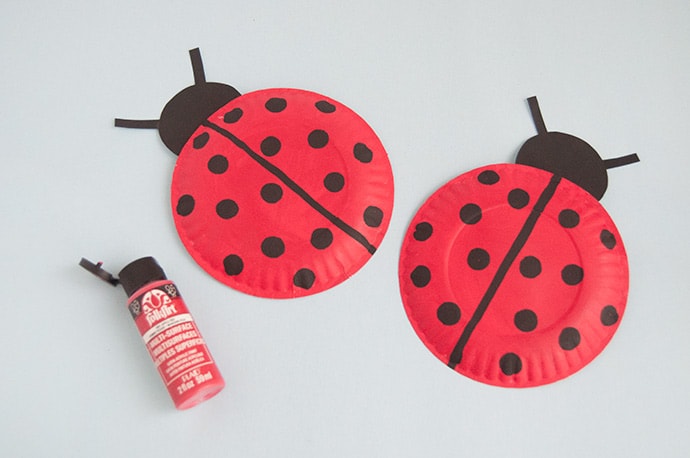
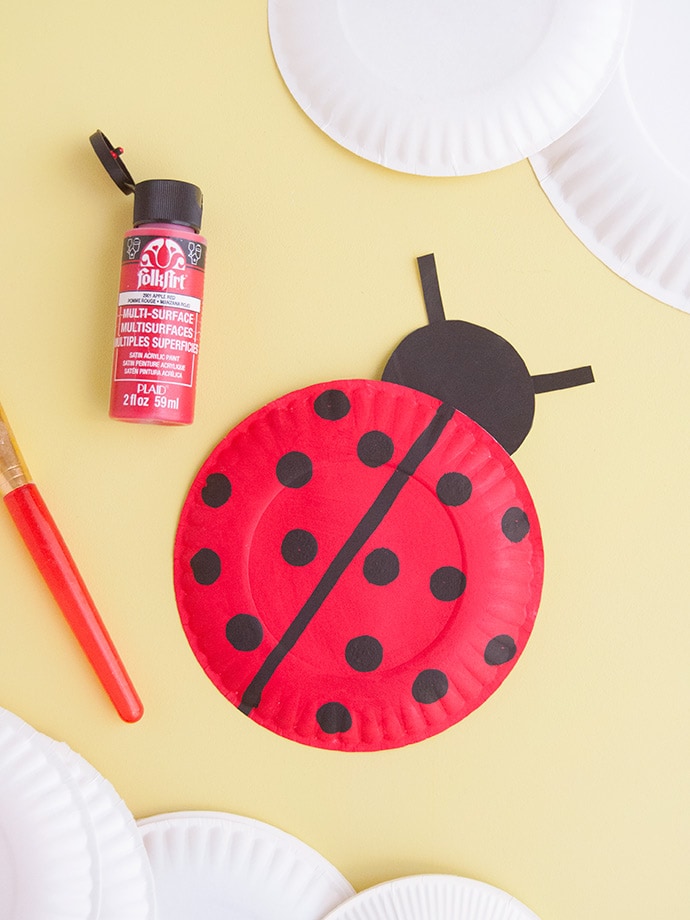
For the ladybugs:
Paint the entire back of a paper plate red and let dry completely. Paint another small plate with black paint – you’ll use this for the ladybugs’ heads – and let that dry too. Use black paint to make a line down the center of the ladybug’s back and paint black polka dots on either side of it. If you have a round sponge brush (usually used for stencilling) this helps make perfectly round dots! Once the black plate is dry, trace a round object onto it, cut out, and glue to the underside of the body. Cut two small antennae and glue them to the head too.
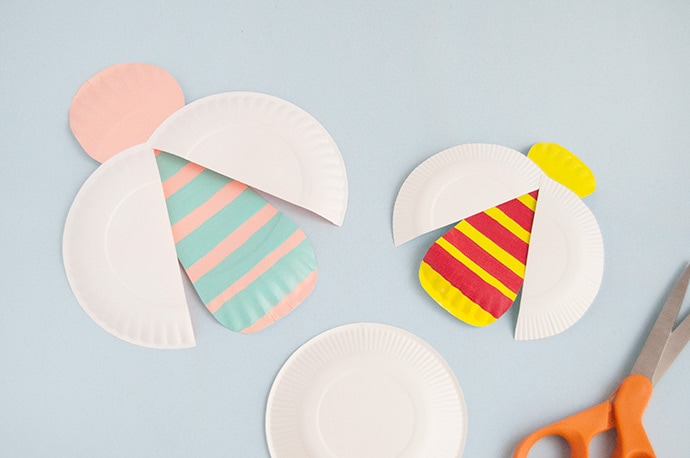
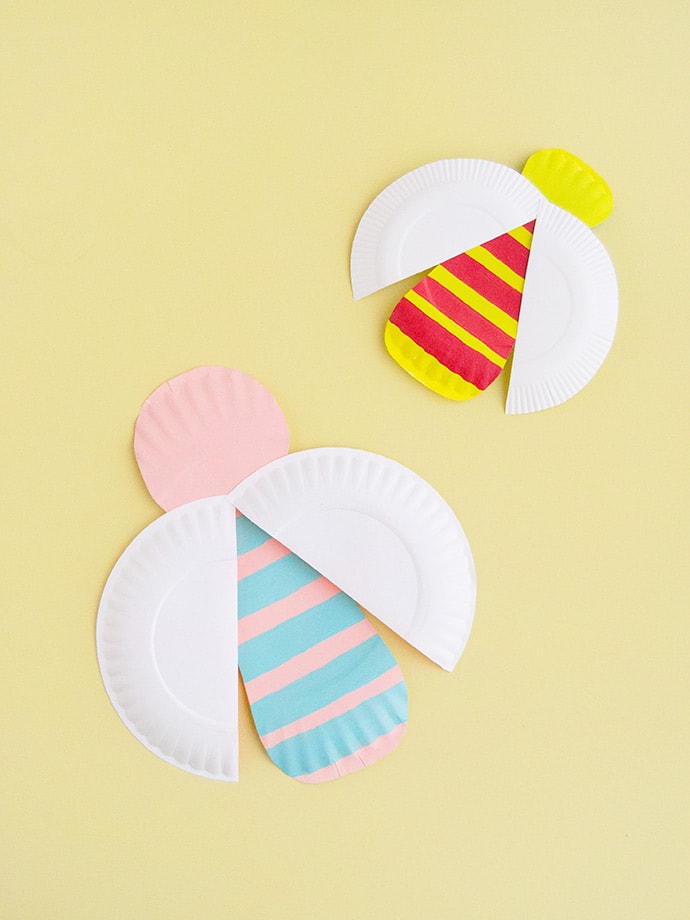
For the flying beetles:
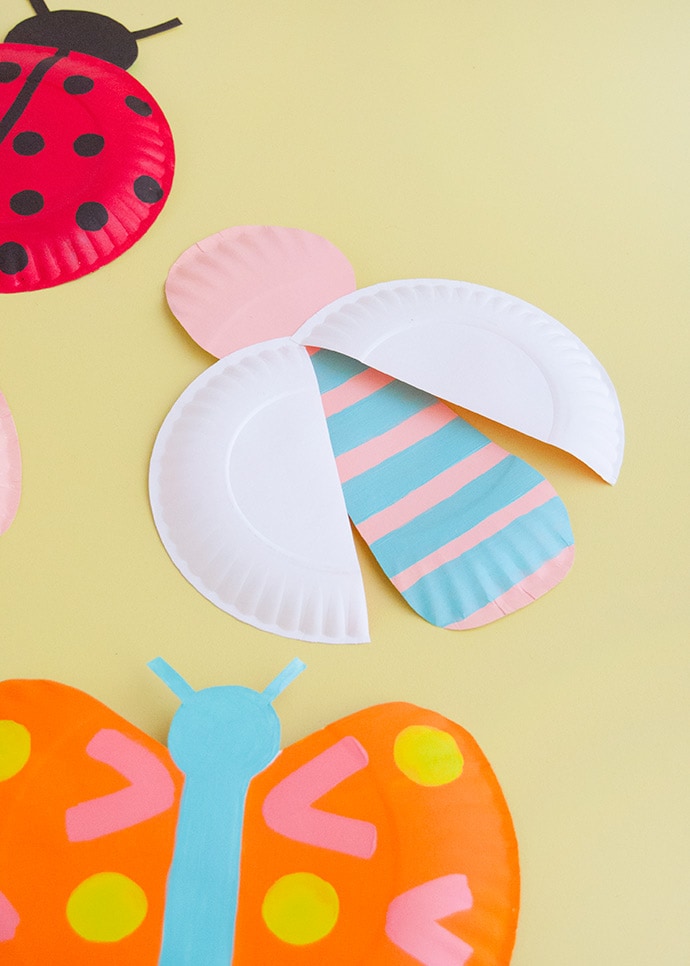
Draw a shape similar to a bowling pin onto the back of a paper plate. Apply a base coat of one color and let dry. Then apply a second color as stripes on the beetle’s body, allowing to dry completely. Cut out the beetle’s body. Take a second unpainted plate and cut in half. Glue onto the back of the beetle right where the head meets the body.
Happy crafting!