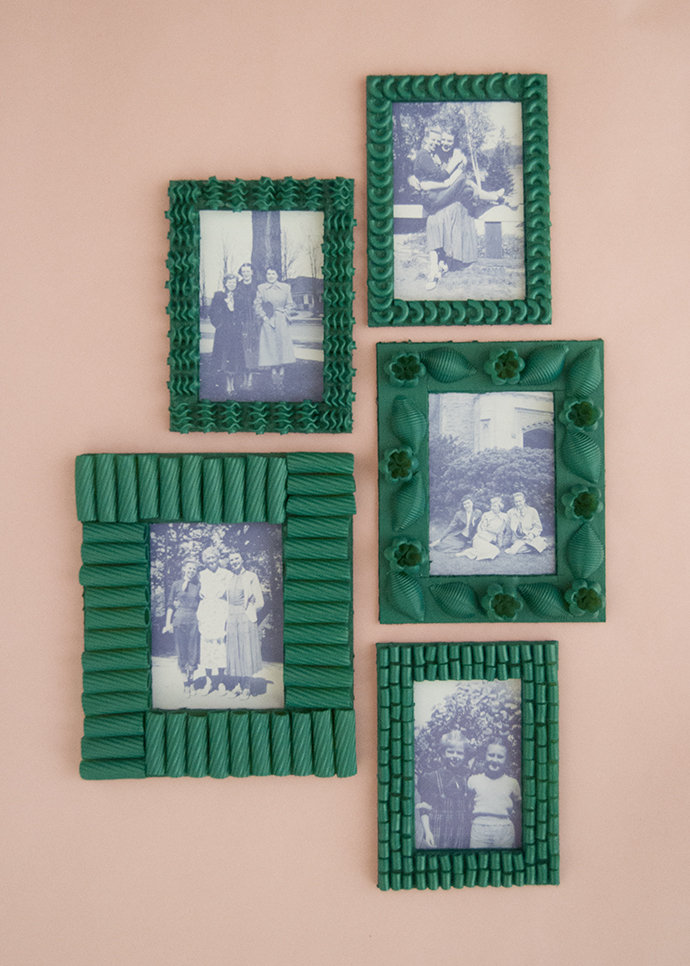
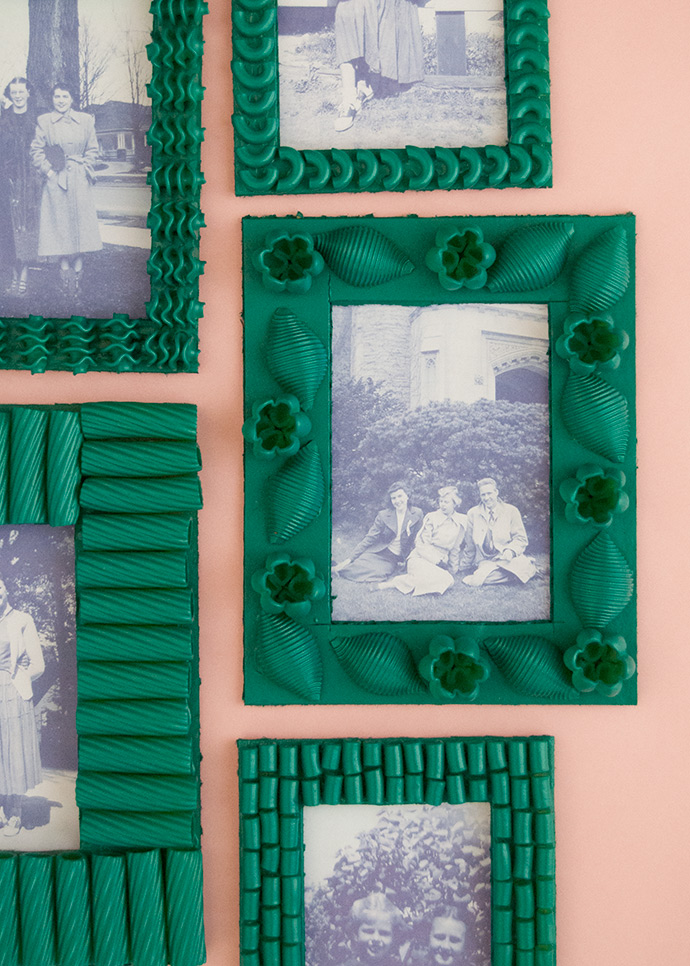
Over the years, I’ve ended up making a fair few pasta crafts and I’m surprised that it took me this long to make pasta frames! The idea is so simple and the options for designs are endless. Funnily enough, back in my high school Theater Production class, I made a pasta frame for a prop assignment. I made it huge and spraypainted the frame gold for a gilded look and I was really happy with how it turned out! This time around, I went for a more subtle look with this muted shade of green.
what you need:
- Corrugated cardboard
- Pasta noodles (various shapes)
- White tacky glue
- Craft knife
- Ruler
- Cutting mat
- Pencil
- Spray paint
how-to:
Step 1
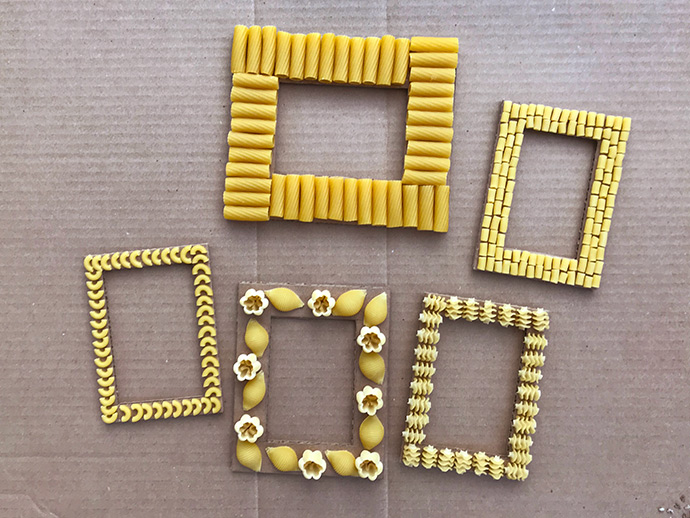
Use a pencil and ruler to draw out the size of frame you would like to make. Keep in mind the photos you plan on using for general size and also what pasta noodles you have on hand.
Step 2
Cut the frame out using a craft knife and cutting mat. Be sure you use corrugated cardboard for the frame – lighter-weight cereal box style cardboard will likely warp from the glue and pasta.
Step 3
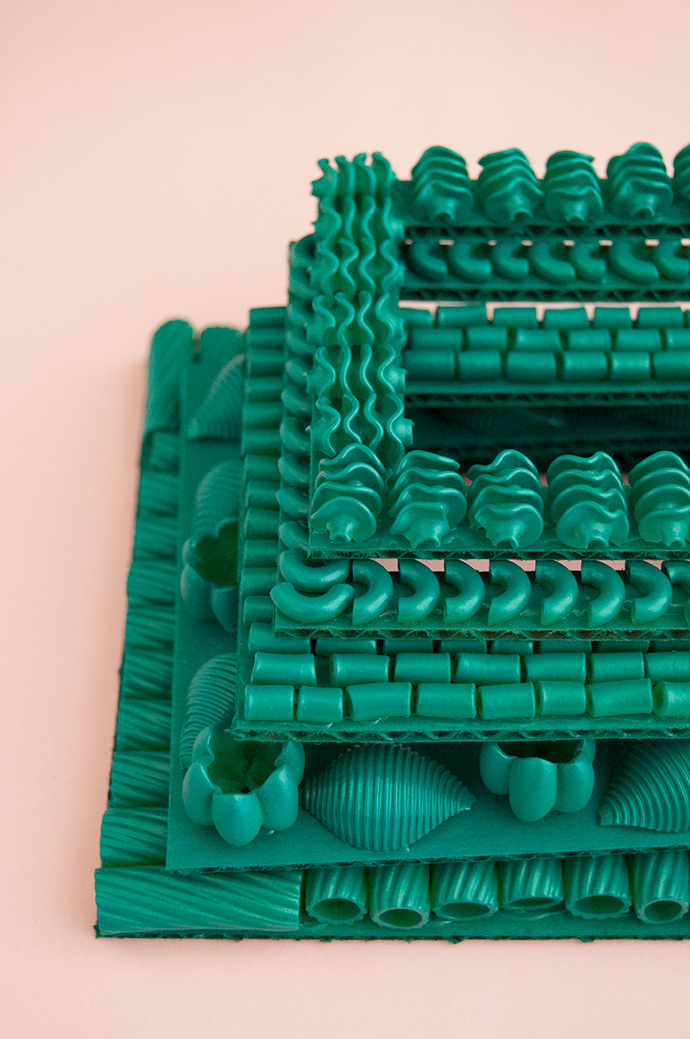
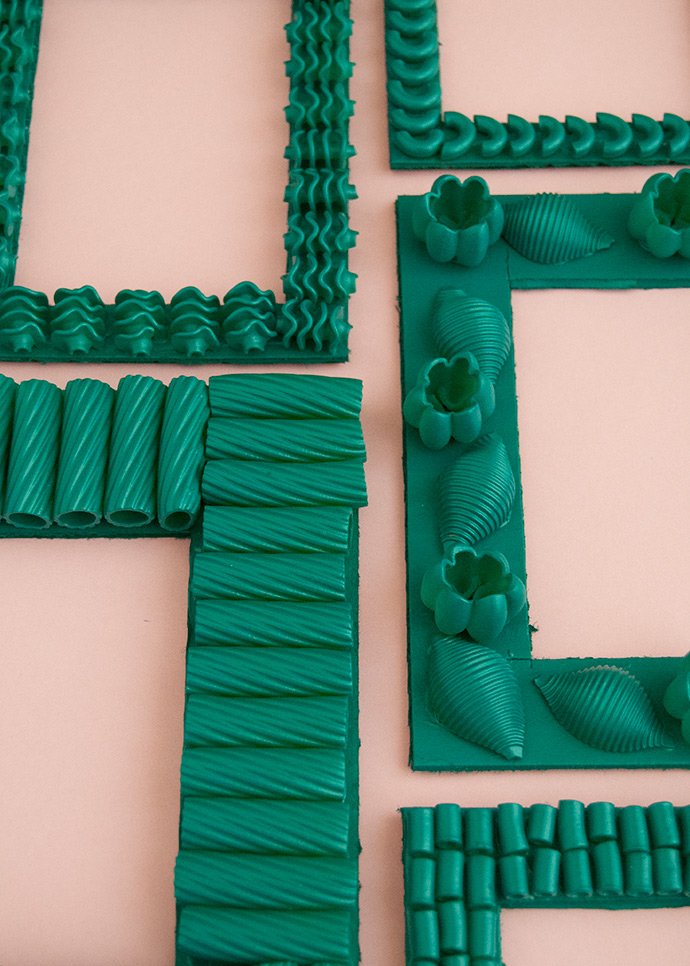
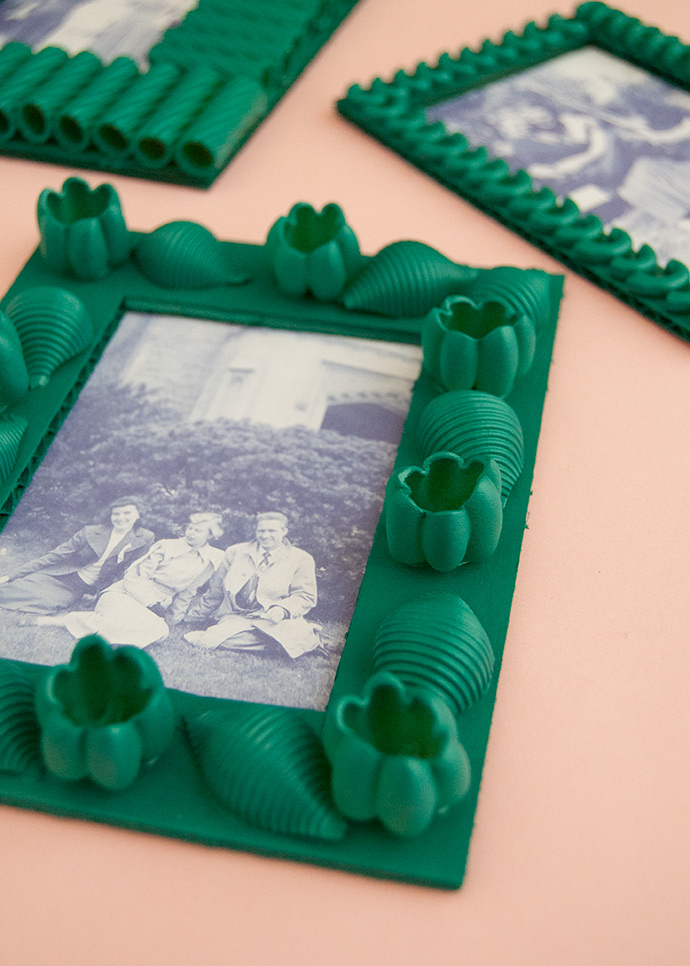
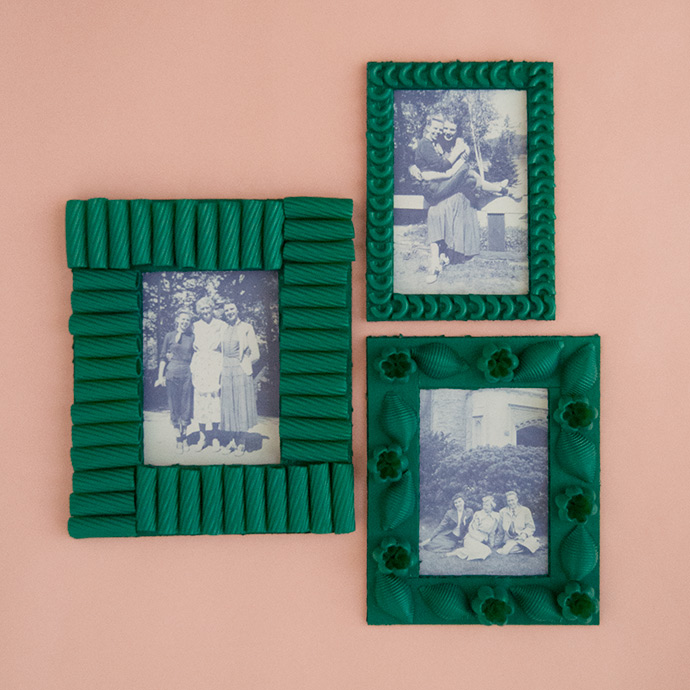
Spread out the pasta noodles you have and get creative playing with different shapes and patterns. It helps to layout most of your design on the frame first so that you can distribute the noodles evenly along the length and width to avoid any little leftover spots where noodles won’t quite fit.
Step 4
Once you’re happy with your designs, use white tacky glue to secure the noodles in place. Hot glue also works, but the little hot glue tails left behind can be tedious to remove so white glue is definitely best. Let the glue dry completely.
Step 5
Set up a drop cloth or a large piece of cardboard outside in a well-ventilated area to spray paint the frames. Work in light coats to avoid any drips and blobs. Make sure to look at the frame from all angles so that you cover all sides of the noodles. Once completely, covered let dry according to the instructions on your spray paint can.
Step 6
Use glue (or tape) to secure your photos into the backs of the frames. If you’d like the frames to be hangable, glue a short piece of string onto the back of the fram so that it can hang from a nail. You could also glue a little triangle to the back if you’d prefer to have the frame stand up. Or leave as is and lean it against another surface.
Happy crafting!