This post is sponsored by Plaid Enterprises.
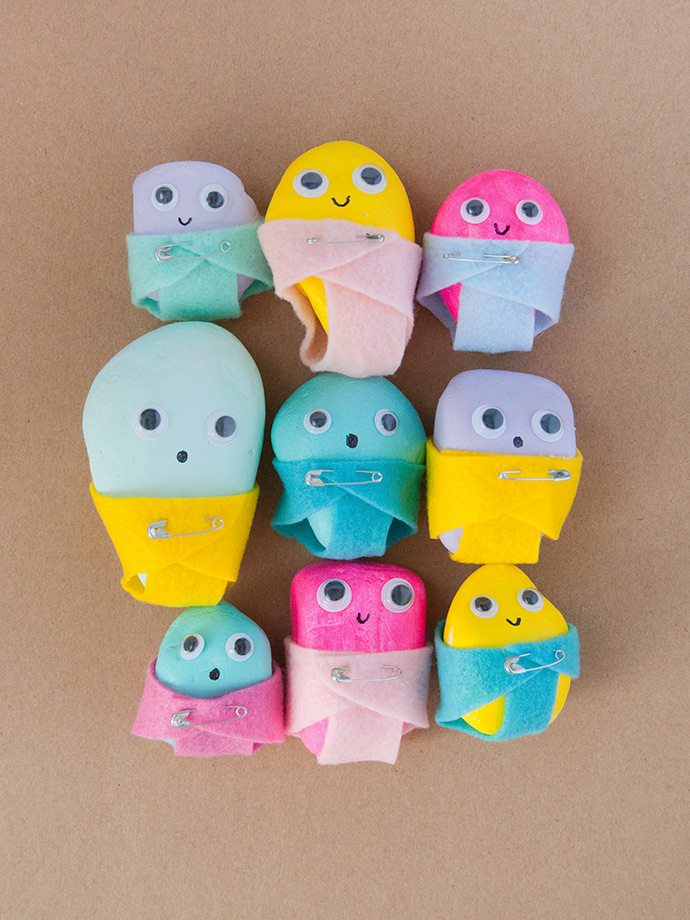
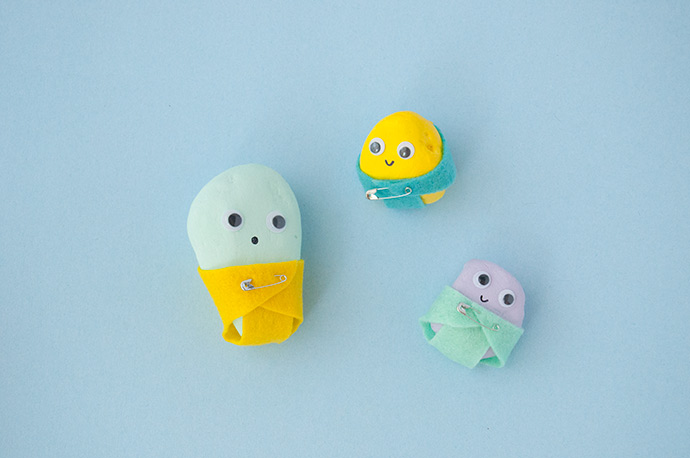
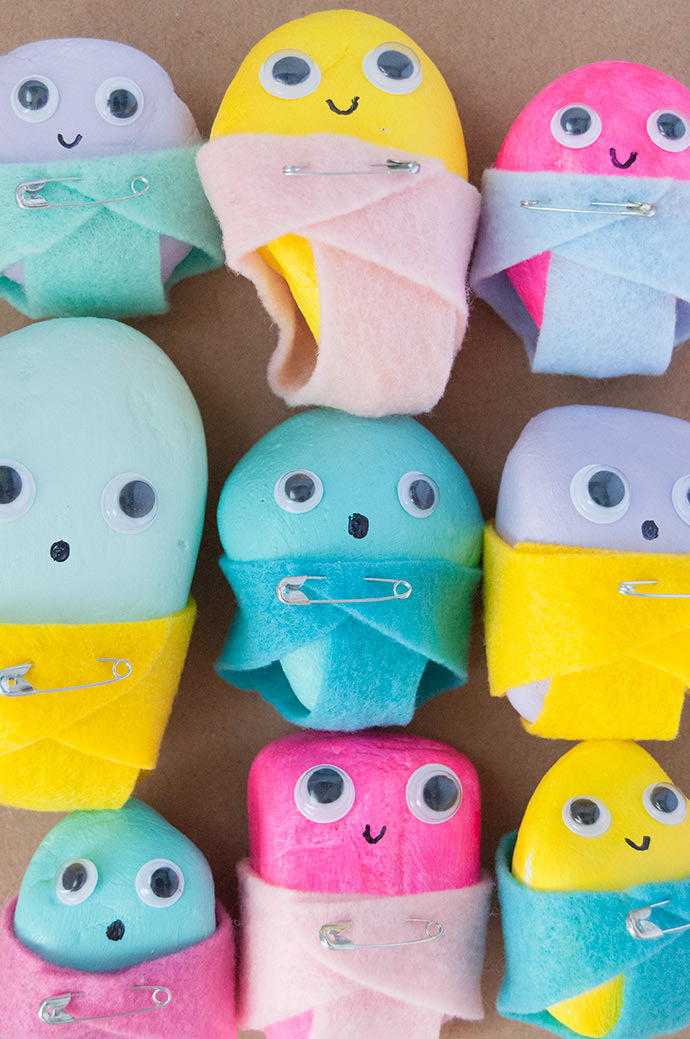
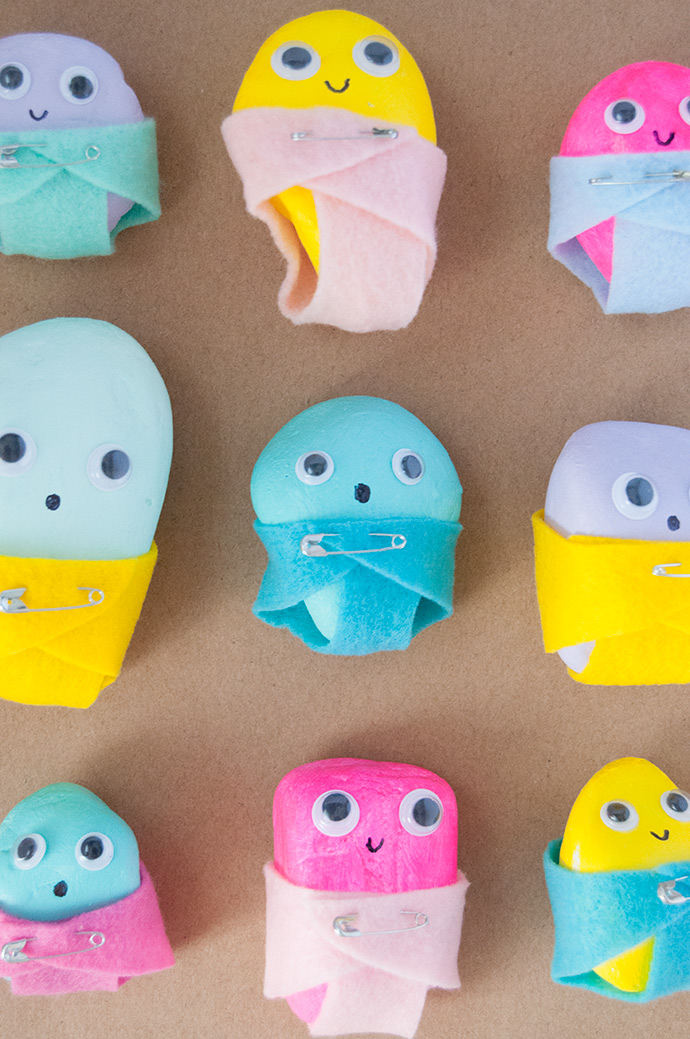
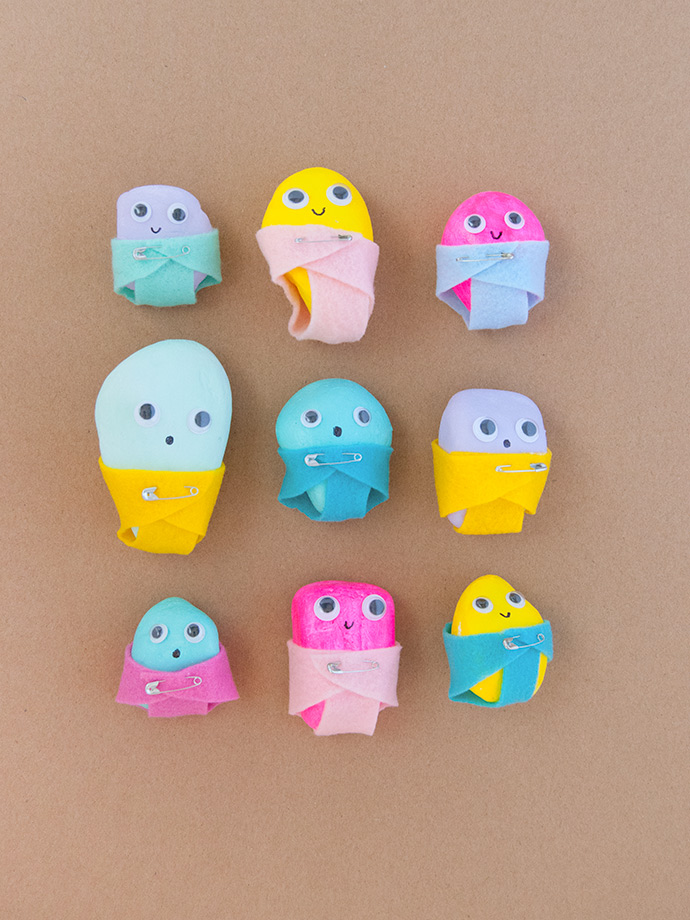
Have you ever made a diaper for a rock before? Well, get ready to cross that off the to-do list because today we’re making a whole daycare of painted baby rocks and they need felt diapers! These adorable little babies are cute as can be and don’t take much time at all. If you’re going on a walk around the neighborhood or park, collect some smooth, round rocks to bring home. With just a quick coat of Folk Art Acrylic Paint, some googley eyes, and felt, these cuties are ready to go!
These little rocks may not be learning to walk anytime soon, but they sure love rolling around and they’re the quietest babies we’ve ever met! You could even make them little felt beach towels and bring them along on your day trip to the beach! Keep reading to see our tips and tricks below.
what you need:
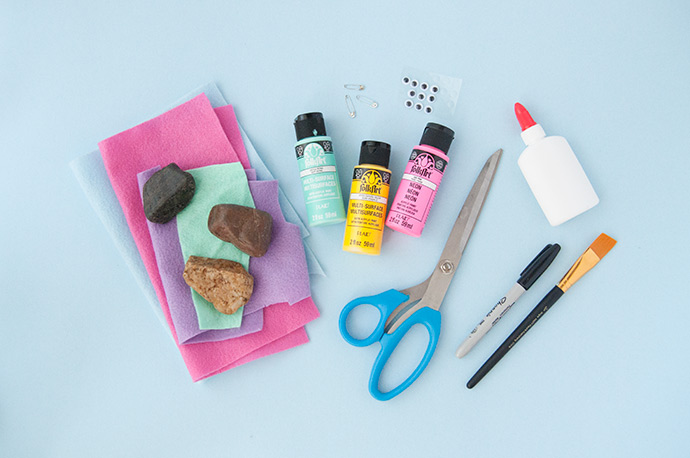
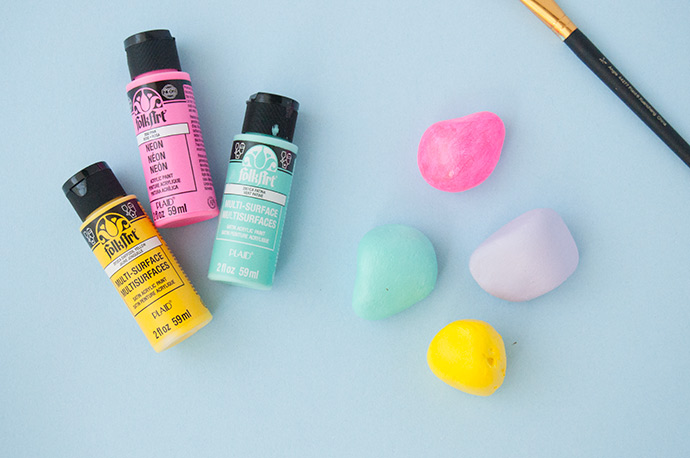
- Folk Art Acrylic Paint Set
- Paintbrushes
- Rocks
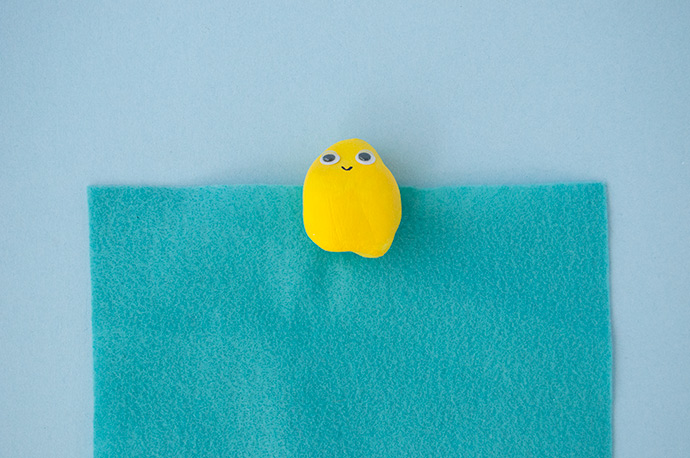
- Felt
- Scissors
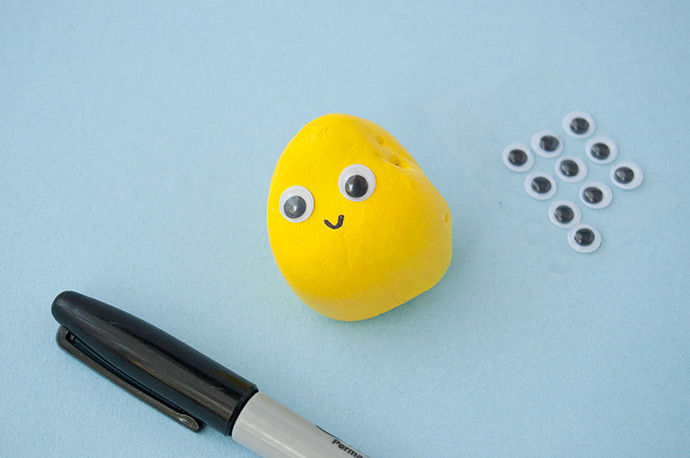
- Googley eyes
- White tacky glue
- Mini safety pins
- Black permanent marker
how-to:
Step 1
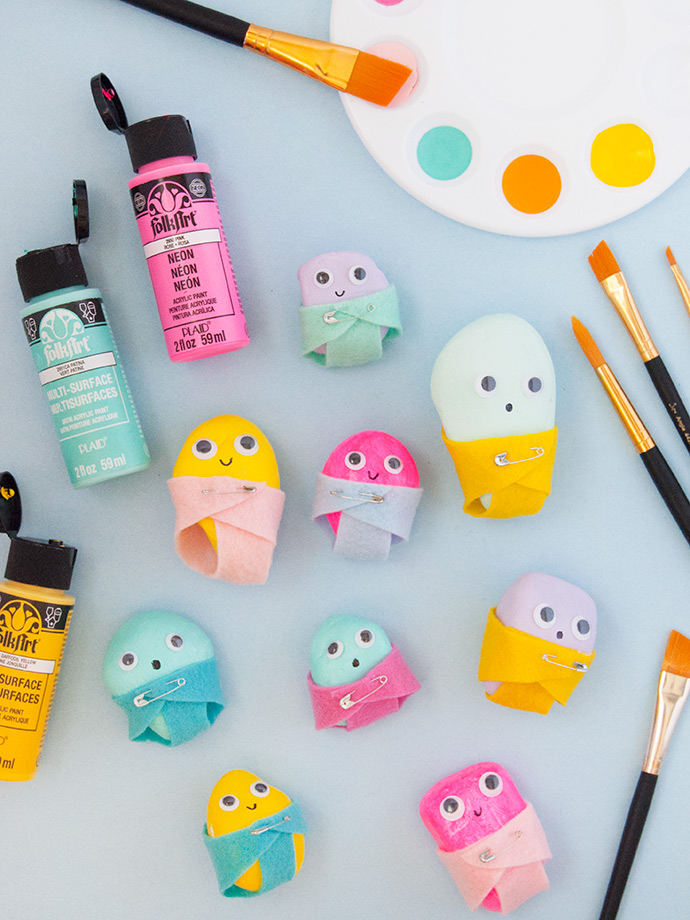
Begin by cleaning your rocks with soapy water, and let dry completely. Once dry, give your rocks a coat of paint! You can use literally any color your heart desires here. If you use neon colors like we did, it doesn’t hurt to give the rock a coat of white paint first – this helps the neon colors really pop! Let dry completely.
Step 2
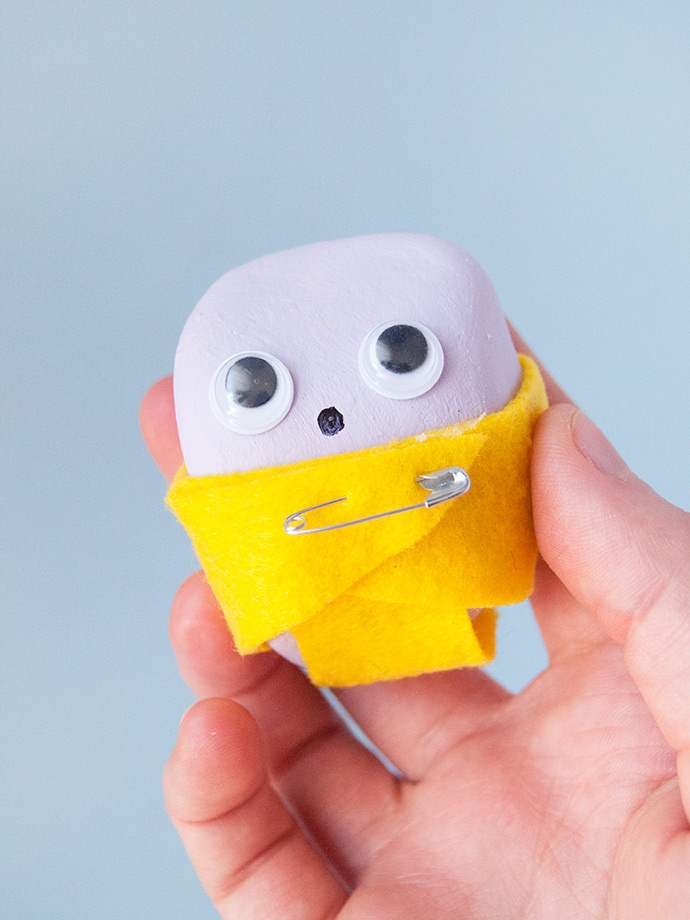
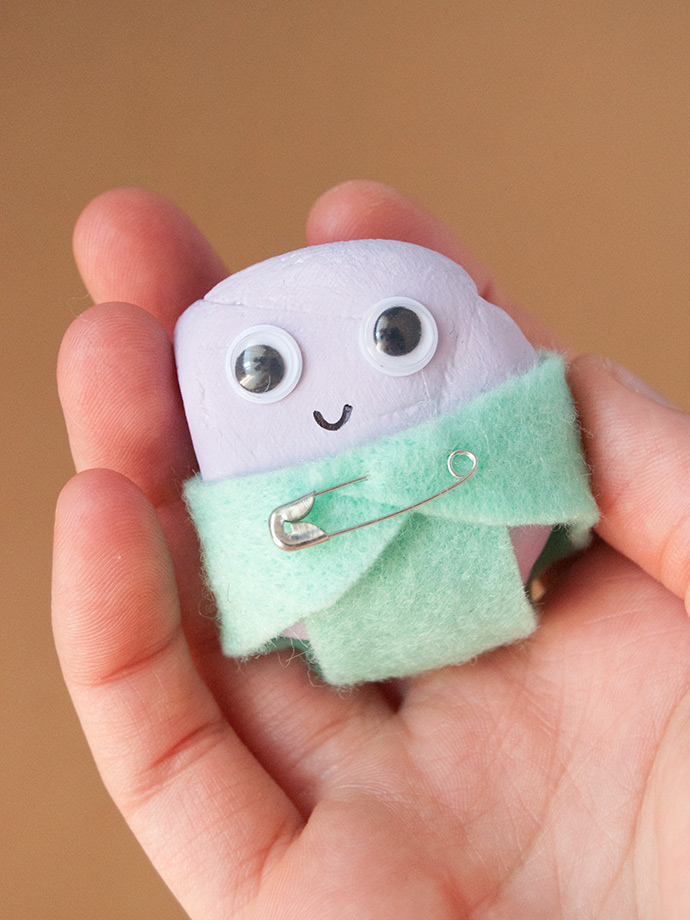
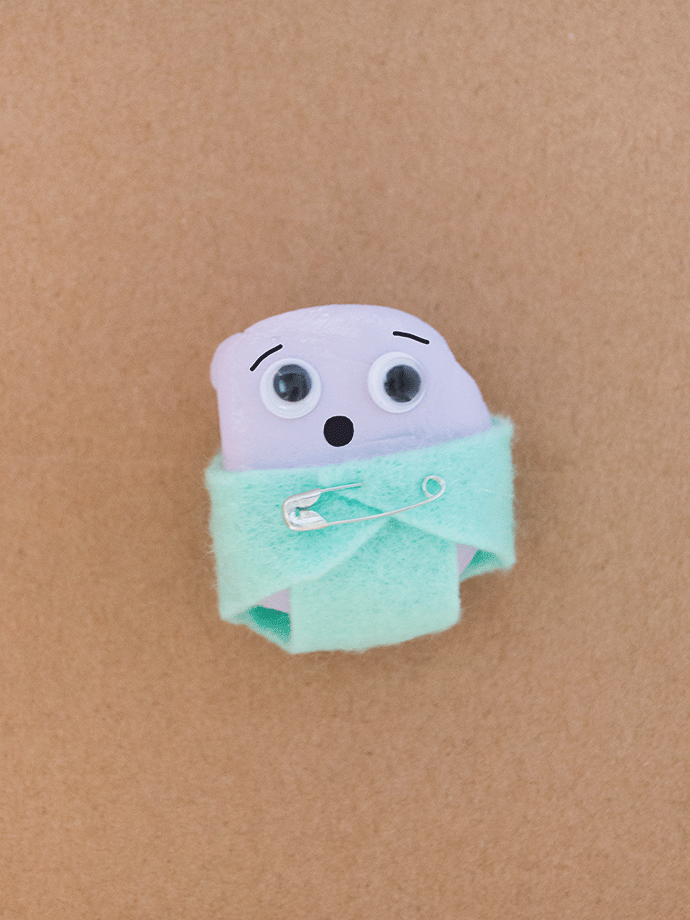
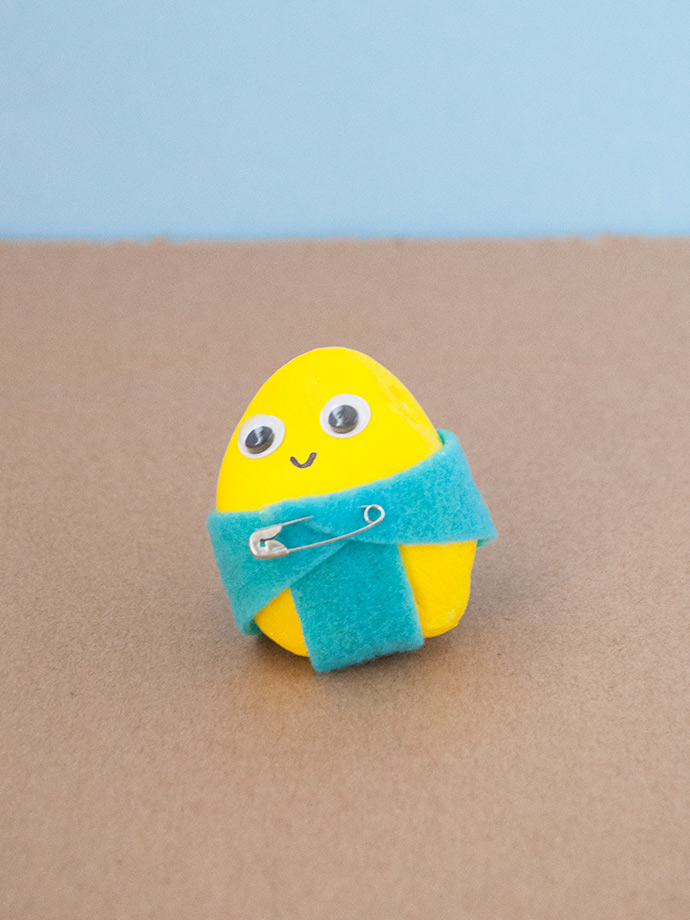
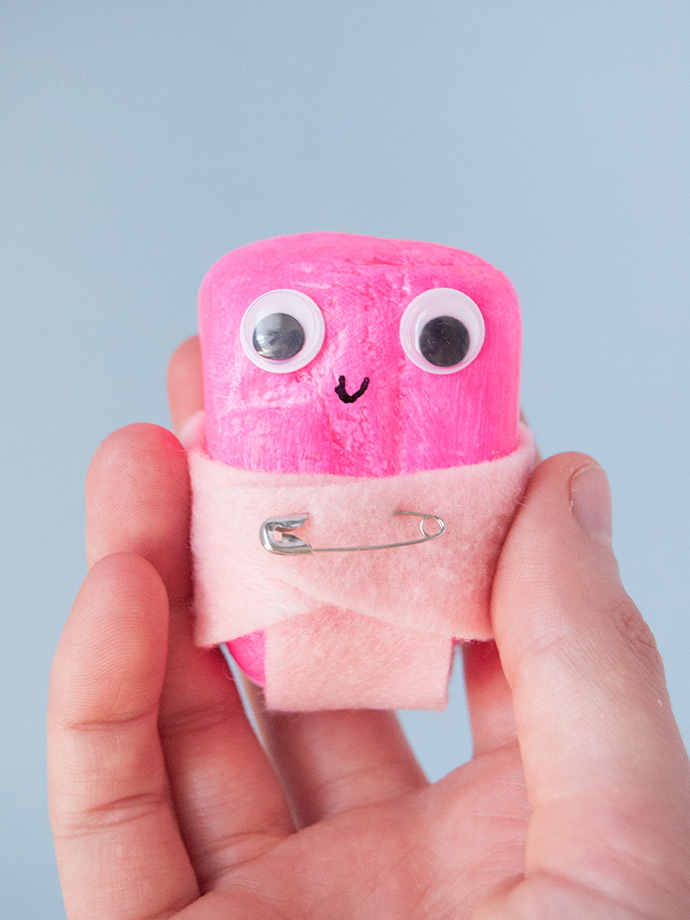
Time to add a cute little baby face! Stick two self-adhesive googley eyes onto the rock and use a black permanent marker to draw on a mouth. Make the mouth a smile, a little O or whatever you like – you can even add eyebrows if you want.
Step 3
To make the diaper, pick a piece of felt and lay it flat on your work surface. Set the painted rock along the edge, centered, with the face above the felt line as shown. Use tacky or hot glue to secure the rock in place here, applying just enough to the back of the rock to hold it down.
Step 4
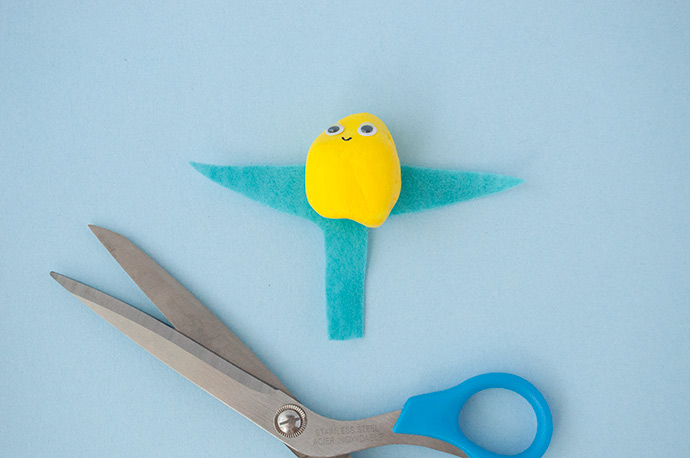
To cut the diaper, you want to make a sort of T shape. The bottom flap of the diaper should be rectangular and reach just below the rock’s mouth. The two side flaps should be long thin triangles that, when wrapped over, reach the other side. Getting this diaper shape will vary a little bit depending on the size and shape of each rock so don’t worry about getting it super exact – no two diapers will look exactly the same.
Step 5
To finish the diaper, pina small safety pin into one side flap and then glue all the flaps down as shown. Repeat on all the remaining rocks.
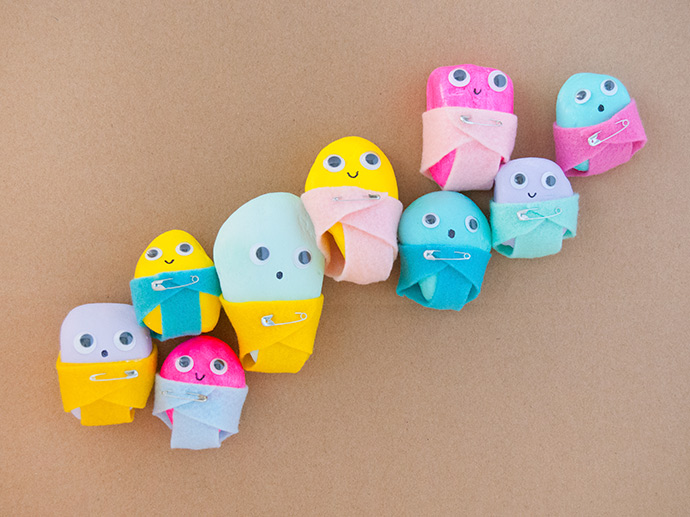
Happy crafting!