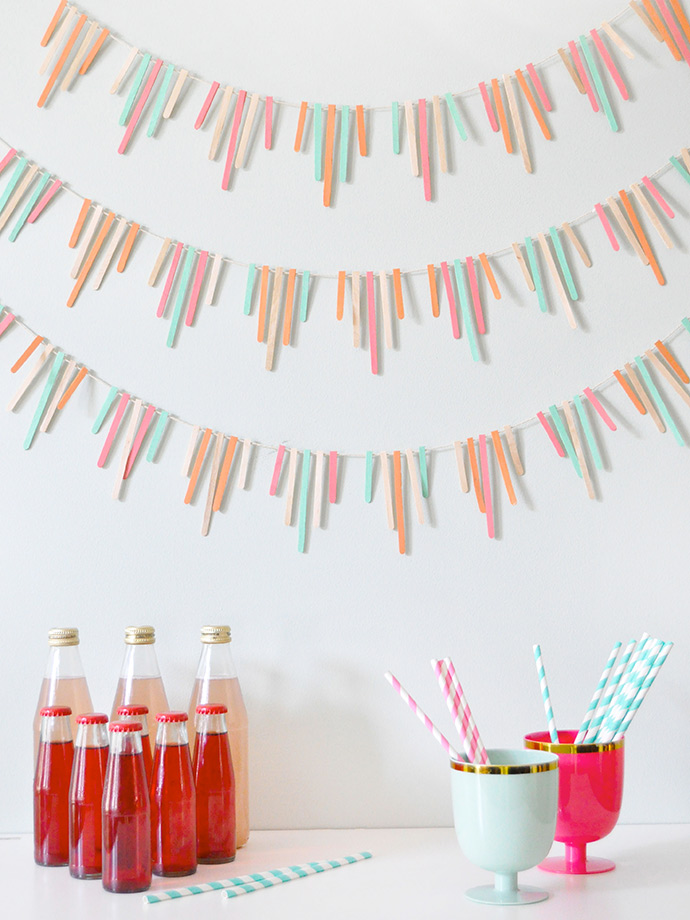
If you look closely, you might recognize the materials used to make this garland – wooden coffee stir sticks! With a quick coat of paint, these everyday items are given an unexpected new use as decor. We used four bright shades of paint and left some of the stir sticks as-is for a fun and playful look. Of course, you can absolutely paint your garland in any color scheme you like, to match whatever theme you have planned for your next party. We’re betting this garland would look adorable in monochromatic colors, or even with some glittery shades mixed in. Whatever colors you choose, keep reading for the full instructions below.

what you need:
- Ruler
- Wooden stir sticks
- Apple Barrel Acrylic Paint Set
- Paint brushes
- Scissors
- String
- Hot glue gun
how-to:
Step 1
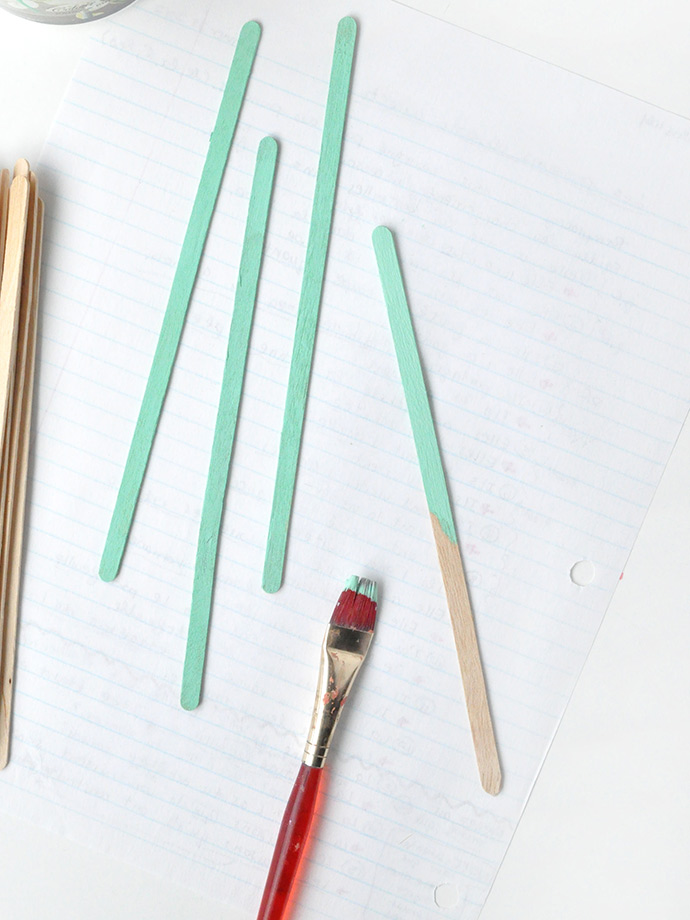
Using at least three colors of paint, paint about 50 stir sticks. If hanging against a wall, it’s only necessary to paint one side. Let dry.
Step 2
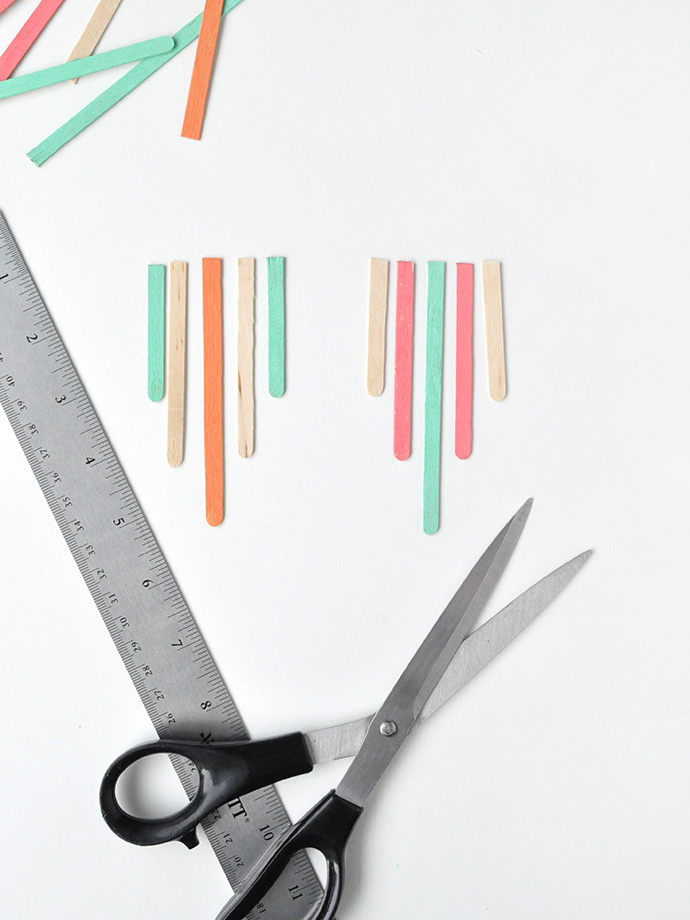
Arrange the colors in groupings of five, and cut the center stick to 4”, the inner two to 3” and the outer two to 2” lengths.

Step 3
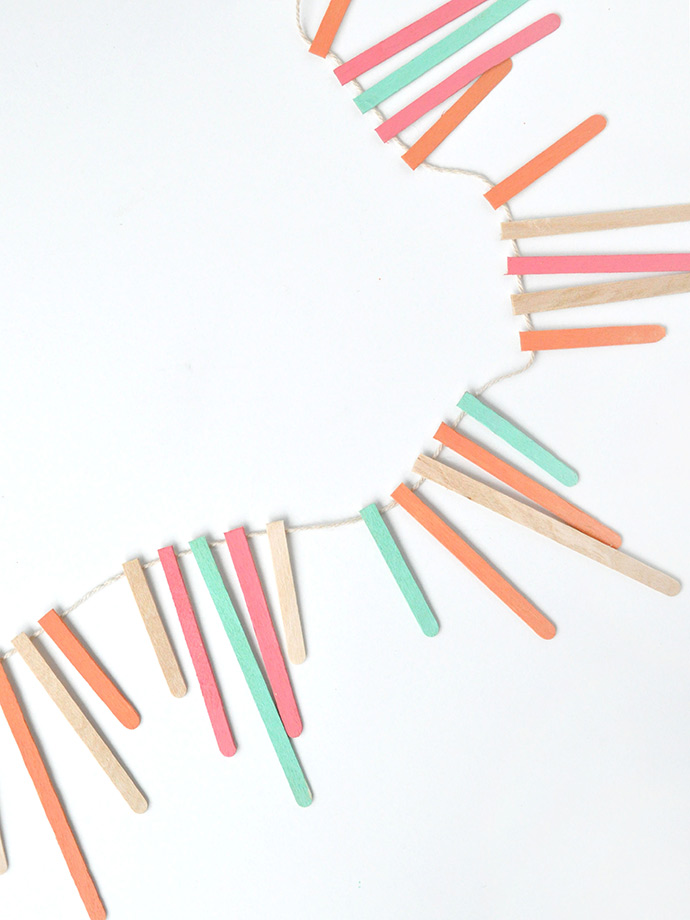
Cut a piece of string, apply a small dab of glue onto the back of the first stir stick, and press into the string. When attaching the next sticks, use an extra stir stick as a spacer to ensure all sticks are evenly spaced. Keep each grouping about 1” apart – you can cut an extra stick to use as a spacer for this as well.
Step 4
Repeat as necessary, using more than one string if desired.
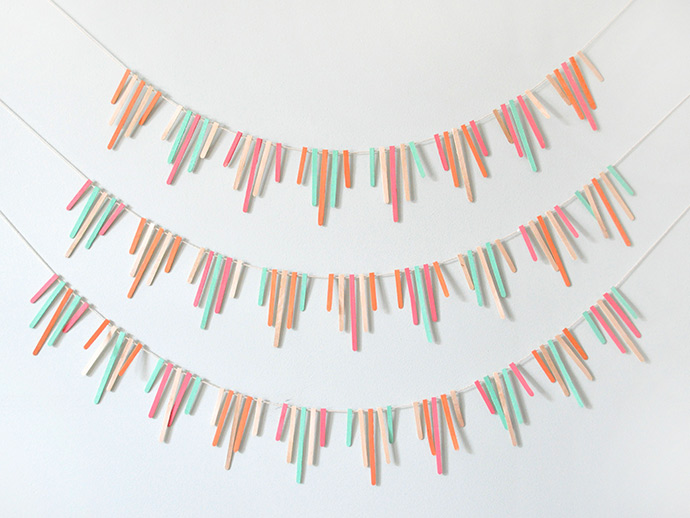
And that’s it! Your garland is now ready to hang. We made a few different strings and taped them to a wall, but these would be super fun to hang anywhere around the house, like in the top of a doorframe or just hanging from the ceiling. If hanging in a place where you can see both sides of the garland, you might want to paint both the back and front of the coffee stir sticks so that it looks just a great from all angles.
Looking for even more DIY party inspiration? Check out the blog archives for even more ideas!
Happy crafting!