Who needs selfie filters when you can decorate photos with colorful paper and your own two hands? The Sizzix Big Shot makes it simple as can be. With an endless supply of designs to choose from, you and your kids will have a blast customizing your family photos. If you’re a user of Pinterest or Instagram, you’ve likely stumbled upon beautiful mixed media art on photos – from embroidery on vintage postcards to illustrations over photographs, we can’t help but admire it all and want to give it a try ourselves!
It’s so easy to leave photos forgotten and tucked away in your phone’s photo gallery, but this project is the perfect reason to get them printed! Kids will love creating their own works of art featuring your family and friends – and the finished pieces make excellent cards, gift toppers, or even postcards!
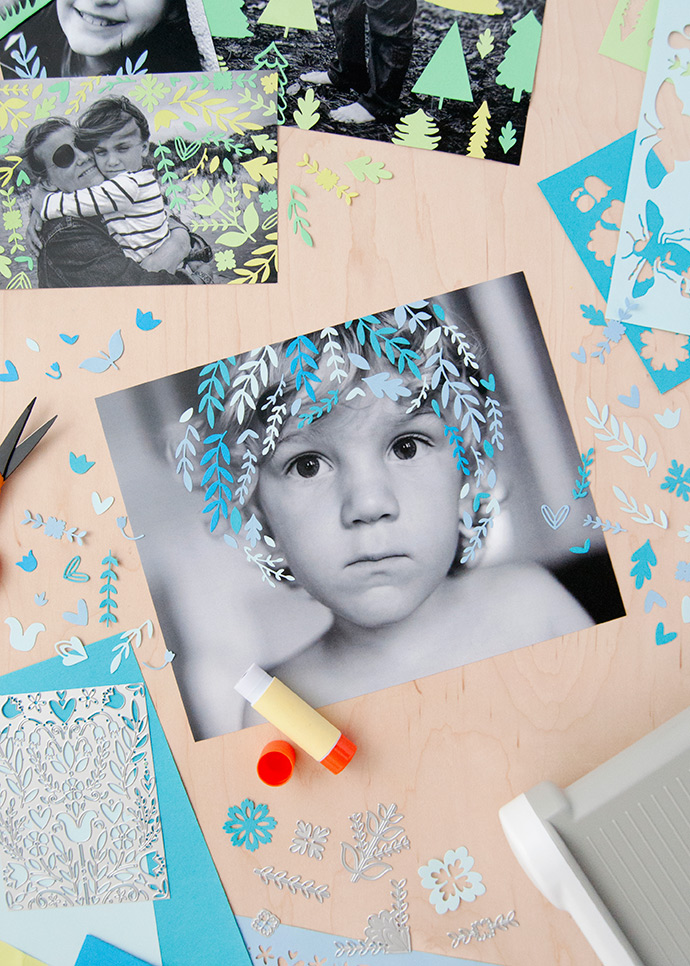
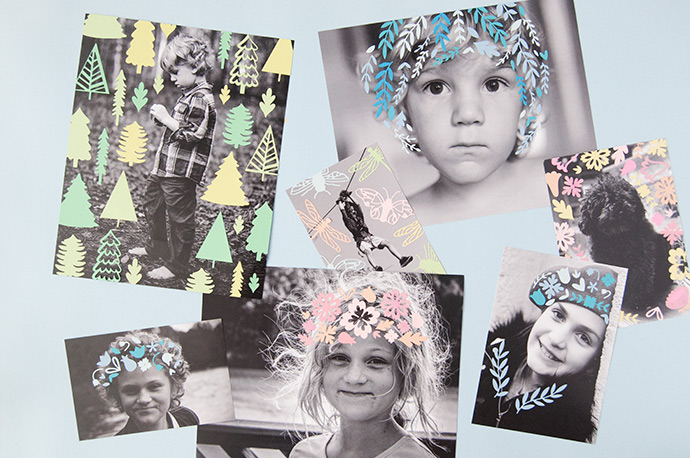
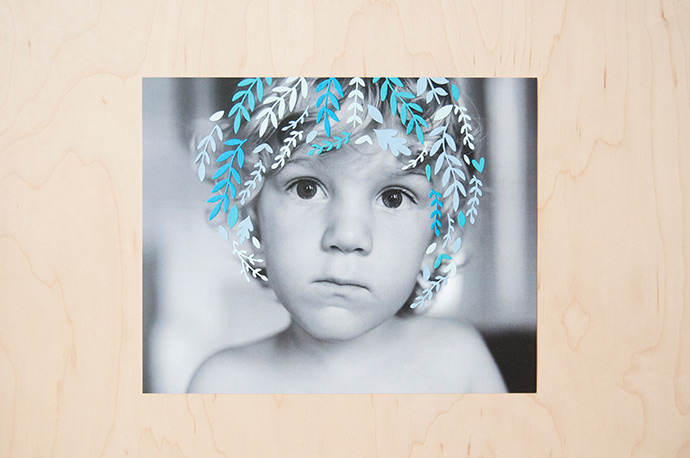
Not only can you make the most stunning flower crowns, but mix and match all sorts of wild and leafy shapes from the just released Chapter 3 designs. Work together with your kids to pick out which colors of paper they’d like to use alongside the Thinlits die sets. Depending on the ages of your kids, have them help with the actual cutting of the shapes or for littler ones you can do this ahead and set out the shapes in shallow bowls or trays for them to explore. We love a good creative play exercise that gets kids imaginations running wild all while making beautiful keepsakes!
what you need:
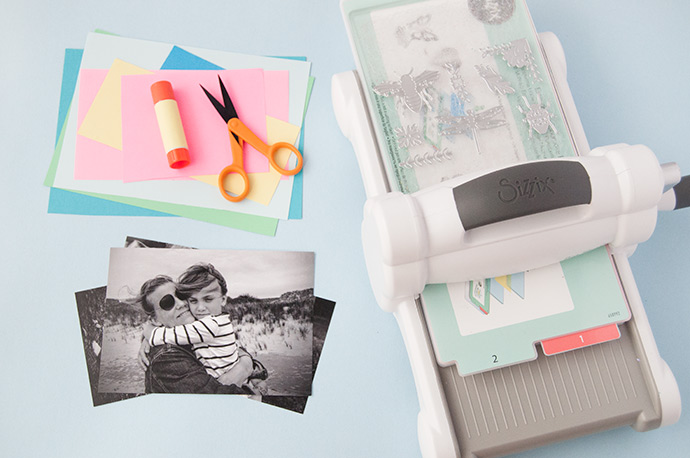
- Sizzix Big Shot Machine
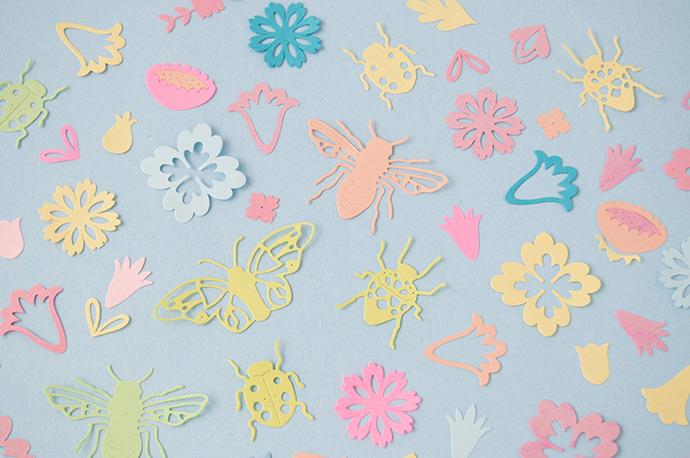
- Sizzix Thinlits Die Set 5pk – Insects
- Sizzix Thinlits Die Set 18pk – Folk Art Elements
- Sizzix Thinlits Die Set 7pk – Folk Art Stencil
- Sizzix Framelits Die Set 9pk with Stamps – Winter Trees
- Colored paper
- Printed photos
- Scissors
- Glue stick
how-to:
Step 1
Pick out the Thinlits and/or Framelits that you’d like to cut out – you don’t want to miss the just released Chapter 3 products for the newest shapes!
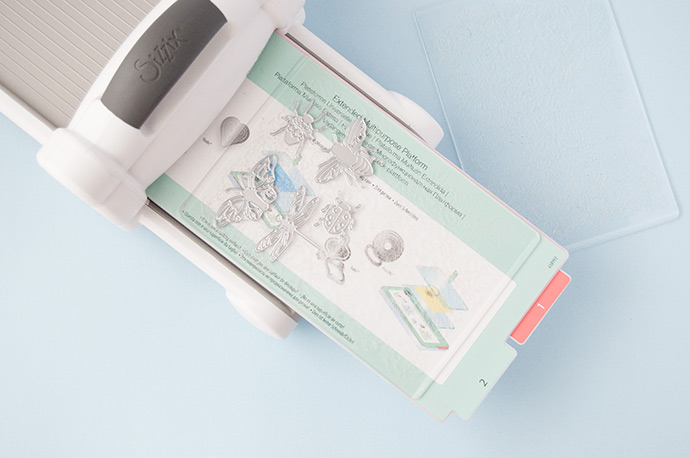
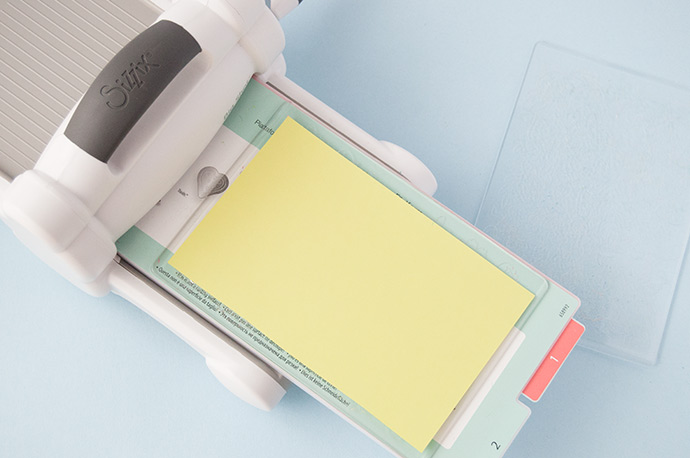
First things first: time to make our Sizzix Sandwich. Place your Extended Multipurpose Platform down on one end of the Big Shot, followed by one of the Standard Cutting Pads. Next, lay your chosen Thinlits on top, facing up.
Step 2
Decide what color paper you’d like to use first, and cut it down to fit onto the Big Shot if necessary. Do this gently so that the Thinlits don’t wiggle around underneath.
Step 3
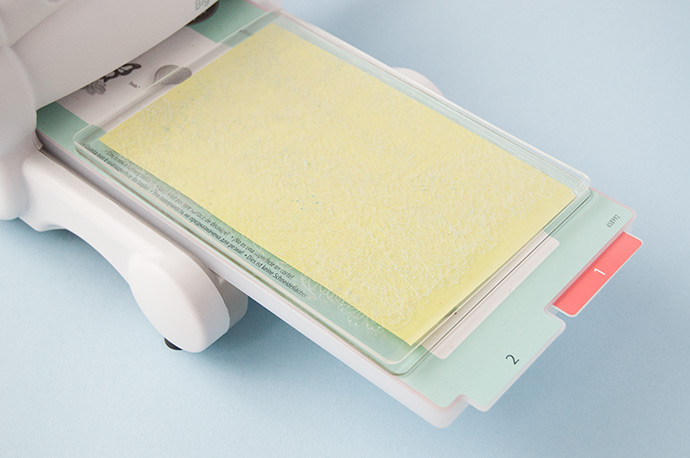
Time to close up this Sizzix Sandwich – place the second Standard Cutting Pad on top.
Step 4
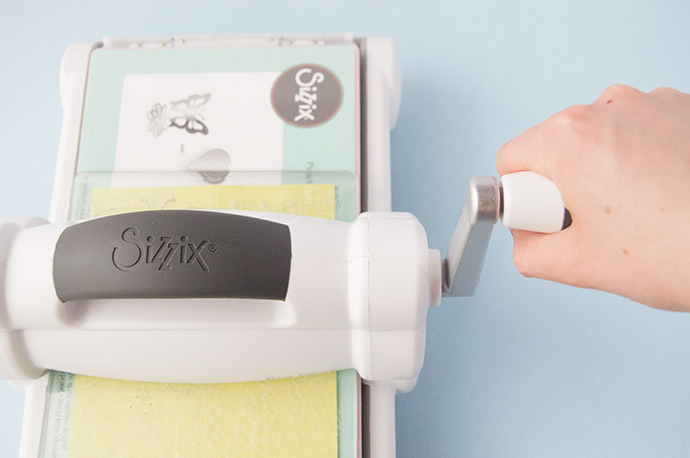
Feed the Sizzix Sandwich through the Big Shot, using the hand crank to move it through. Your shapes will begin to appear as the platform moves through!
Step 5
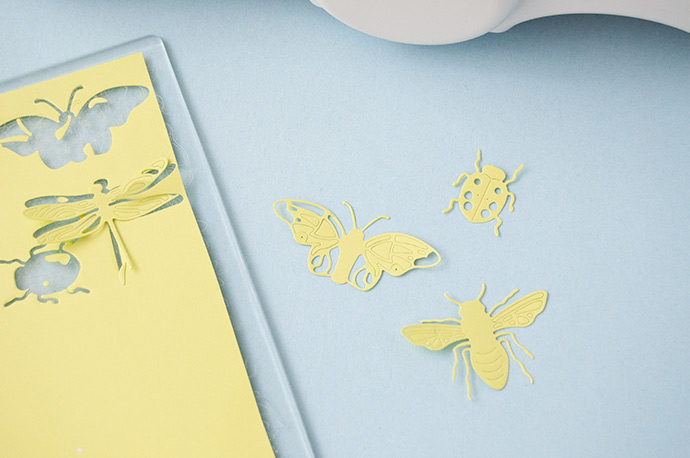
Disassemble your sandwich – if there are any pieces remaining in the Thinlits, use a die pick to poke them out, and set the cut shapes to the side.
Step 6
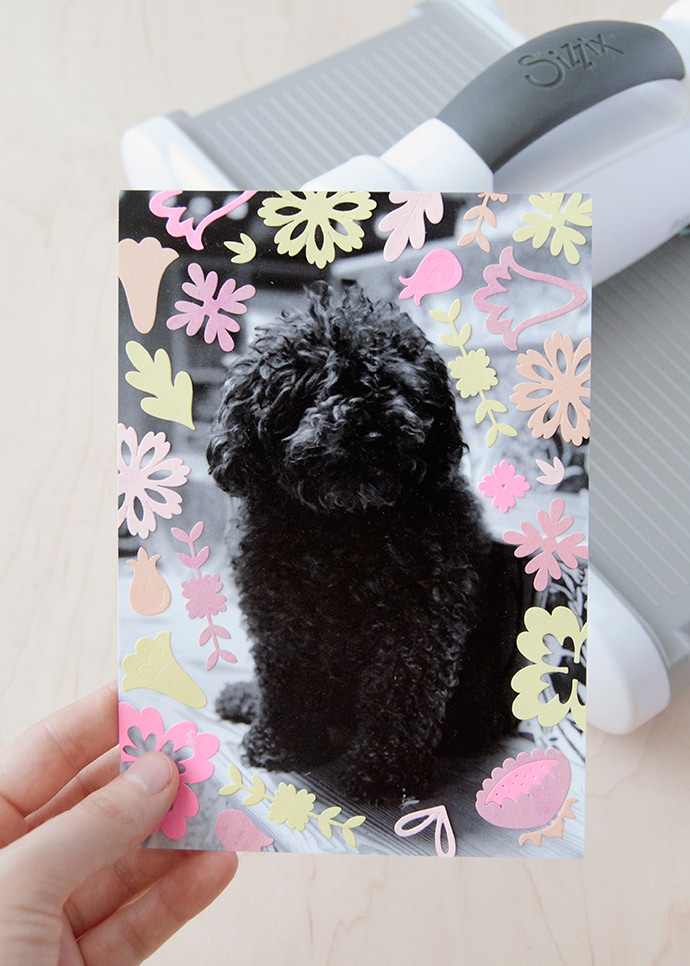
Repeat with lots of colors and shapes! You can sort them into small dishes by color or shape.
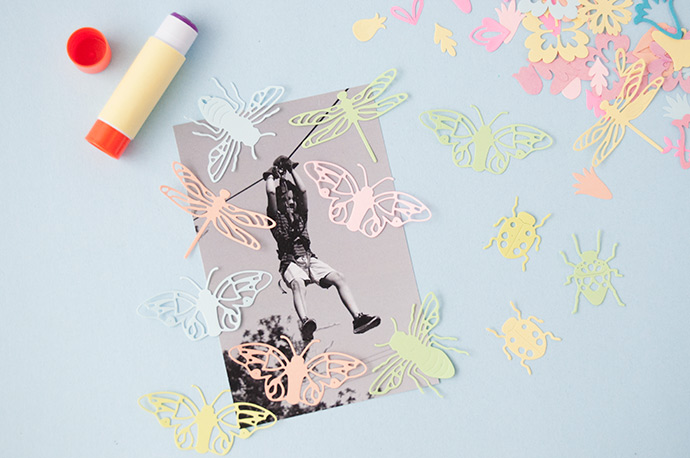
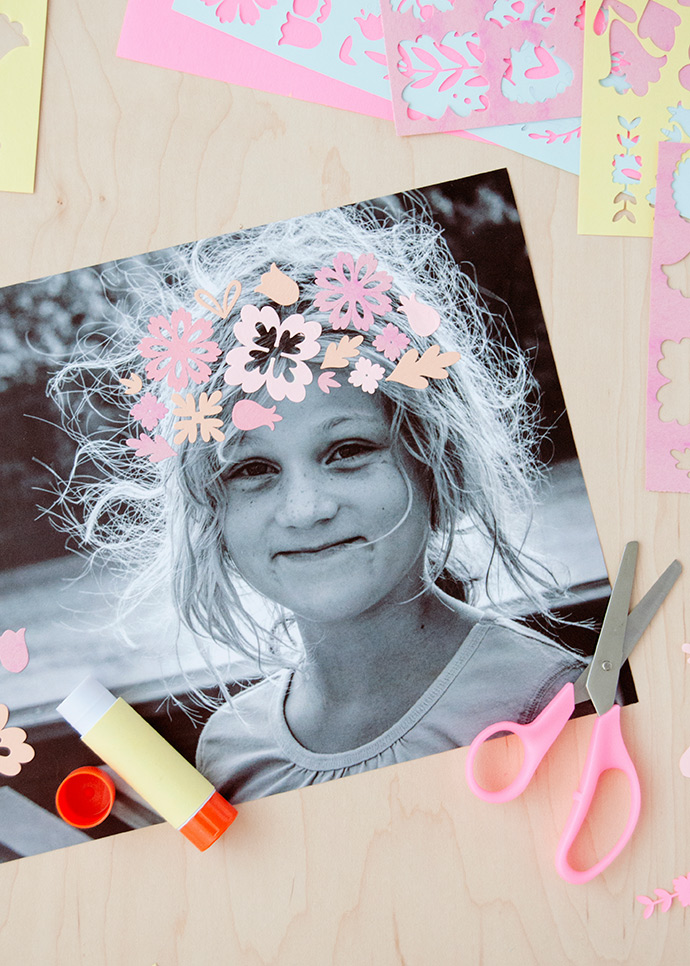
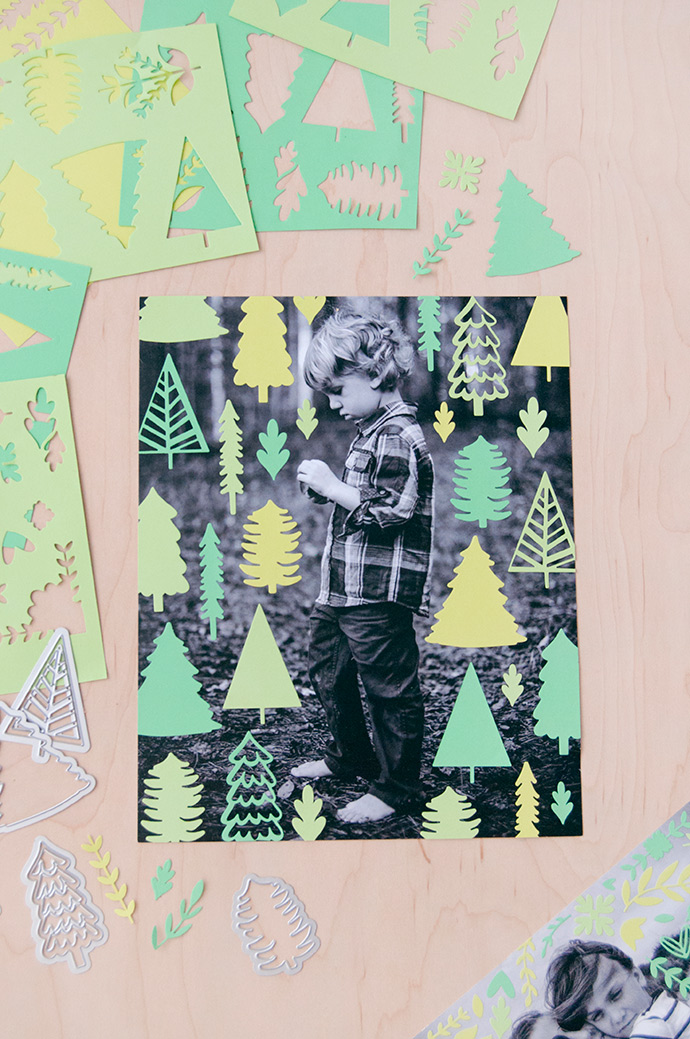
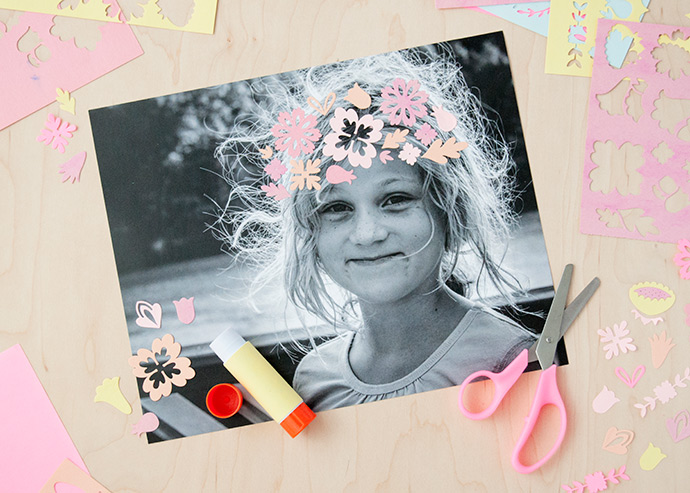
Step 7
Arrange the shapes onto your photo. It’s totally okay if they hang off the edge, since we’ll be trimming those later. Once you’re happy with the layout, use a glue stick to adhere the shapes in place.
Step 8
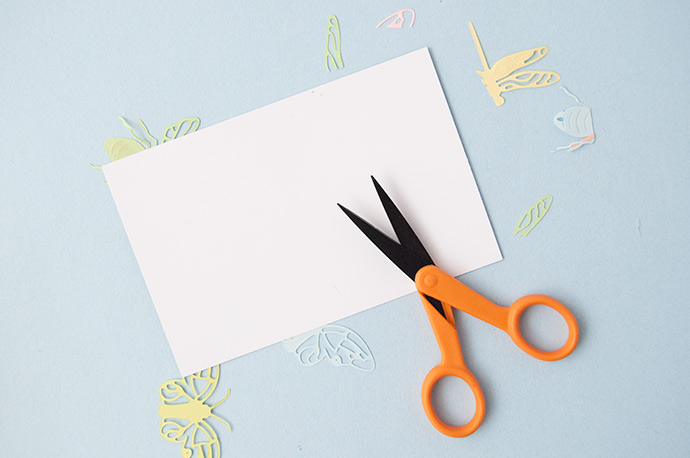
Trim off any overhanging paper shapes.
Step 9
And repeat on all your photos! Use your photo as a jumping off point, like using tree shapes in forest photos or insect shapes in the air. There is no right or wrong way to do this, and kids will have lots of fun sliding the shapes around, making leafy hairdos, floral crowns, and wild backgrounds!
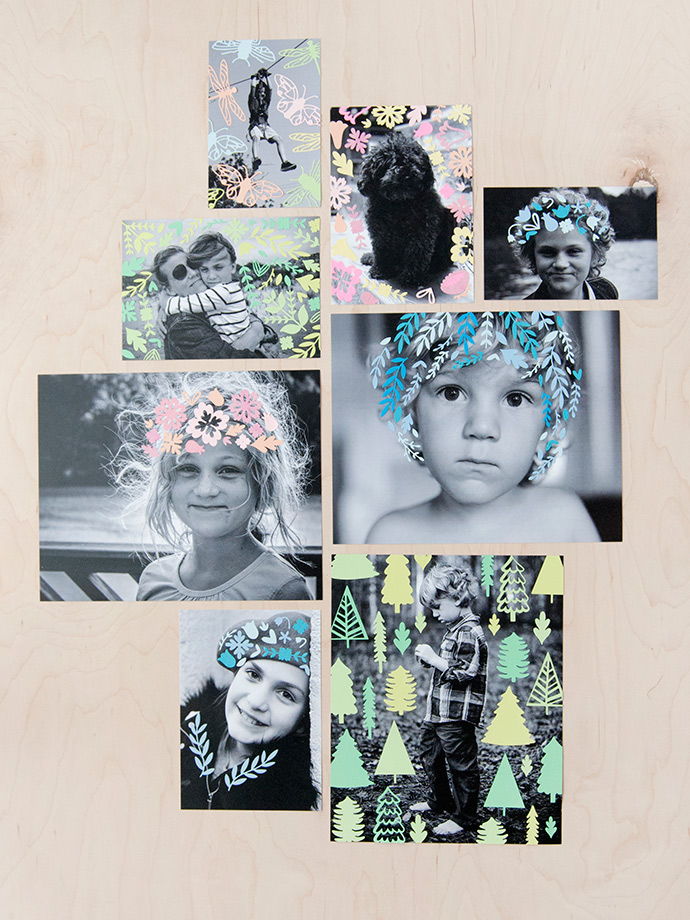
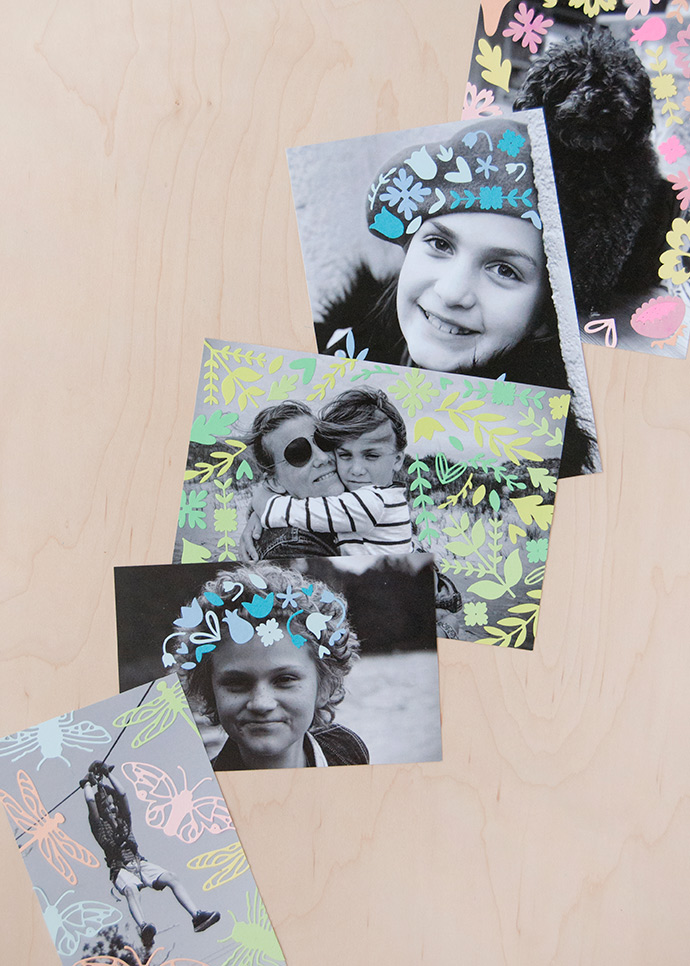
The finished photos can be framed, put up on your fridge, or mailed to friends and family!
Happy crafting!!