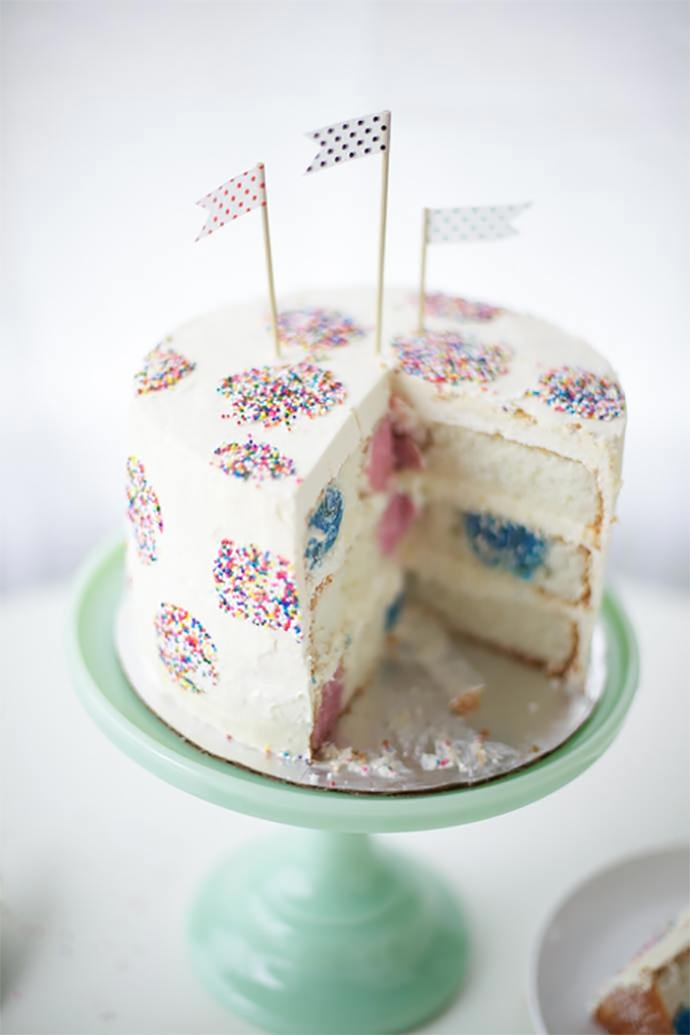
This cake has gone dotty – polka dotty, that is! Sprinkles and polka dot surprise-inside colorful cake balls will make this a birthday cake one to remember! I used cake mix to make this super fun party cake – kids can help make this too by shaping the cake balls with clean hands!
What You’ll Need
- 3 boxes of white cake mix
- Gel food coloring in your favorite colors (I used pink and blue)
- 1 baking sheet lined with parchment paper
- Round cake pans – I used three 7 x 2 inch round pans.
- 4 cups of your favorite vanilla butercream recipe, or 2 cans of frosting
- Non-pareil rainbow sprinkles (the round sprinkles)
- Parchment paper sheet for stencil
- Scissors
- An offset spatula
Step 1
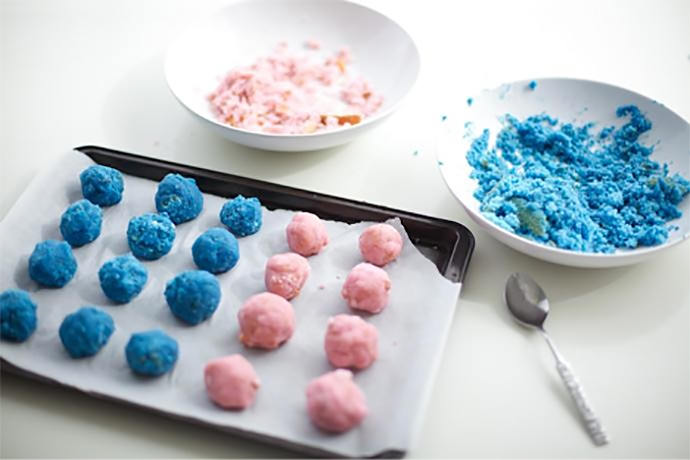
Start by mixing together one box of the cake mix. Divide batter into two bowls; color one bowl with pink gel food coloring and the other with blue. Pour batter into your greased and floured cake pans. Bake according to the cake box instructions for HALF THE RECOMMENDED TIME. You want to make ooey gooey underbaked cakes in order to form cake balls. Take the cakes out of the oven; remove contents of each pan into bowls and mash it up to make a gooey mess. Form cake balls (this will get sticky – use a bit of cornstarch on your hands) and place them on a lined baking sheet. Freeze for 20 minutes.
Step 2
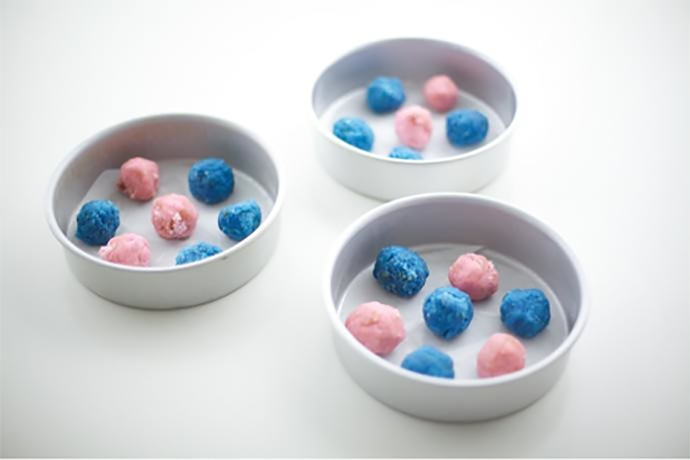
In your greased and floured cake pans, place the cold from the freezre cake balls in random orders into each pan.
Step 3
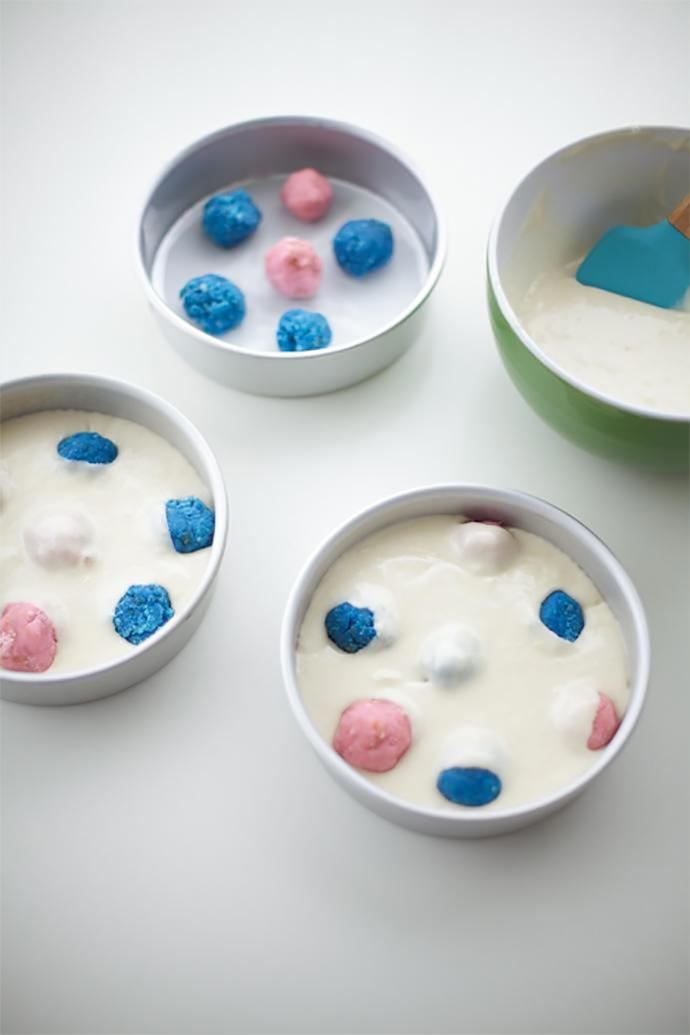
Make the other two cake box mixes according to box instructions. Pour the batter over top of the cake balls! Bake according to cake box instructions; set to cool on wire racks completely.
Step 4

Once cakes are cooled, remove from cake pans and use a serrated knife to level the tops if need be. Place a dab of buttercream on a cake board or cake plate and place the first cake layer on top, levelled side up. Using your offset spatula, add a filling of buttercream.
Step 5
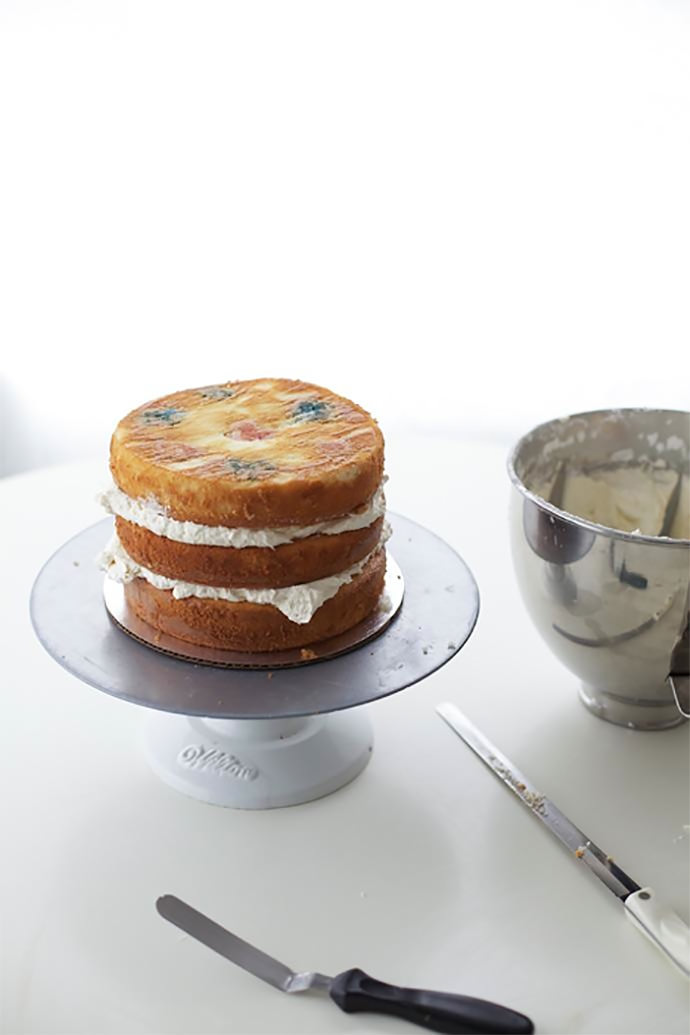
Continuing stacking and filling cakes, ending with the top layer leveled-side down. Isn’t this exciting? :)
Step 6
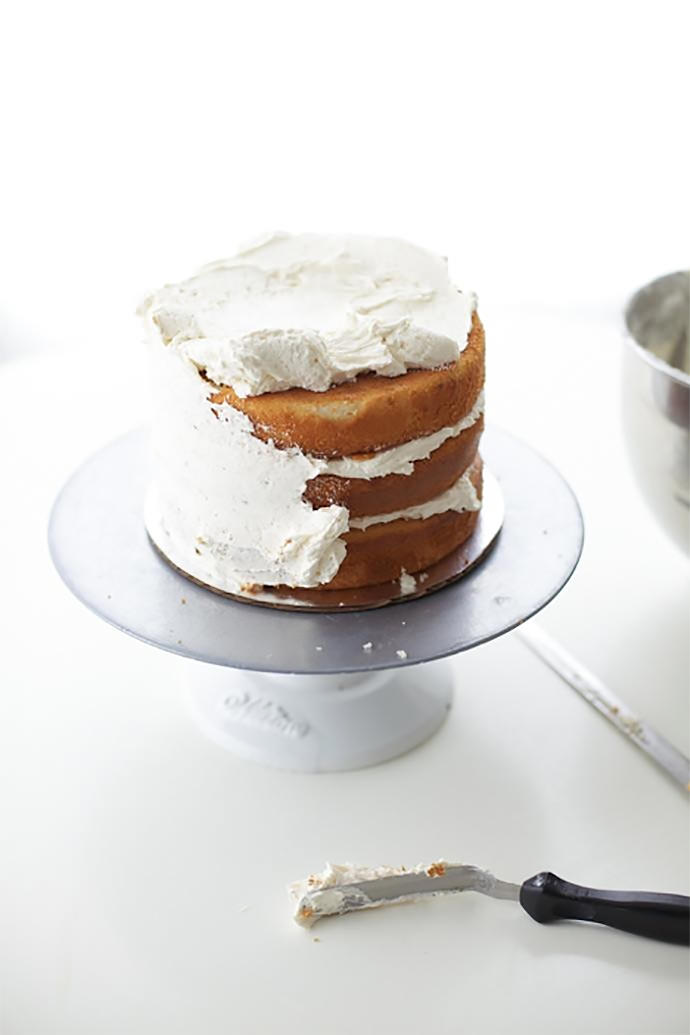
Frost the entire exterior of your cake with a crumb coat; this seals in the crumbs. Place the cake in the freezer for 15 minutes to set the buttercream layer.
Step 7
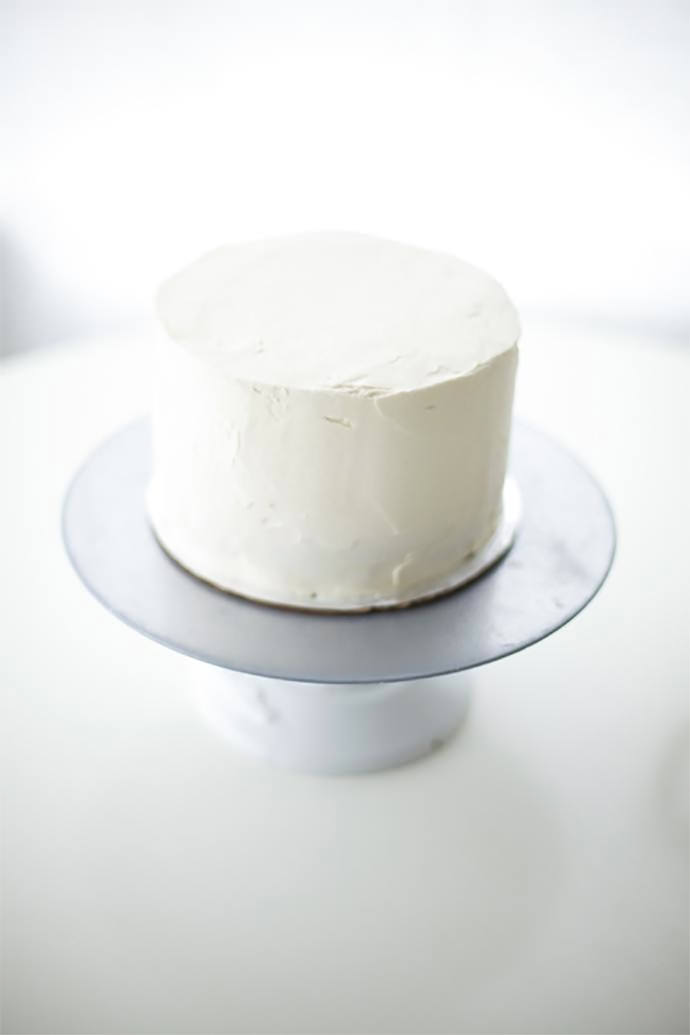
Remove the cake from the freezer and apply another coat of buttercream, smoothing it out as best as you can. Place in the freezer once again for 15 minutes! You’ll want a somewhat chilled cake for the next step, the outside polka dots!
Step 8

Using scissors, cut round holes into a sheet of parchment paper to make a delightfully dotty DIY stencil. You can be even-steven with this or more willy-nilly – up to you!
Step 9

Remove your cake from the freezer. Very gently, place the parchment paper on the cake, pressing down ever so lightly to adhere a touch.
Step 10
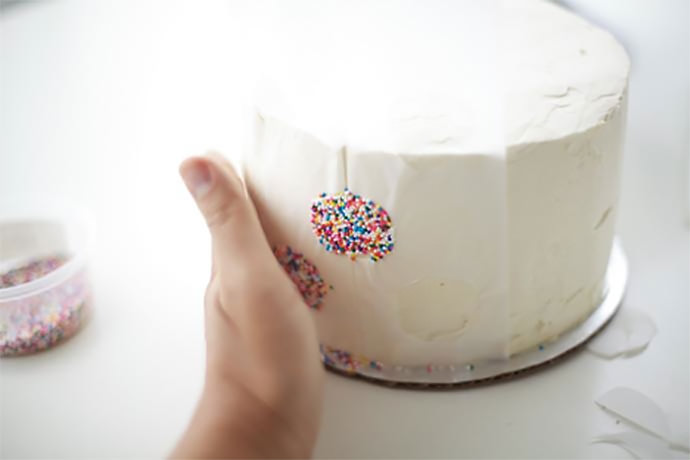
This will be a bit messy – you can set your cake on top of a clean baking sheet to catch the sprinkles if you like – but grab a handful of sprinkles, and swiftly pat the sides of your cake with the sprinkles! Do it a few times to ensure full polka dot coverage!
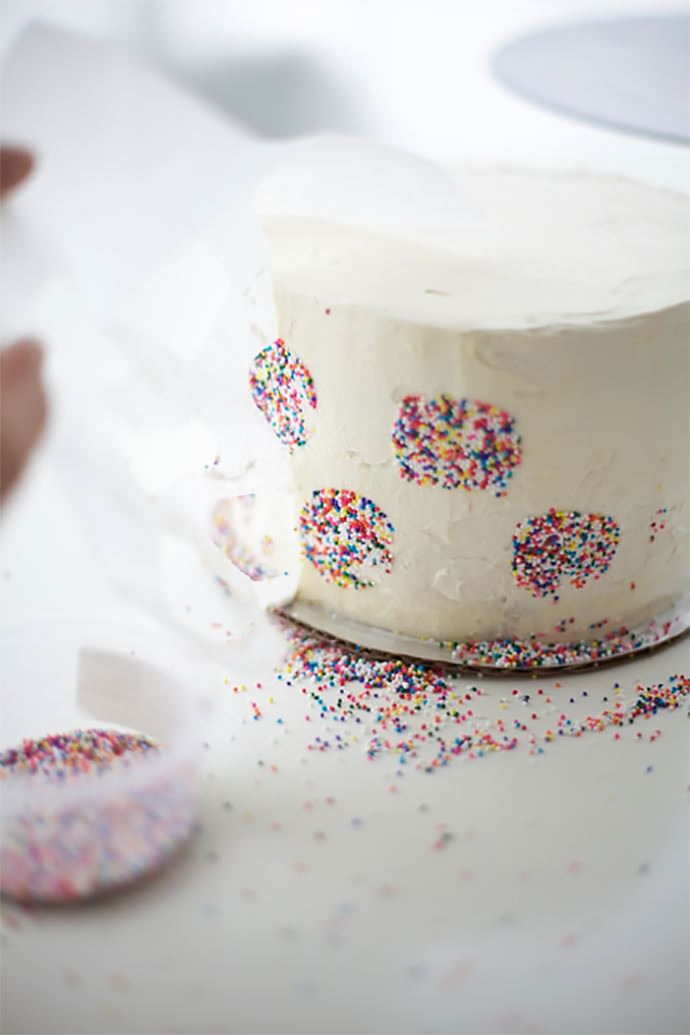
Once you’ve done the sides, carefully pull away the parchment paper stencil – polka dots!
Step 11
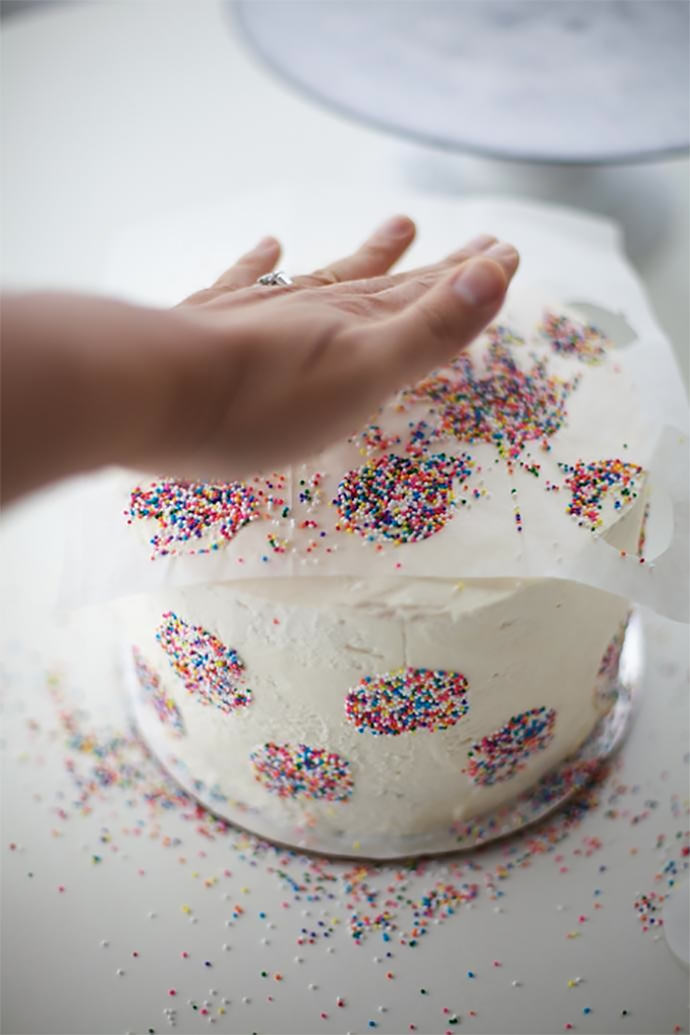
Using the same stencil or a fresh one, place on the top of the cake and continue adding sprinkles!
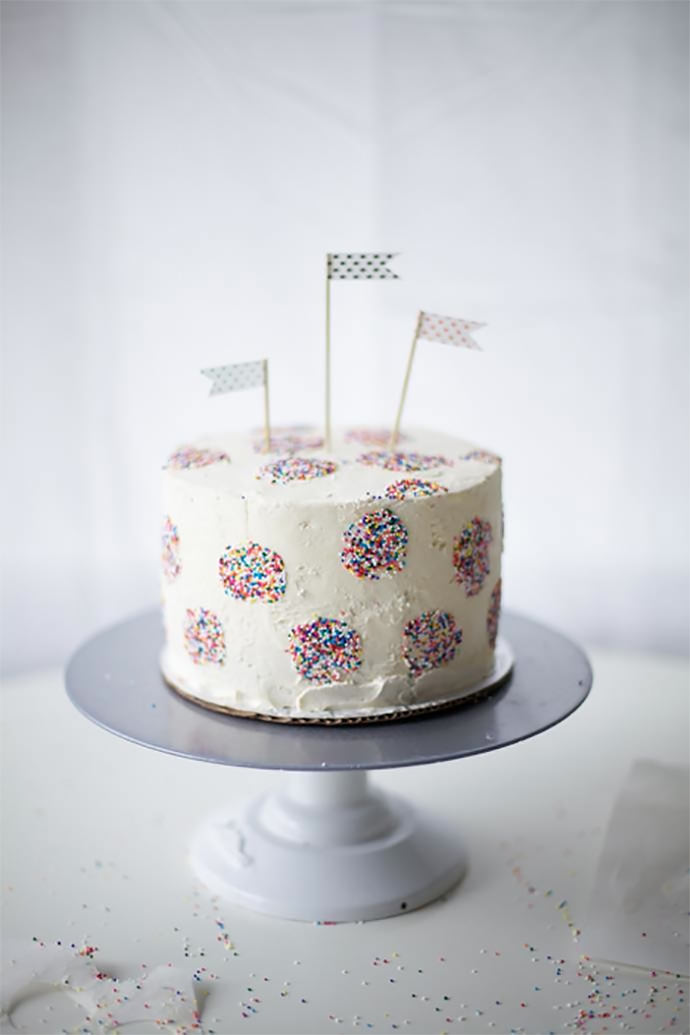
Decorate with colorful polka dot washi tape flags!

But the best moment of all… cutting into this cake! Polka dot slices!
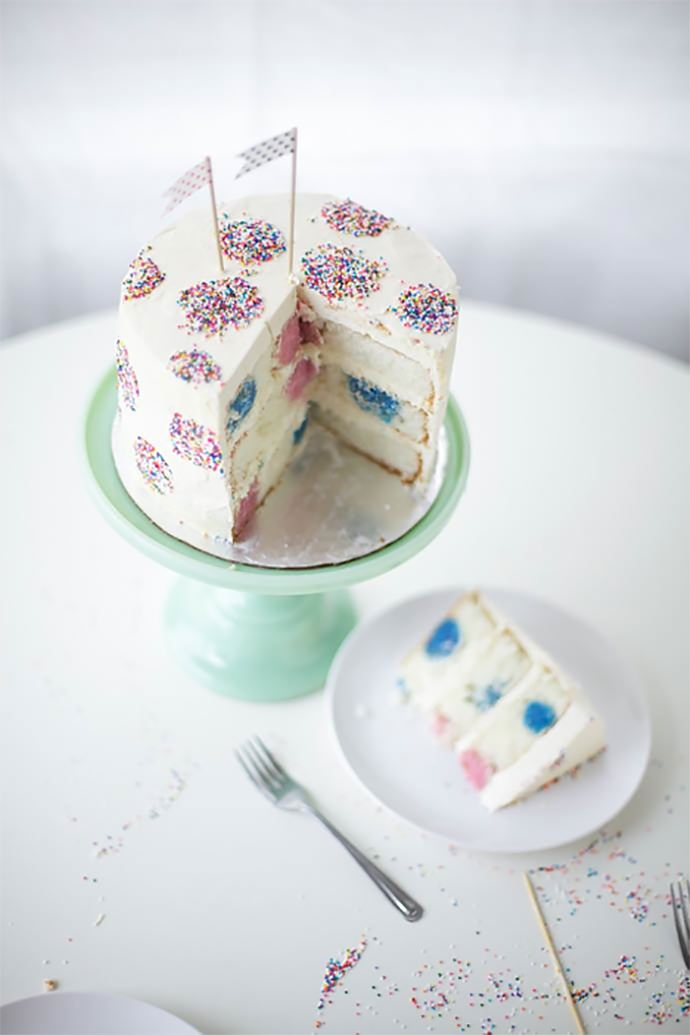
Cutest cake ever!?? Hope you enjoyed this polka dotty tutorial—would love to see your results! See you again real soon with another cake decorating DIY!