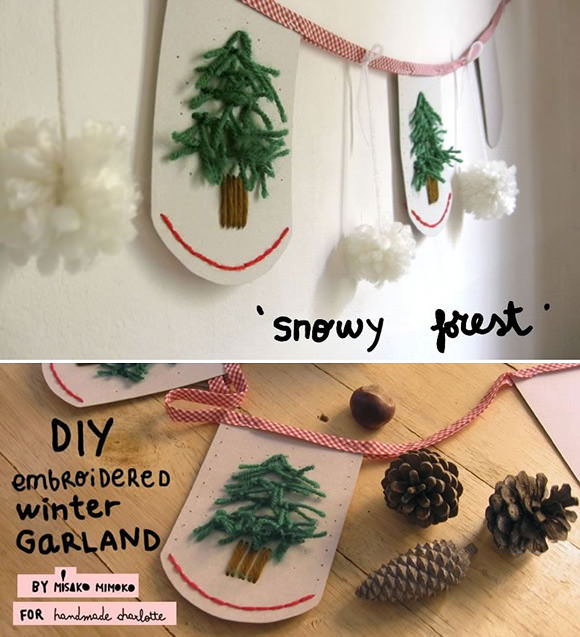
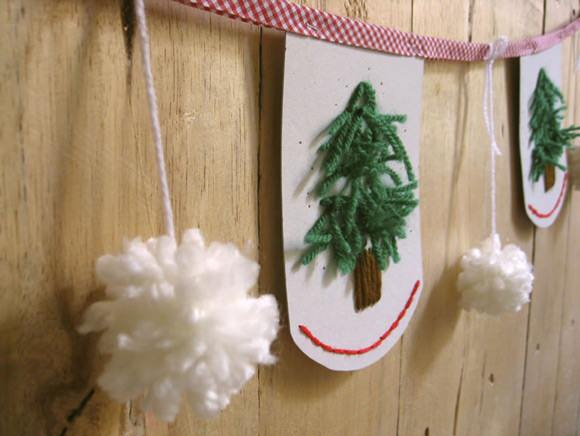
Bring a little winter green to your home with this easy and super fun tutorial by Misako Mimoko! She’ll show you how to recycle your old cereal boxes and scraps of yarn into a cozy, furry garland with a snowy forest.
No sewing or embroidery skills are necessary to make the garland. You don’t even need a sewing machine, just a stapler and some glue. It’s a perfect project to share with your kids :)
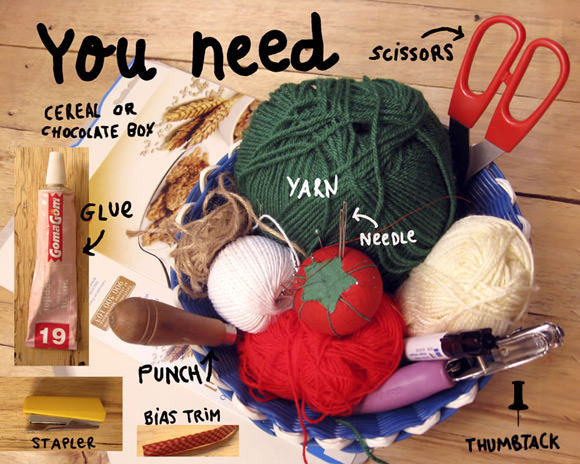
Materials
- Printable template (download here)
- Cereal boxes
- Yarn needle
- Scraps of yarn
- Bias tape
- Thumbtacks
- Scissors
- Stapler
- Glue
Step 1
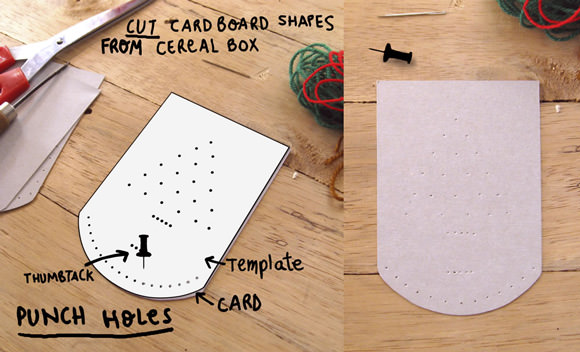
Print and cut out the template. Use the template to cut the cardboard shapes out of the cereal boxes. Place the paper template onto the front of the cardboard card you just cut out and attach it using tape (or simply press with your fingers).
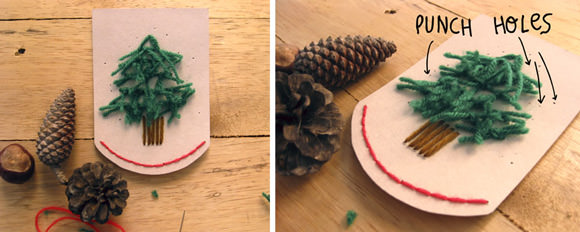
Next, place the card on a padded surface (thick cardboard, felt, or wood will work) and punch out the holes marked on the template using a thumbtack.
Step 2
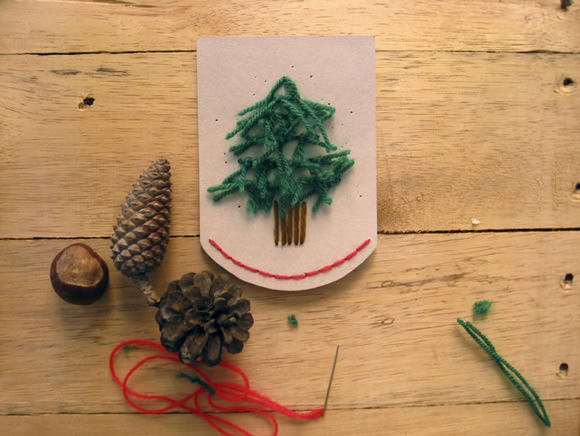
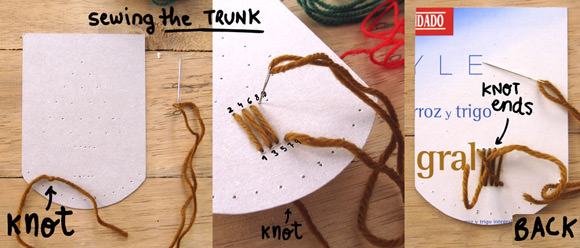
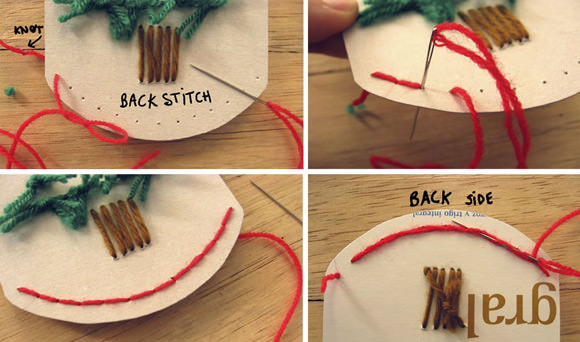
Time to make the tree trunk! Thread your needle with a single strand of yarn and sew long, straight stitches (as pictured above). Knot yarn ends on the back side to finish and secure your trunk.
Step 3
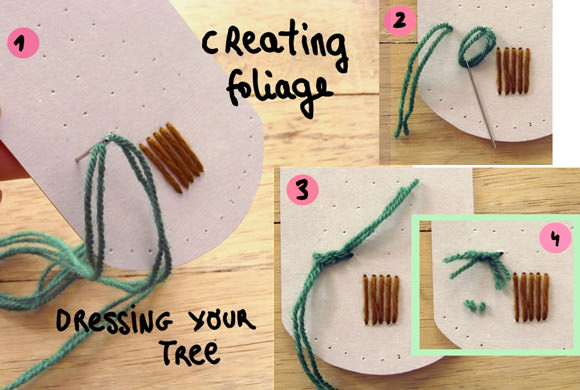
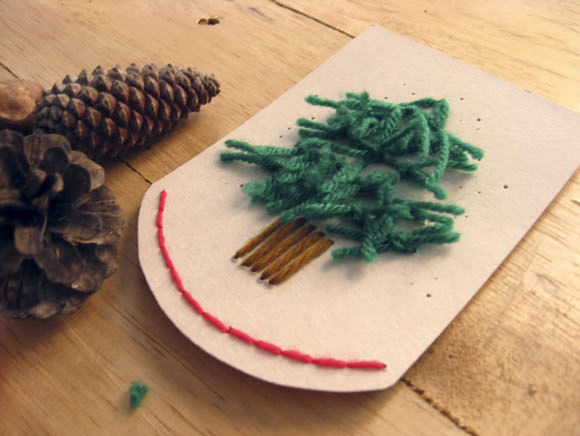
Now let’s dress your tree with a green, furry foliage using double yarn knots. Start working at the bottom of the tree for easy and comfortable sewing. Working on the front side of the card, pass the double threaded needle through the left bottom hole, leaving a tail, and then bring the needle up again through the next hole.
Still working on the front of the card, knot the doubled strands twice and cut, leaving four short yarn ends. Repeat the same process on the rest of the holes until you reach the top hole.
Step 4
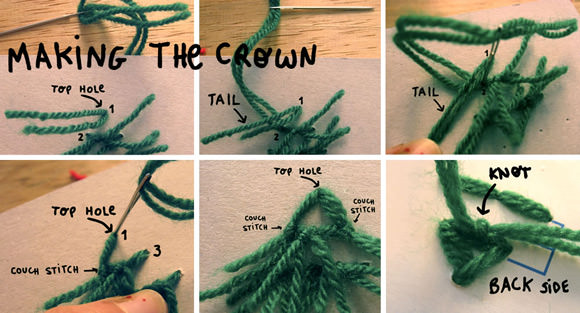
You need will need to use a different stitch to create the crown, two single couch stitches worked separately. Working on the front side of the card, pass the double threaded needle through the top hole leaving a tail (short floss end). Lay the tail down onto the card and then tack or “couch” it. Bring the needle up again through hole number two and back down through the same hole, over the tail. This way you’ll make a loop or a tiny stitch that holds down the tail.
The needle and thread should now be on the back side of the card. Leave a short floss and cut, reserving the excess length. Repeat the same steps from the top hole to hole number three and then tie the two tails at the back of the card to finish.
Step 5
Thread a different yarn to embroider the edging using a back stitch. Finish and secure as pictured above.

Step 6
Decorate the card and make it sparkle by punching more holes around the tree.
Step 7
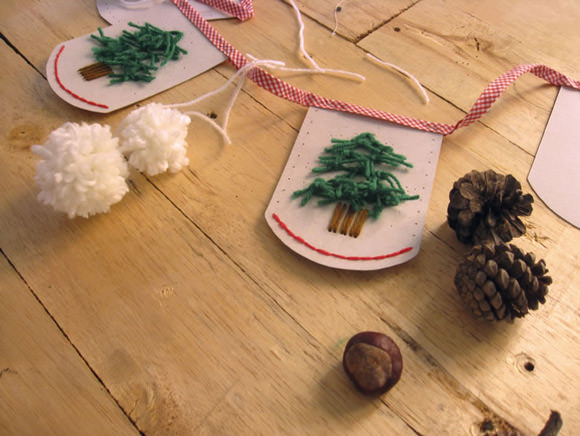
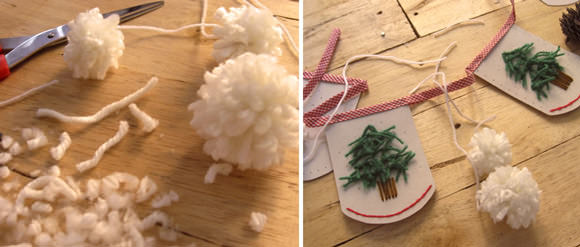
Now it’s time to make the garland. Fold the bias trim at the top of the embroidered card and staple. Glue the rest of the bias trim between the cards. To add snowflakes, use white yarn to make cute little pom-poms and attach to your garland.
Enjoy your new crafty, snowy forest!