
These freezer printer stencil celebration flags are a fun way to dress up a party with your favorite fabric. Get the look of screen-printing without the complicated process! And to make it even easier, you can use our cutting files to create your stencils.
Celebrate a graduation, birthday, or any occasion that deserves a hooray!


With a bit of ironing and trimming, the flags come together in a flash. And once your stencils are cut, a few dabs of paint finish the job.

Now, who’s ready for a craft party?
what you need:
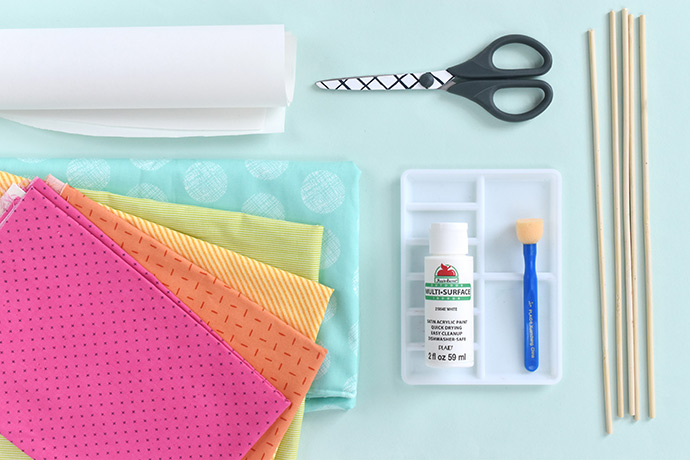
- Fabric – a fat quarter makes two flags
- Paper-Backed Fusible Web
- 12-Inch Long Large Kitchen Skewers or Thin Dowel Rods
- Scissors
- Iron
- Pins
- Freezer Paper
- Cutting Machine or Pencil, Craft Knife, and Cutting Mat
- Acrylic Paint
- Paint Tray
- Foam Dauber or Stencil Brush
- Printable flag template PDF
- Flag SVG cutting files
how-to:
Step 1
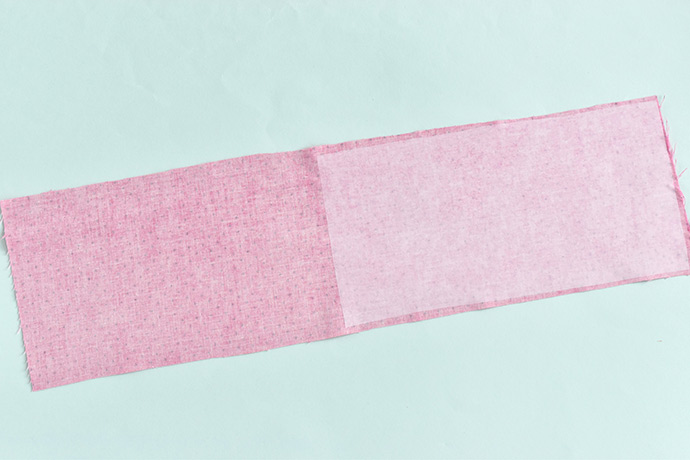
Cut a roughly 5x20in piece of fabric and a roughly 5×10⁻¹/2in piece of paper-backed fusible web. Iron the fusible web to one end of the fabric on the non-printed side. Peel away the paper backing.
Step 2
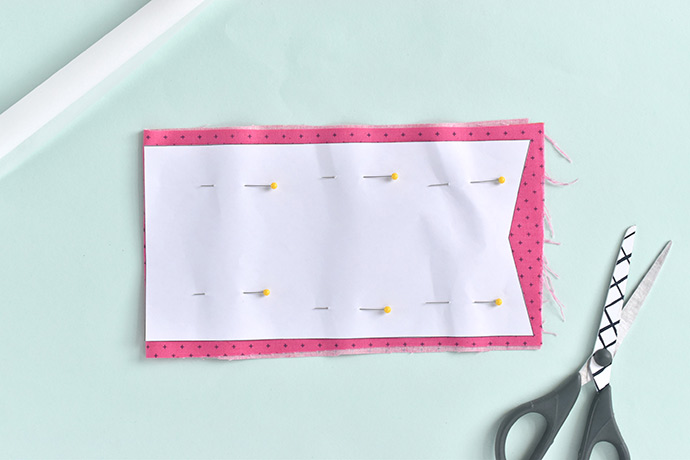
Print the first page of the PDF and cut out the flag template. Fold the fabric in half, checking the fusible web is in the fold. Pin the template to the fabric with the short flat end on the fold. Cut around the flag shape without cutting the fold.
Step 3
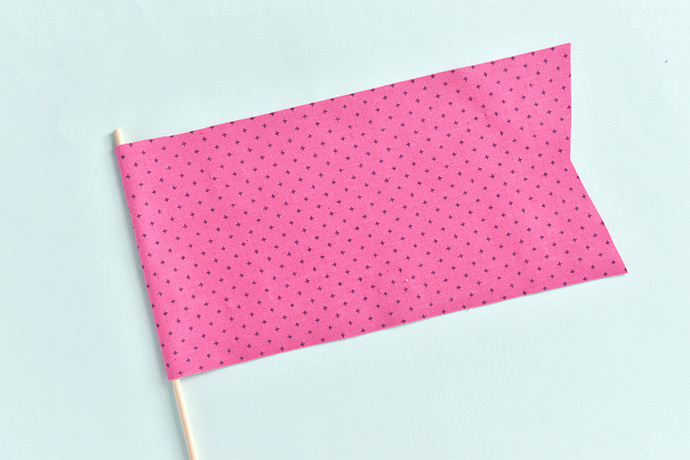
Unpin the template and slip a skewer or dowel into the fold. Iron the flag, pressing right up the flag stick. This holds the fabric together and keeps the flag on the stick.
Step 4
If you have a cutting machine, use the SVG cutting files to cut out the word stencils from freezer paper.
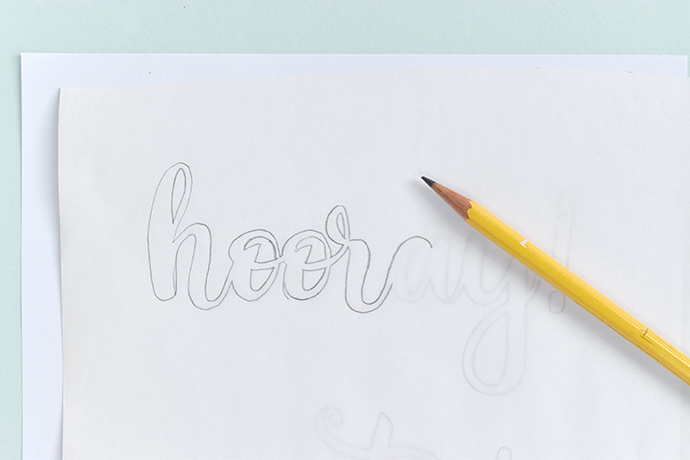
You can also make the stencils by hand. Print out the word pages in the PDF and trace the words onto freezer paper. Space them several inches apart.
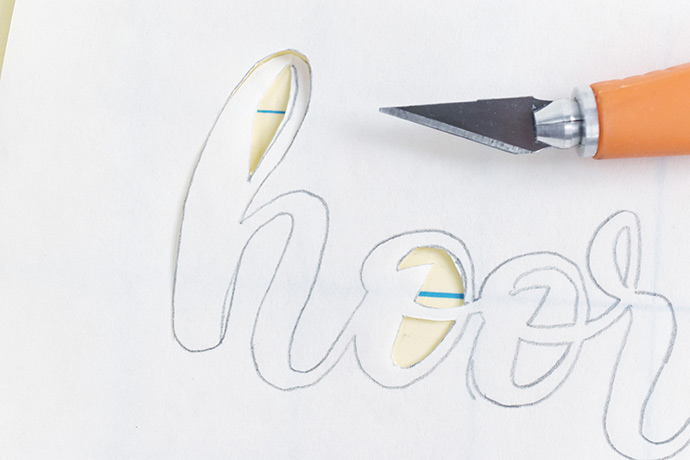
Use a craft knife and cutting mat to carefully cut out the words, leaving about an inch of paper around the outside.
Whether you use a cutting machine or a craft knife, keep the pieces from inside the letters.

Step 5
Place the freezer paper stencil on your flag. Iron the freezer paper in place.
Position the insides of the letters so they line up and match the word outlines that you see in the PDF. Iron these small pieces in place.
Step 6
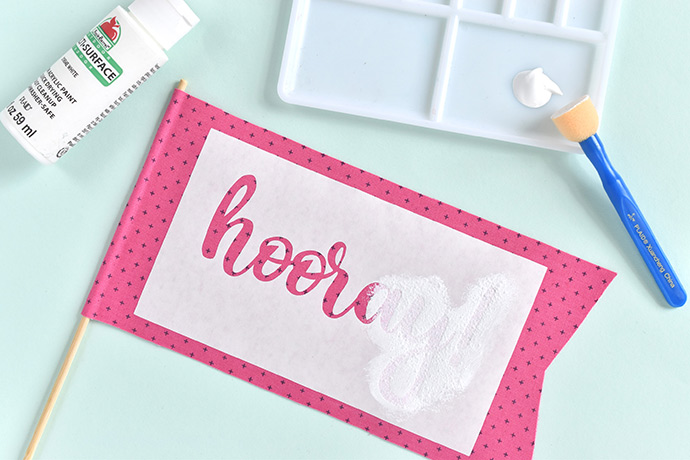
Use a foam paint dauber or stencil brush to fill in the letters with acrylic paint. It’s best to apply two thin, even coats.

Step 7
When the paint is dry, peel the freezer paper stencils off the fabric. The small pieces inside the letters can be tricky to peel, but they will come off. And now your flag is ready for a celebration!

Make one flag for a special purpose or a whole bunch for a real party!

I made my flags in a rainbow of semi-solid fabrics, but they would look great in solid colors with different colors of paint. Or, keep the white letters and use floral fabric for a more romantic celebration!


Tuck your finished flags into the top of a cake, in a potted plant or bouquet of flowers, or under the ribbon on a wrapped gift. Of course, you can also use these to wave and cheer someone on for a job well done!

Happy crafting!