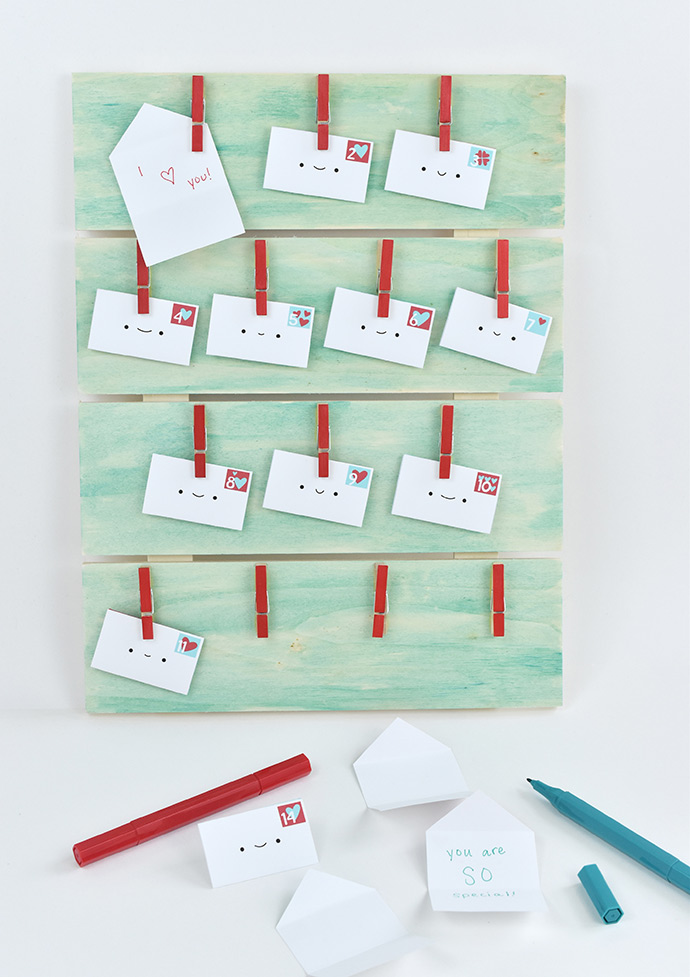
Do you get as excited about Valentine’s Day as we do? Get ready for February 14th with this DIY countdown board filled with little notes of love and hearts (or maybe even some fun activities!).
To create the watercolor look on the back of this board, we used Folk Art Watercolor Acrylic, but you can decorate yours however you like. Paint it solid, use stencils, or even leave it plain.
For the notes, print out the kawaii envelopes and fill them with loving words, silly jokes, or Valentine’s activities.
Get ready to start the Valentine’s countdown!
what you need:
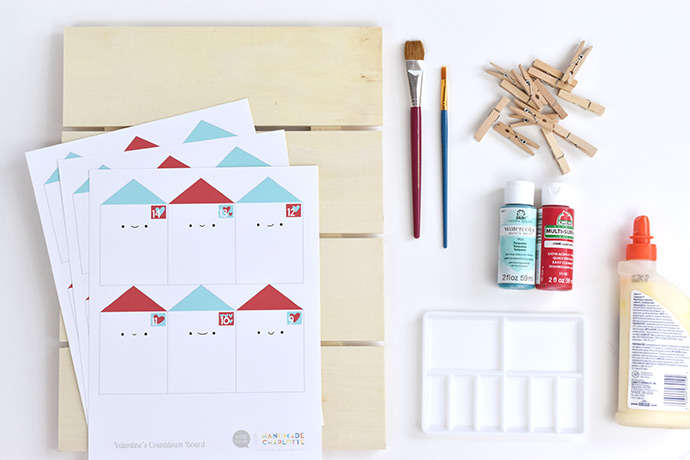
- 14 Mini Spring Clothespins
- Wood Pallet Panel or Other Wood Backing Board
- Apple Barrel Acrylic Paint in Candy Apple
- Folk Art Watercolor Acrylic in Turquoise
- Paint Dish and Paint Brushes
- Wood Glue
- Card Stock
- Scissors
- Colorful Pens
- Printable envelope notes
how-to:
Step 1
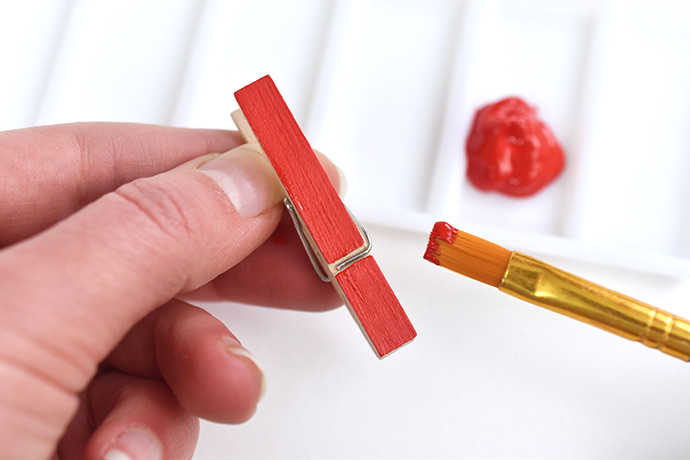
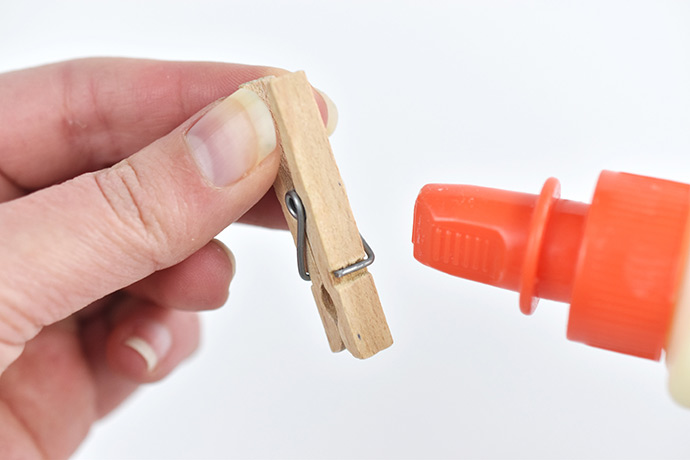
Paint the front of all the clothespins red. Set these aside to dry.
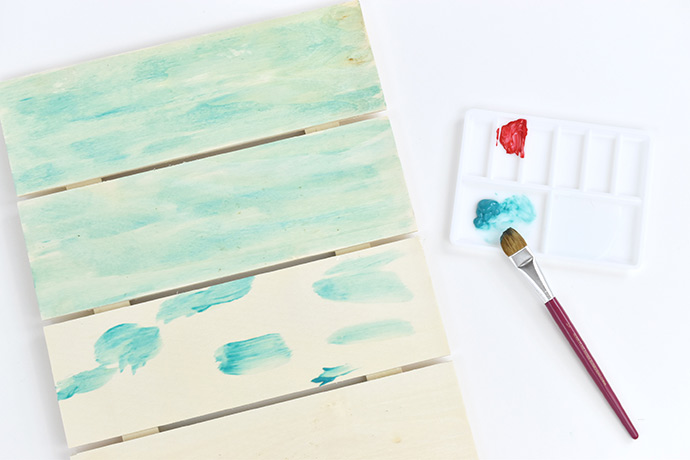
Paint the wood panel with the watercolor acrylic. To use this paint, start with a wet brush and dip it into the paint. Make a few brushstrokes, which will most likely look like the full color of the paint.
Use a little more water and paint and brush it onto the wood panel. To blend the paint and create a watercolor look, add more water and leave some areas sheer and others with bolder color.
Set this aside to dry for at least a few hours, especially if you used lots of water.
Step 2
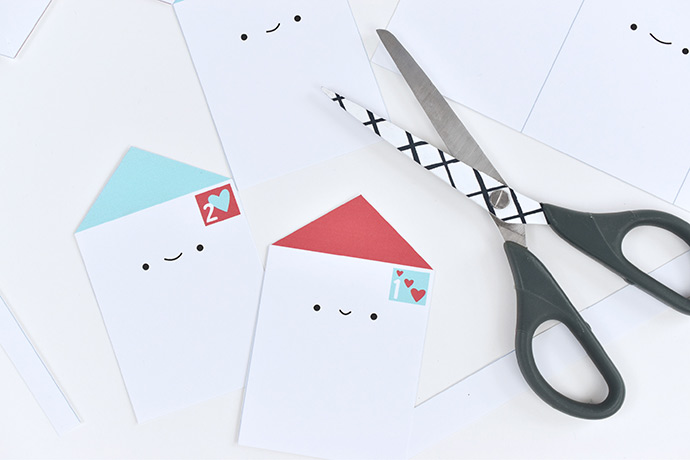
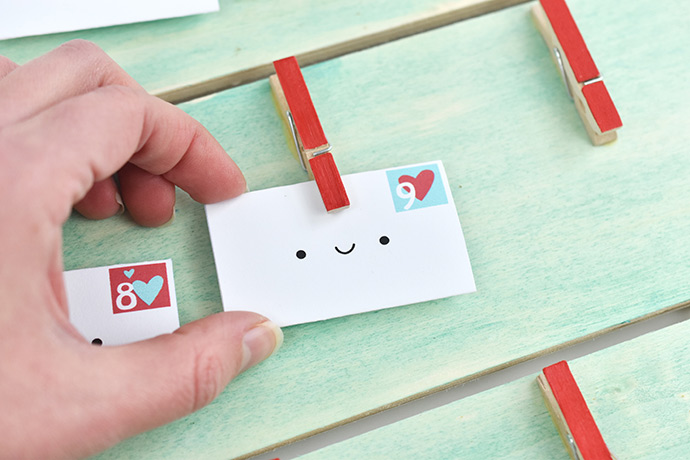
Print the Valentine’s Countdown Envelopes PDF page on card stock. Cut out the foldable envelopes. You only need the ones numbered 1 to 14, so you can use the extras for something else.
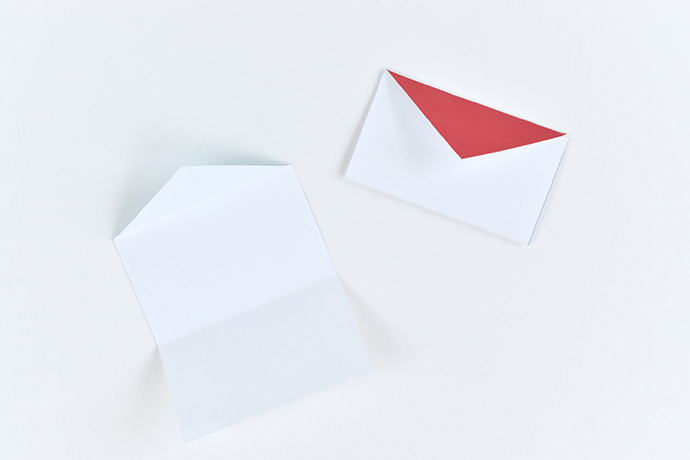
Fold the bottom edge up to the bottom of the triangular flap. Fold the flap down.
Step 3
Figure out the best spacing for the 14 clothespins on your wood board and mark where each clothespin should go. Run a thin line of wood glue on the back of each clothespin and place it on the board.
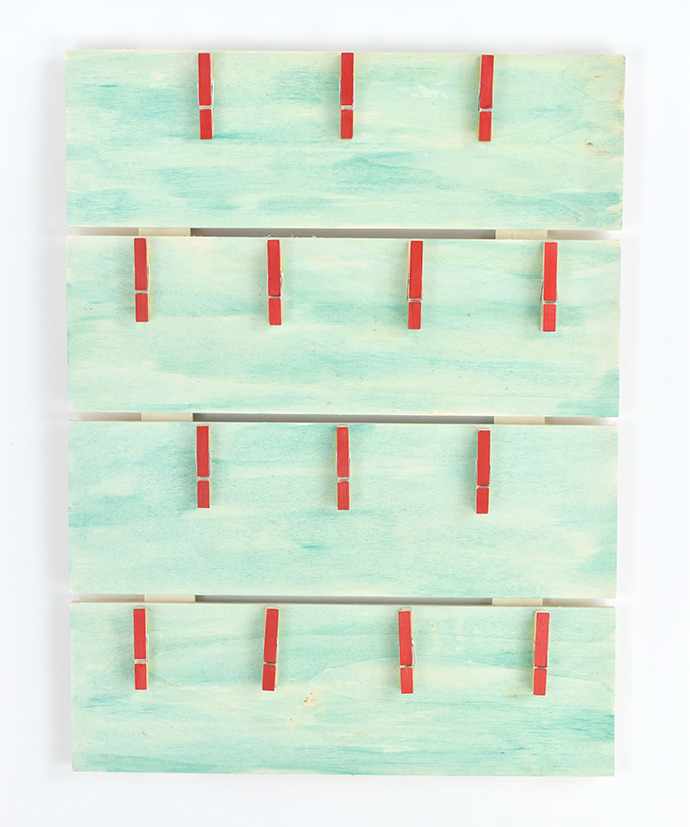
Add all the clothespins and let the glue dry overnight.
Step 4
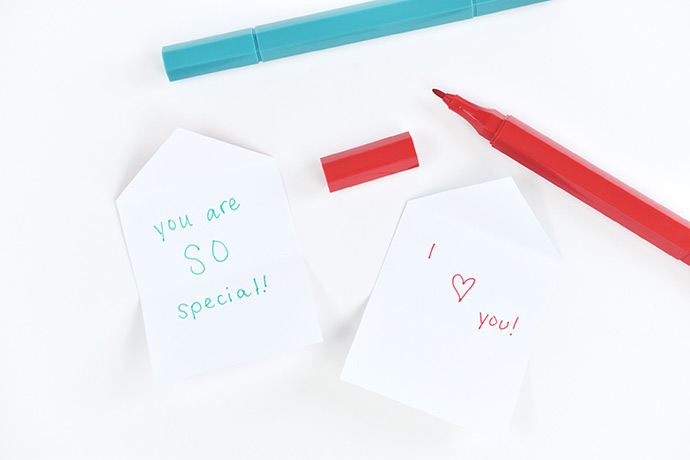
While you wait for the glue to dry, start writing messages, simple activities, or prompts in the envelopes.
Step 5
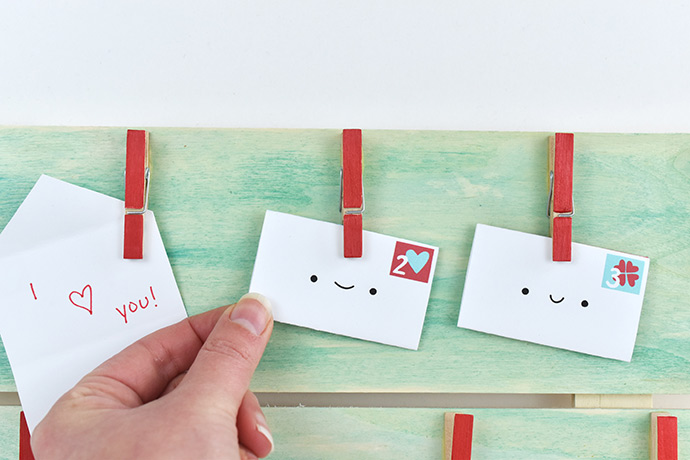
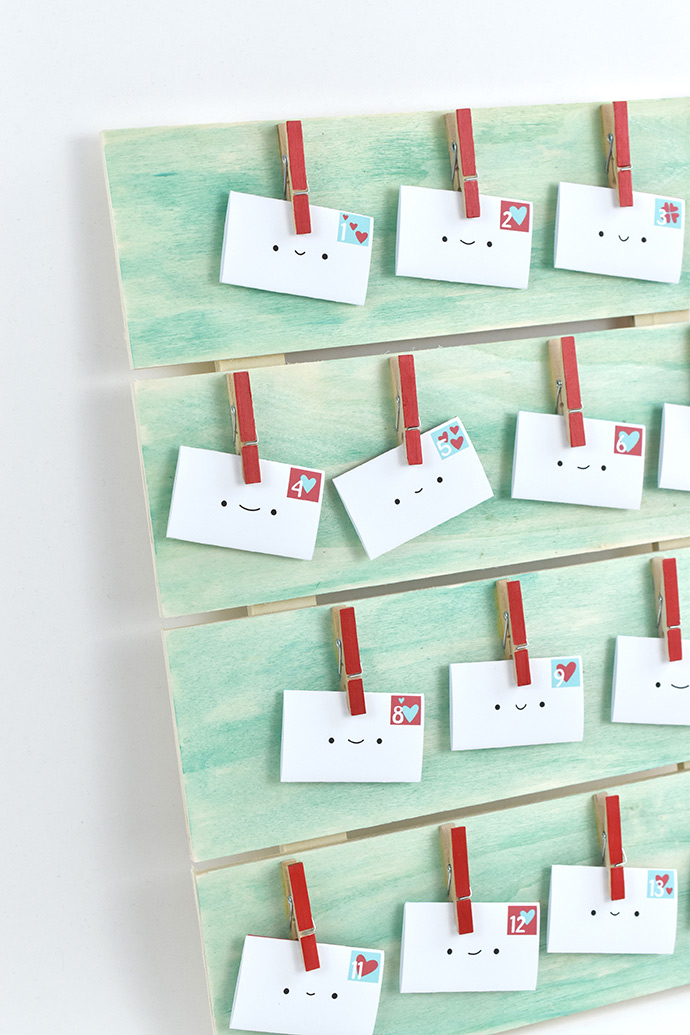
Once the glue is dry, fold up the envelopes and clip them to the board. You can place them in order from 1 to 14 or mix them up so you have to look for the next one to open!
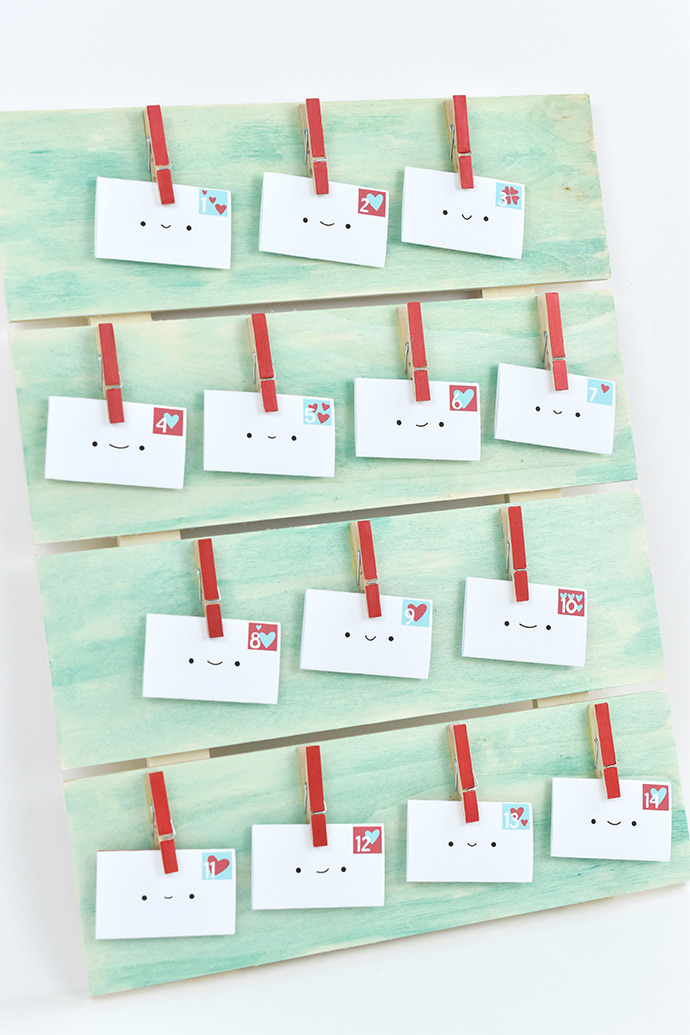

All those notes lined up look so cute and so enticing as you look forward to Valentine’s Day!
Not sure what to write inside your envelopes? Try one or more of these ideas!
- Short notes of love or encouragement (“You’re so special!”, “I’m proud of you!”, “I love you.”)
- Valentine’s Day jokes
- Activities (Cut out paper hearts, make candy jewelry, bake cookies)
- Drawing prompts
- Kindness practices (Hold the door open, help someone with chores, give a hug)
- Names of people to write notes to
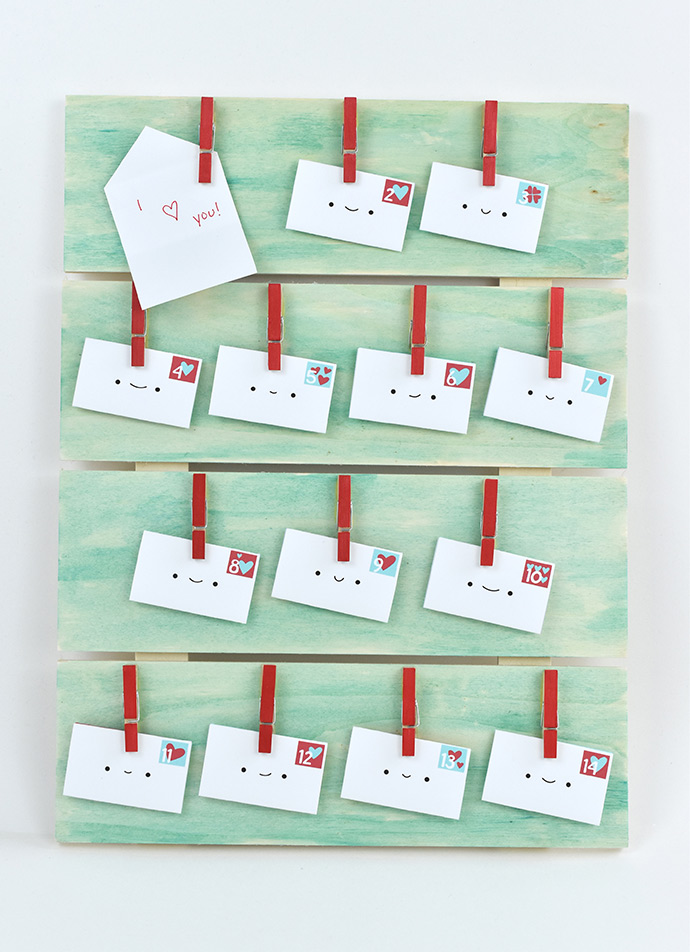
Each day as you open a new note, hang the opened envelope back on the clip so when Valentine’s Day comes you can see a board filled with love!
Happy crafting!