This post is sponsored by Plaid Enterprises.
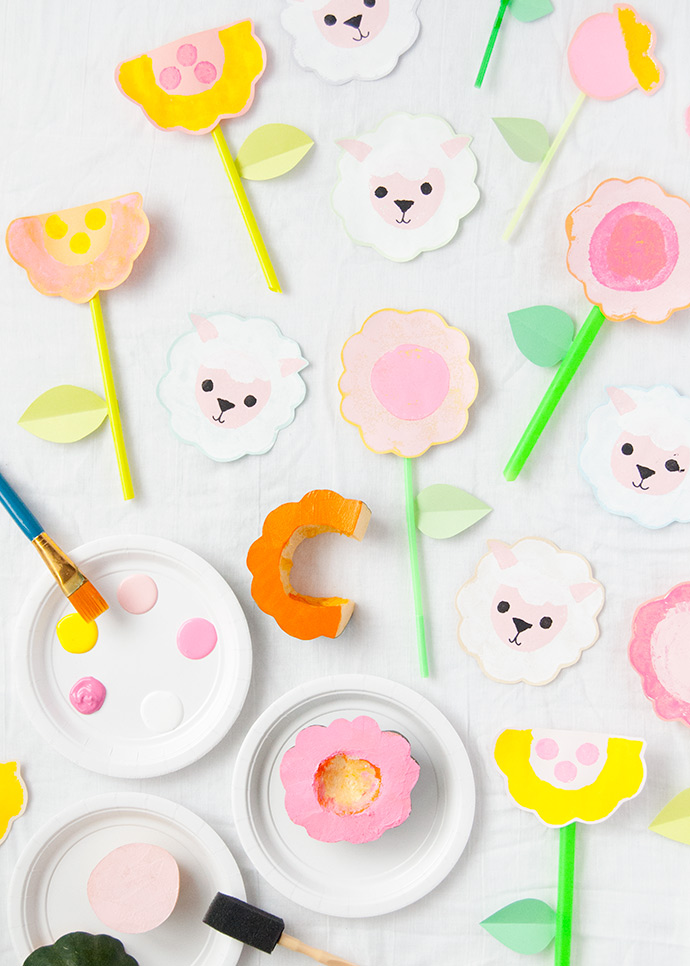
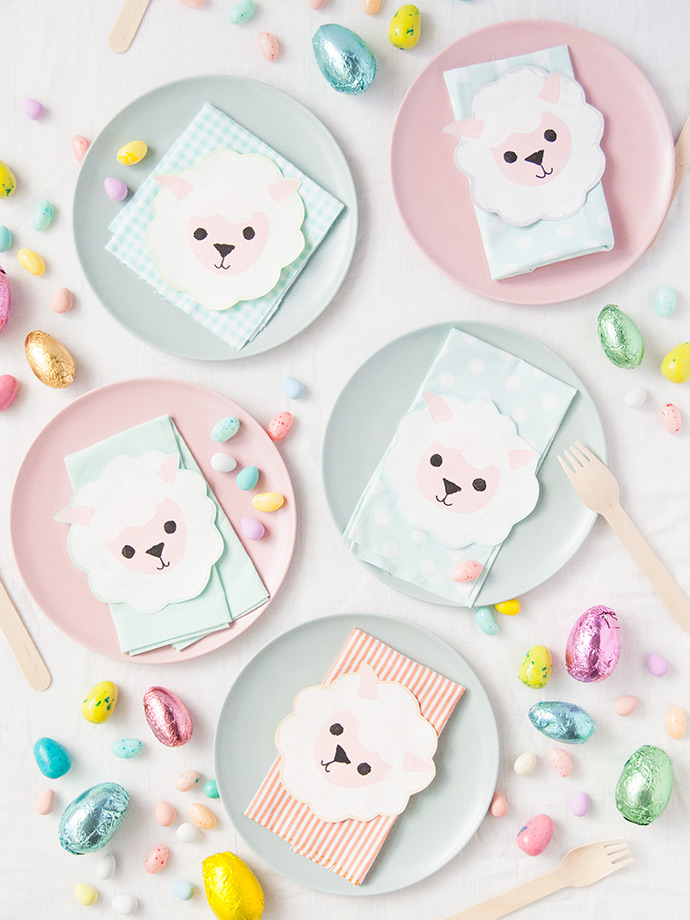
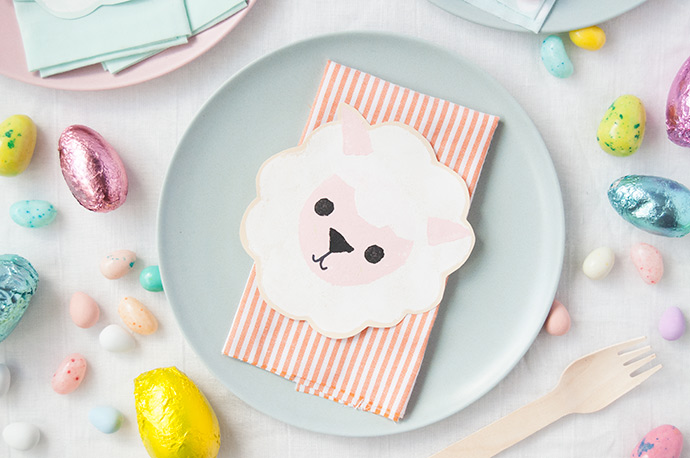
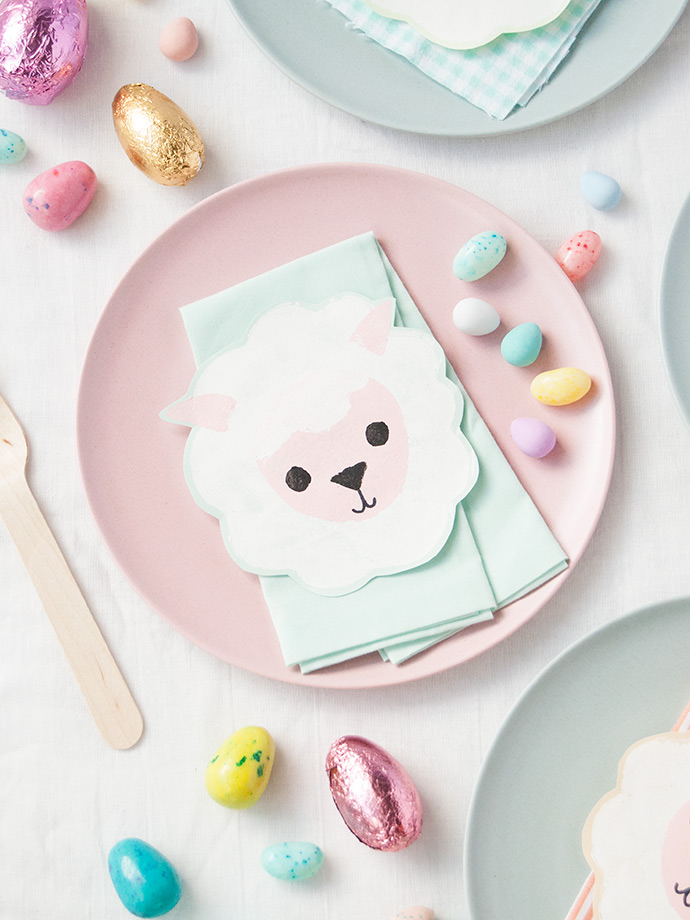
Springtime is finally here and we’ve never been so excited. Flowers are finally starting to bloom and we can’t help but think about how soon we’ll be able to get back into the garden. We love repurposing everyday things in new ways, so had so much fun on this project – you’ve likely heard of stamping with potatoes before, but how about acorn squash? The bumpy, cloud-like shape is absolutely perfect for stamping these adorable lamp place settings, or even making a colorful paper bouquet!

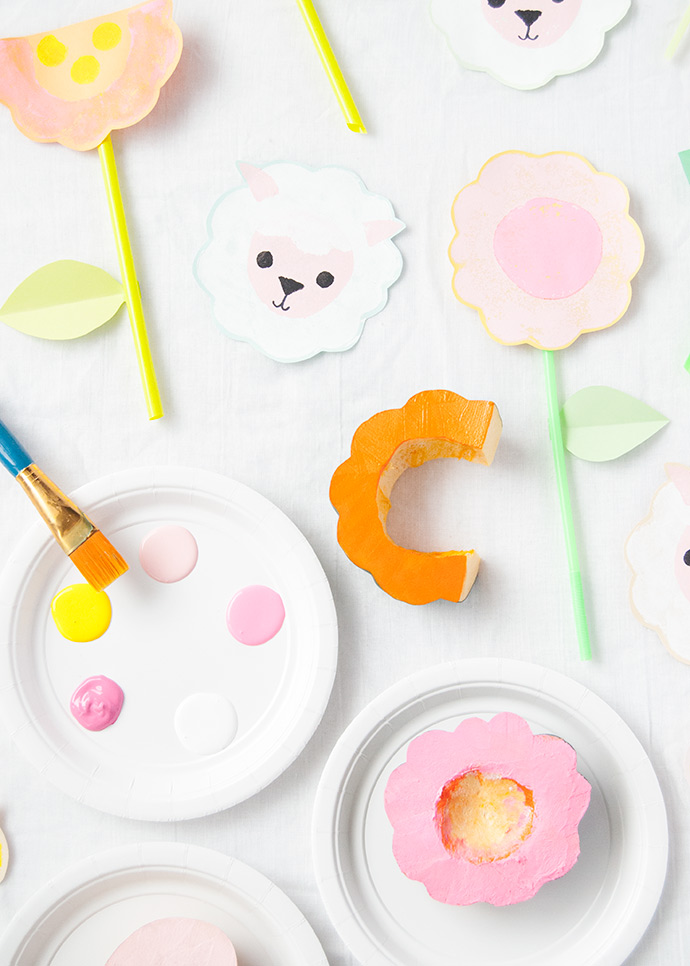
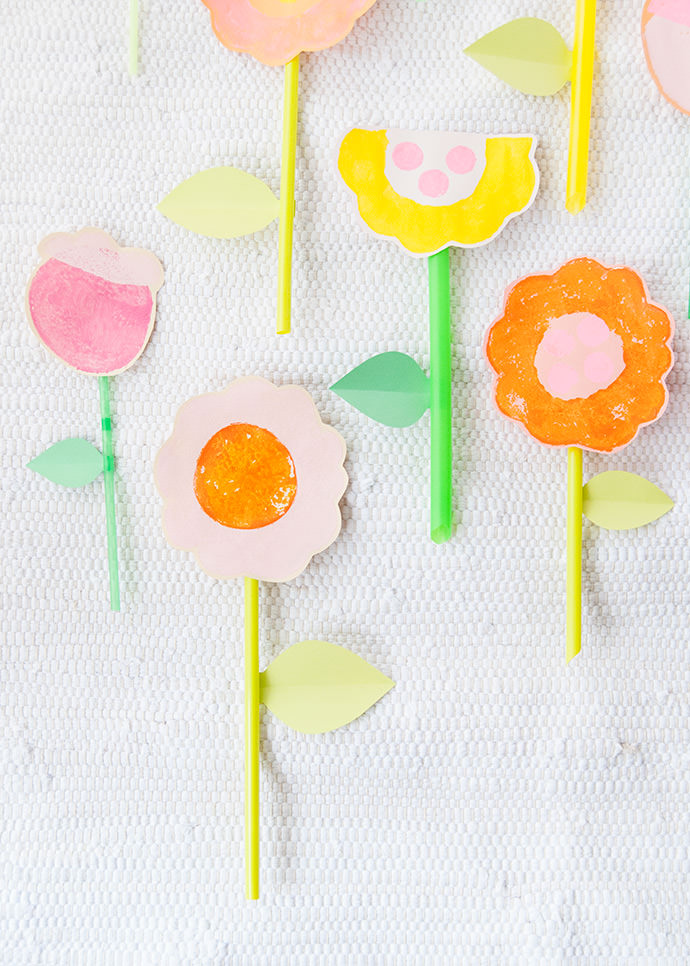
We actually stumbled upon the flower idea by accident while stamping the lambs – just grab a few bright shades of Apple Barrel paint, and you’ll have a colorful centerpiece for your table in next to no time! We recommend using paper straws for the flower stems, or to use straws you already have on hand instead of purchasing new ones – you can read more about this in the how-to below.
what you need:
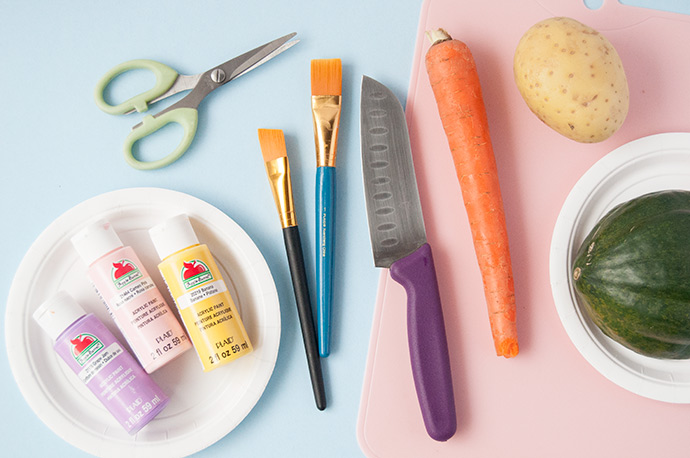
- Apple Barrel Acrylic Paint
- Paintbrushes
- Acorn squash
- Potato
- Carrot
- Chopping board
- Kitchen knife
- Paper
- Scissors
- Paper towel
- Drinking straws (optional)
- Hot glue gun (optional)
how-to:
Step 1
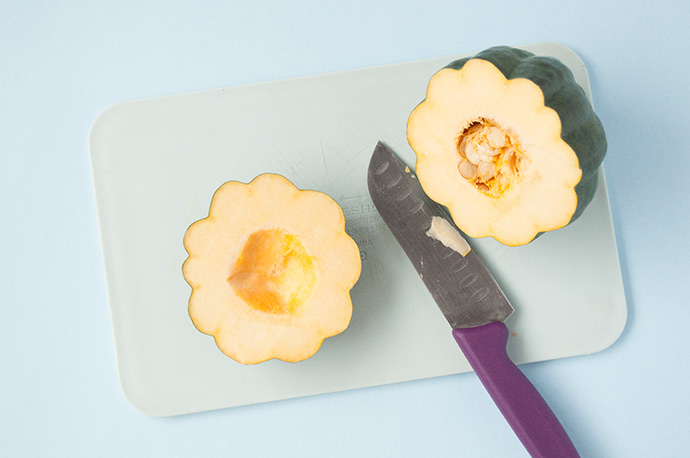
Begin by cutting the top off the acorn squash. Depending on how far in you cut, you may need to use a spoon to scrape out any of the insides.
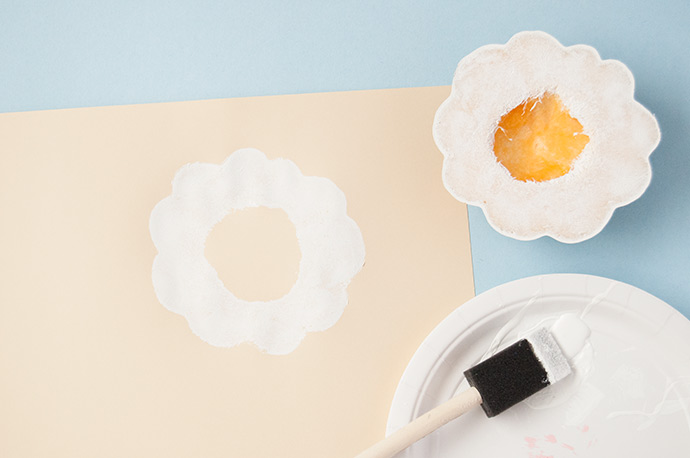
Step 2
Use a paper towel to blot the acorn squash dry, and then apply a layer of white paint. Press the squash onto the paper, stamping the cloud-like shape.
Tip: It’s a good idea to experiment with this stamping technique on scrap paper first. Depending on how evenly you’ve cut your squash, you may want to go back to smooth it out if needed. We also found that carefully picking up the paper and rubbing the paper from the back, pressing it into the squash, helped make the best imprint possible.
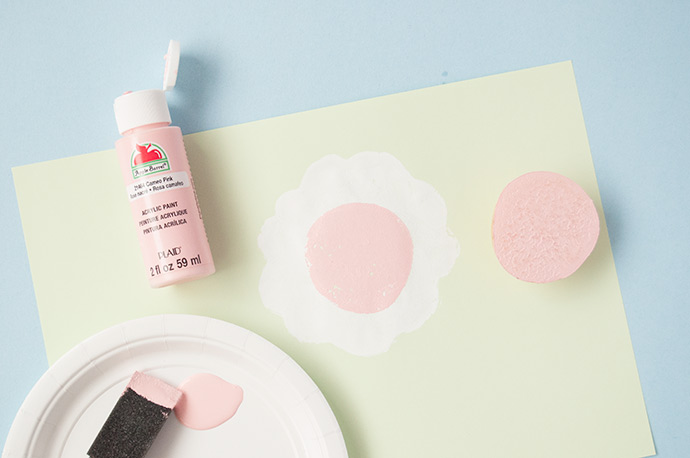
Step 3
Let the white paint dry. Cut a potato so that you have a circle that is smaller than the white lamb head you’ve got on your paper. Dry the cut edge of the potato with paper towel, and just like before, apply a coat of pink paint onto the potato and press onto the center of the white lamb face. You should now have something that looks like a flower!
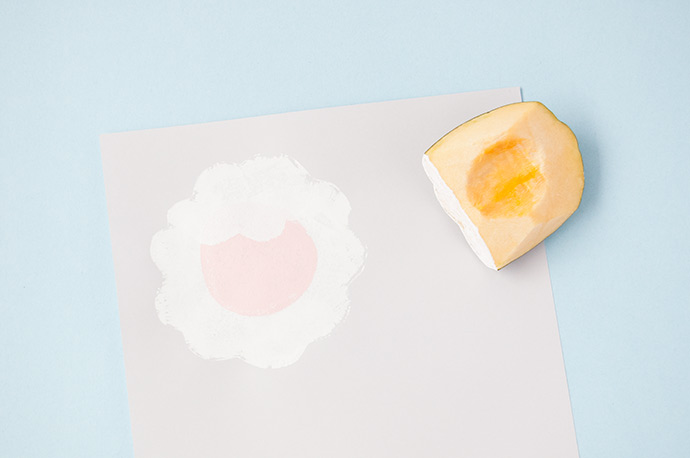
Step 4
To make it look a little more lamb-like (as opposed to a lion or flower) we cut an edge of the unused part of the acorn squash to make a stamp to form sort-of bangs. We used a piece that had three little bumps. Stamp this onto the lamp, overlapping the pink face, and let dry.
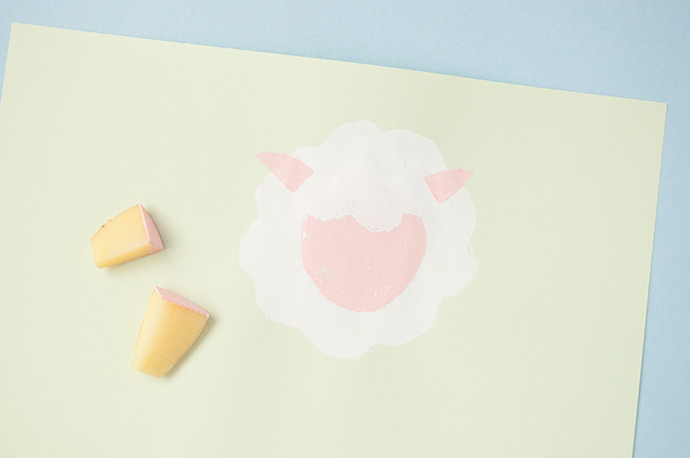
Step 5
Time to add some ears – we cut the other half of the potato into these small triangle-like shapes, embracing the curved edge of the potato. Stamp each one onto the lamb’s face.
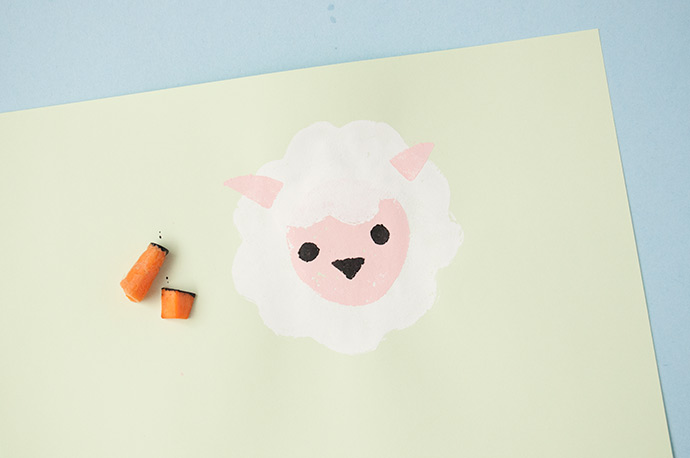
Step 6
For the lamb’s face, we cut the tip off of a carrot, applied a coat of black paint, and then stamped the eyes. For the nose, cut a triangle shape out of carrot and stamp on as well. For the mouth, use a fine paintbrush to do this part by hand.
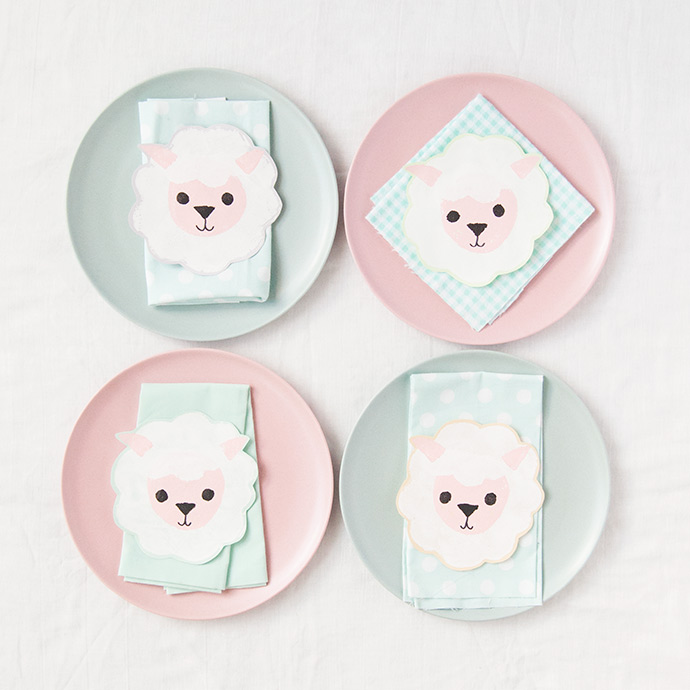
Repeat as many times as needed – we did this on different shades of paper. Let all dry and then cut out. Use as place settings, or write a little note on the back for your friends and family!

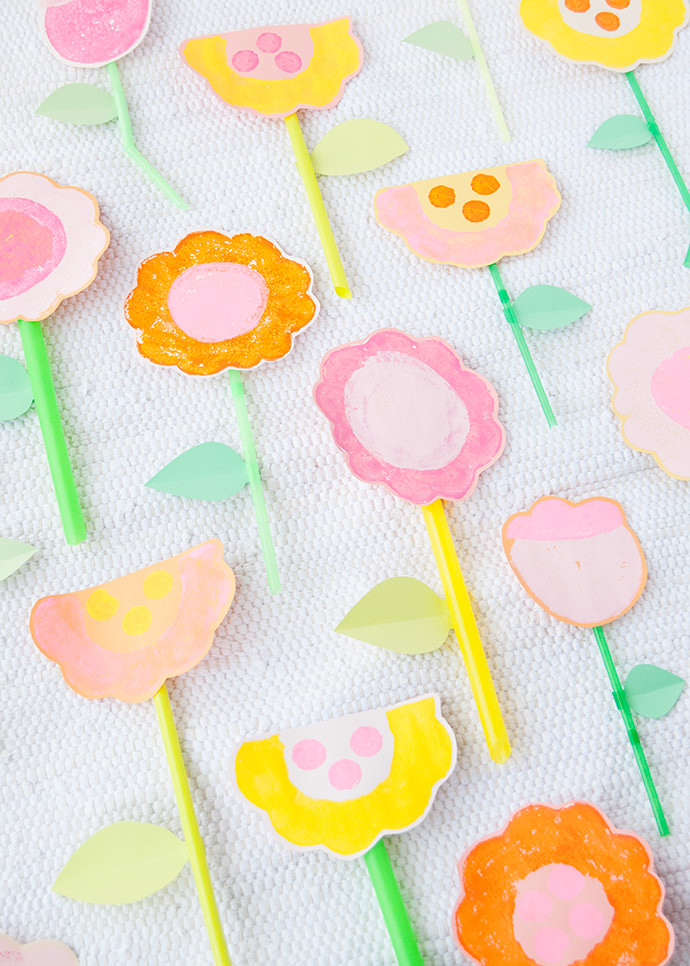
Step 7
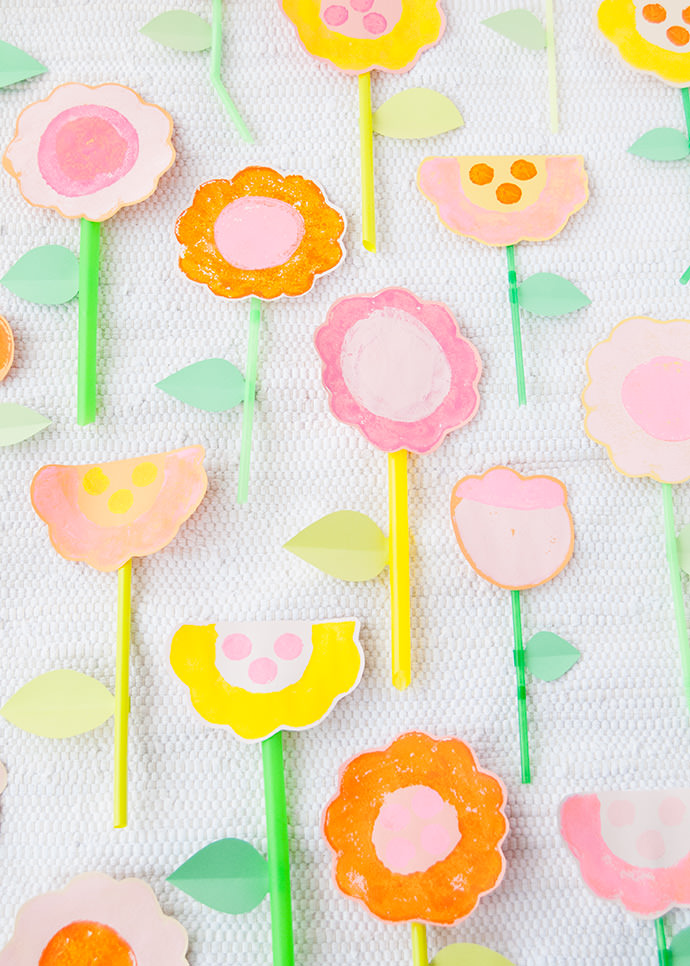
If you’re like us, you may have noticed while stamping your lamb that at first she looked a lot like a flower! We embraced this and played around with different colors to make these bright spring flowers! Use the whole acorn squash slice as the petals and stamp the potato round in the center. Or, cut the acorn squash in half for a more cup-like flower, and fill the hollow with carrot stamps as the center. You can even stamp the potato round solo and add the lamb’s bang detail on top as a little bud.
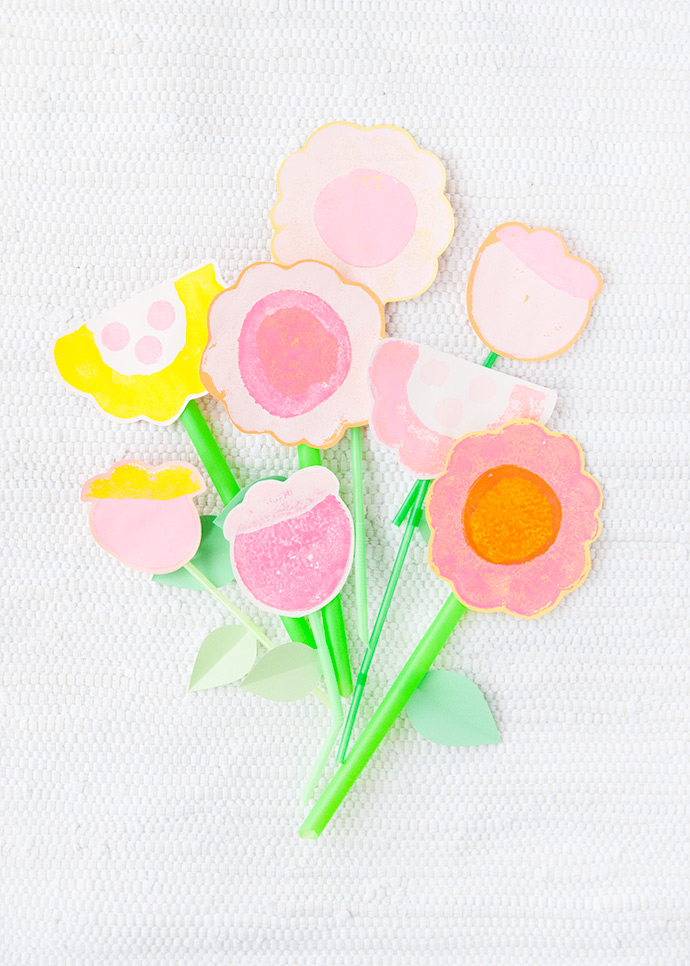
When using different colors, we recommend wiping any excess paint off the stamp with paper towel prior to adding a new color on top. And once you’re done, let it all dry, cut the shapes out, and glue onto straws. You can even cut little green paper leaves if you like! Arrange as a bouquet on your table or give out to friends as a fun little Easter surprise.
Note: We recommend using green paper drinking straws for this project, or apply a quick coat of green paint to any paper drinking straw. But if you’re like us, you may already have a small stash of plastic straws on hand from previous projects. We encourage you to use what you already have – we’ve had a collection of plastic drinking straws for years before knowing the environmental effects, and are now doing our best to put what we already have to good use. If you need to purchase straws for this project (or any other craft project really!) we recommend getting paper ones, recycling plastic ones you find yourself with, or checking your local thrift shop to see if any unused ones are available.

Happy crafting!!