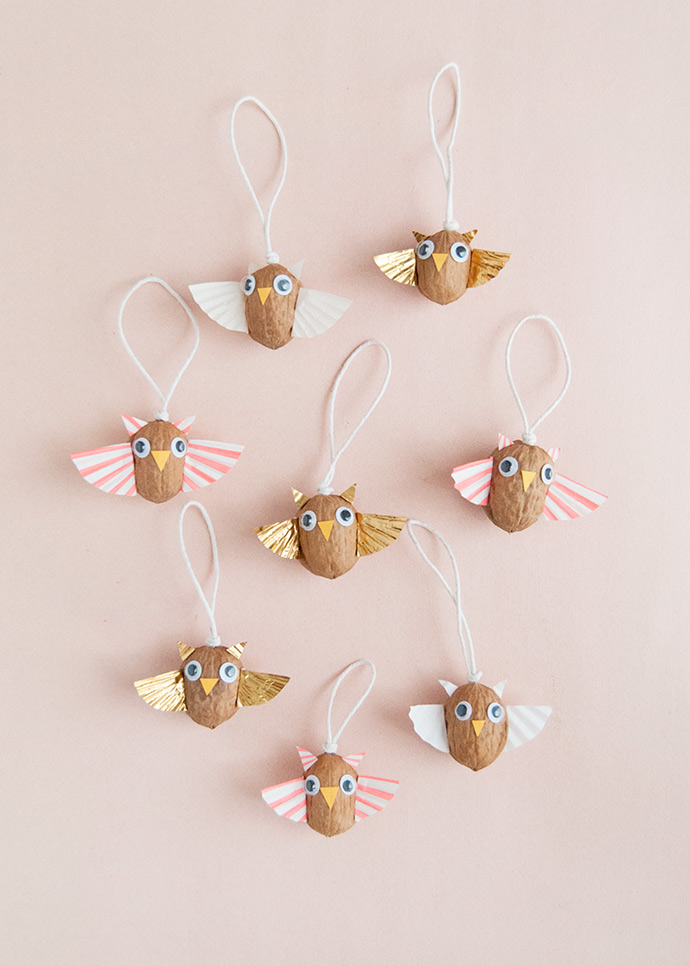
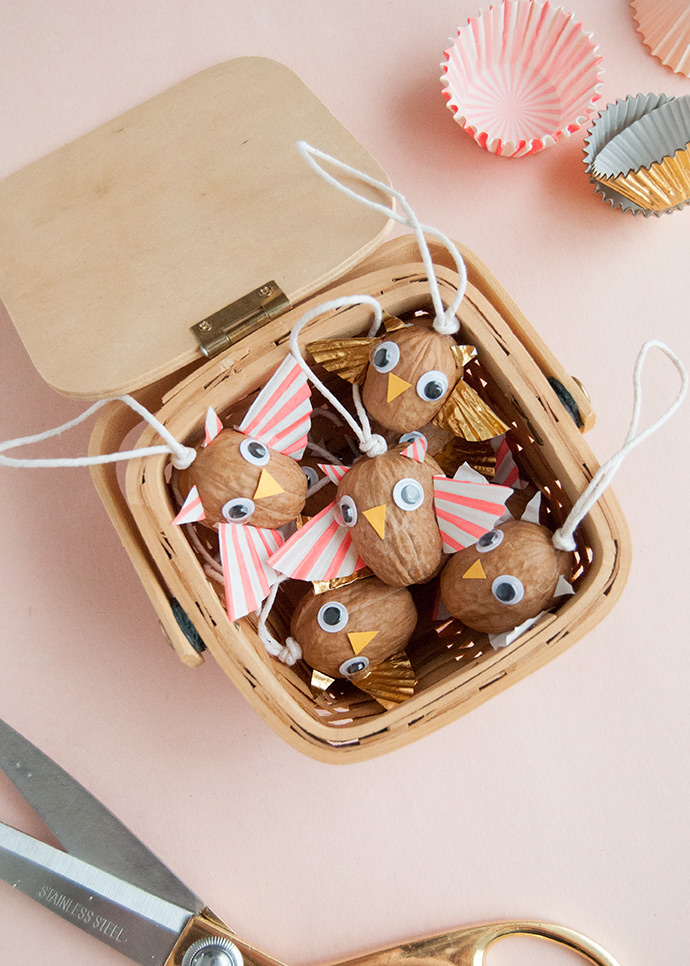
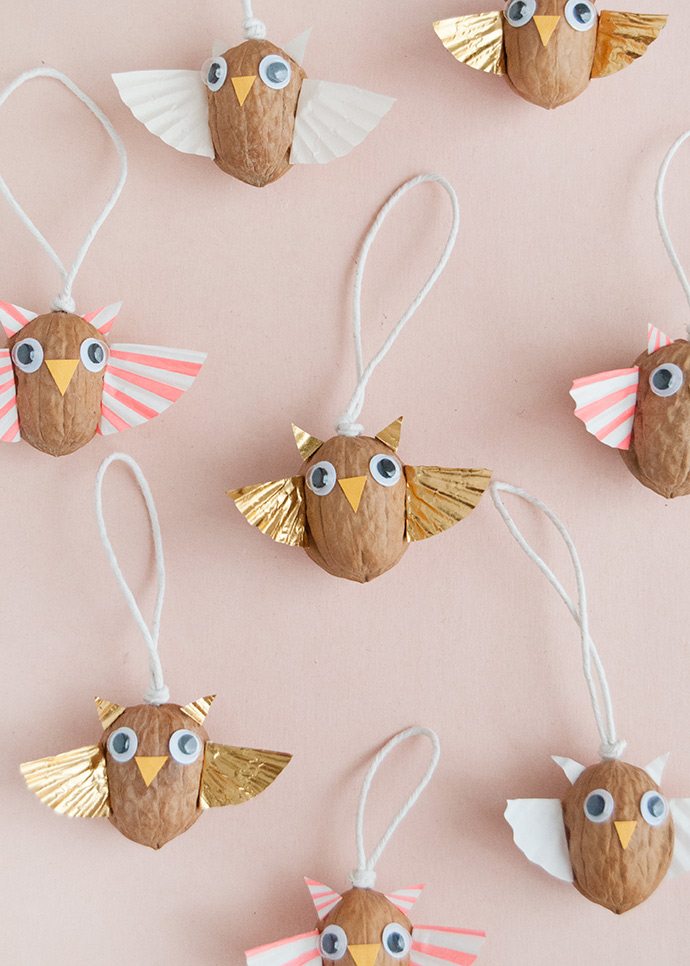
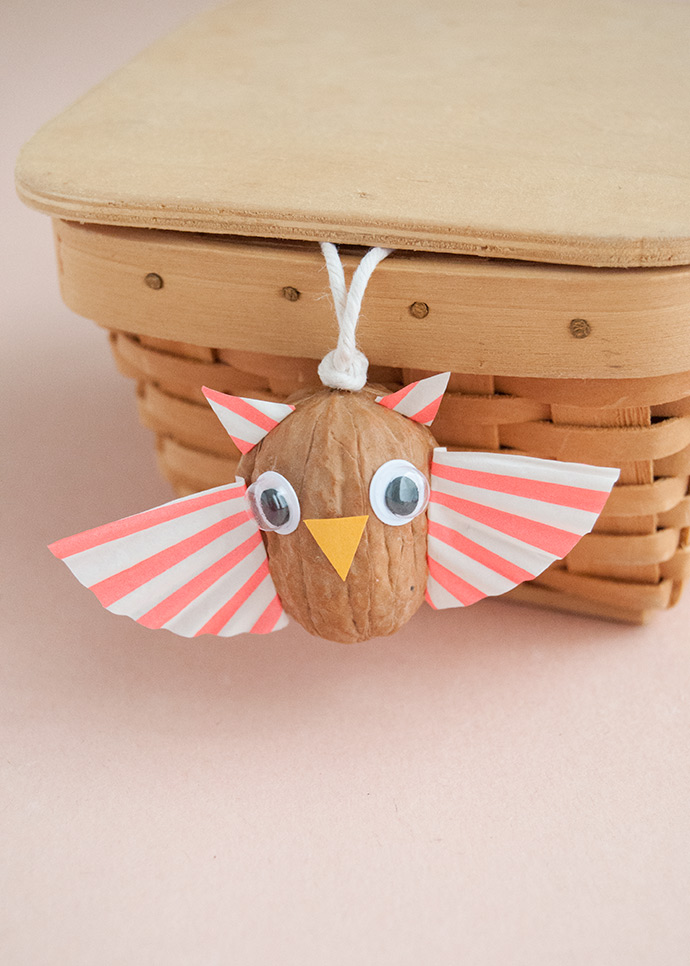
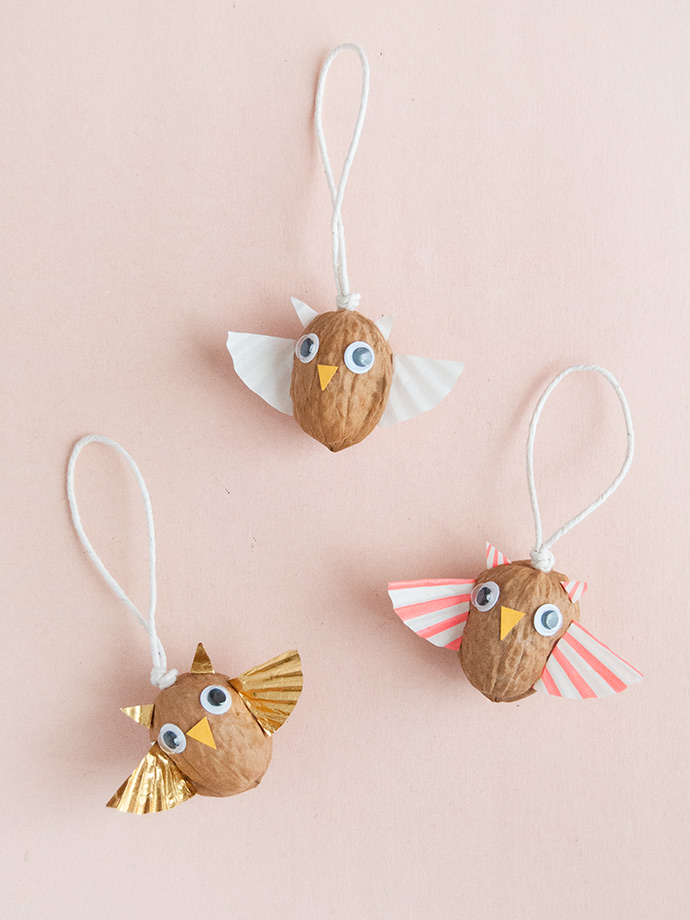
Hoo else is getting excited about Christmas? Soon we’ll be setting up the Christmas tree at our house and I can’t help but have ornaments on my mind. Last year my daughter wasn’t walking or crawling yet, but now that she is I know we’ll have to be strategic about what ornaments and decorations we use. I’m thinking we will completely skip glass ornaments on the tree, but that means I’ll have to swap in some new ones. These DIY walnut owls aren’t breakable and I suspect we’ll end up hearing many “hoo hoo!”s as she spots them on the tree. A few years ago I made pinecone owls, inspired by a retro craft book. These ornaments are similar but a bit smaller and lighter to make more suitable ornaments for your tree. The wings and tufts are made of cupcake papers, so you can use whatever colors you have on hand – I used gold, white, and pink for a festive feel!
what you need:
- Walnuts (in shells)
- Cupcake papers
- Scissors
- White glue
- Googly eyes
- Yellow paper
- String
how-to:
Step 1
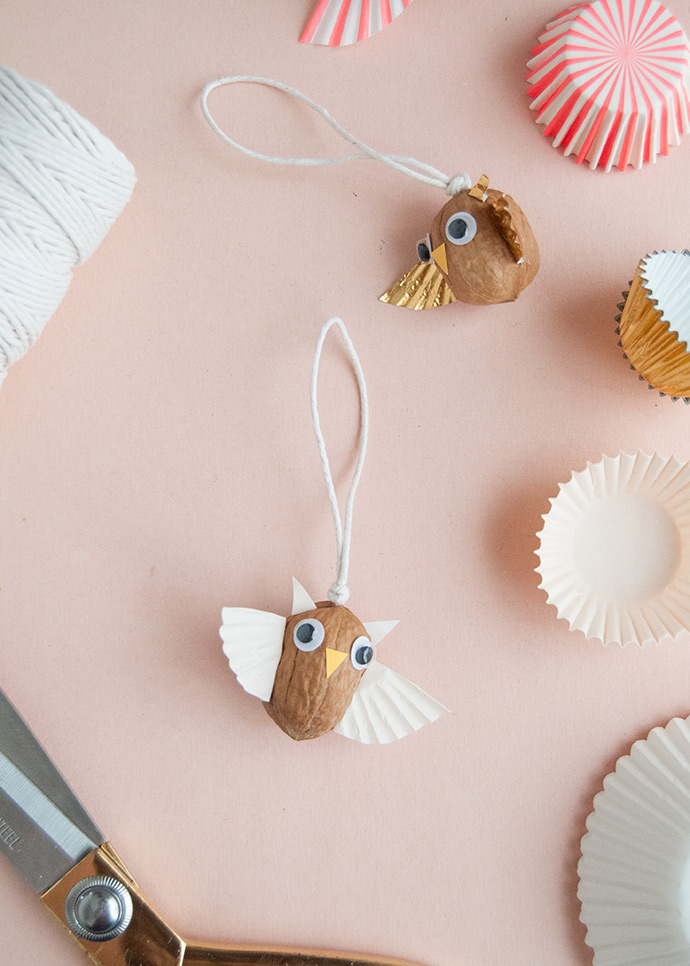
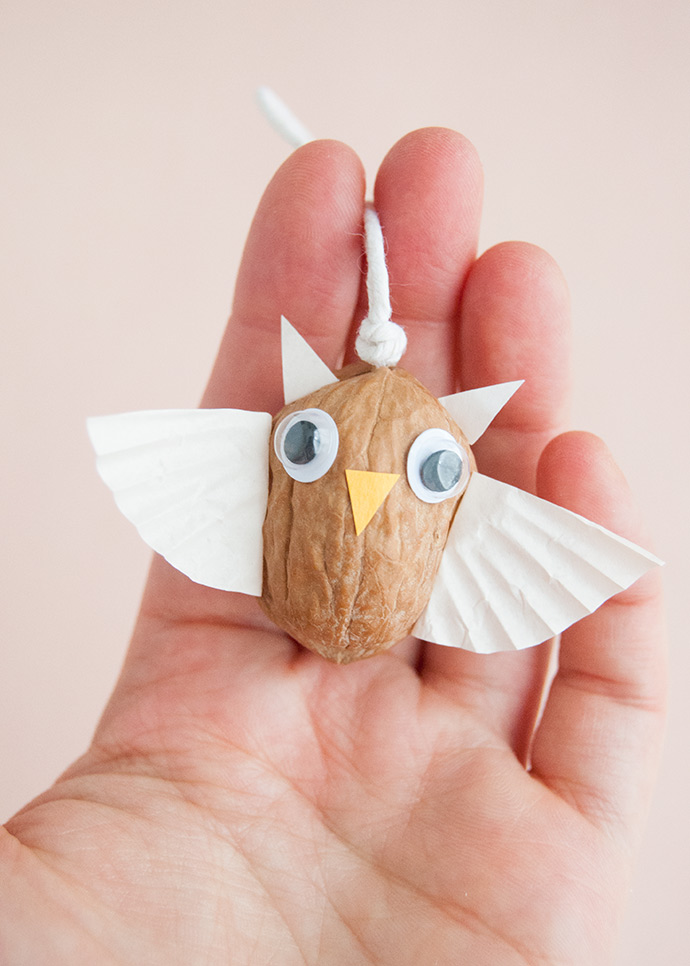
Fold a cupcake paper in half so that the colored/patterned side of the paper is on the outside. Imagine the folded straight edge as the top horizontal edge of the owl’s wing and use scissors to cut a snip up, perpendicular to this folded edge so that the wing is about 1″ long. Then trim the curved edge and snip along the folded edge so that you now have two matching wings.
Step 2
Fold the inside edge of each wing in a tiny bit, forming a narrow flap. Apply a thin line of white glue onto these flaps and attach one wing to each side of the walnut.
Step 3
Using matching cupcake paper, cut two tiny triangles to be the owl’s tufts – these are the ear/horn looking points sticking out from the top of their heads. Fold a small flap down at the base of each triangle and again use white glue to adhere each to the top of the walnut.
Step 4
Stick on two small googly eyes and cut a small triangular beak from yellow paper, and then glue that on too.
Step 5
Finally, cut a piece of string and tie it into a loop using an overhand knot. Trim the excess tails and then apply a dab of glue directing onto the bottom of the knot. Stick this to the top of the walnut, holding in place until secure and then let dry completely before hanging.
Happy crafting!