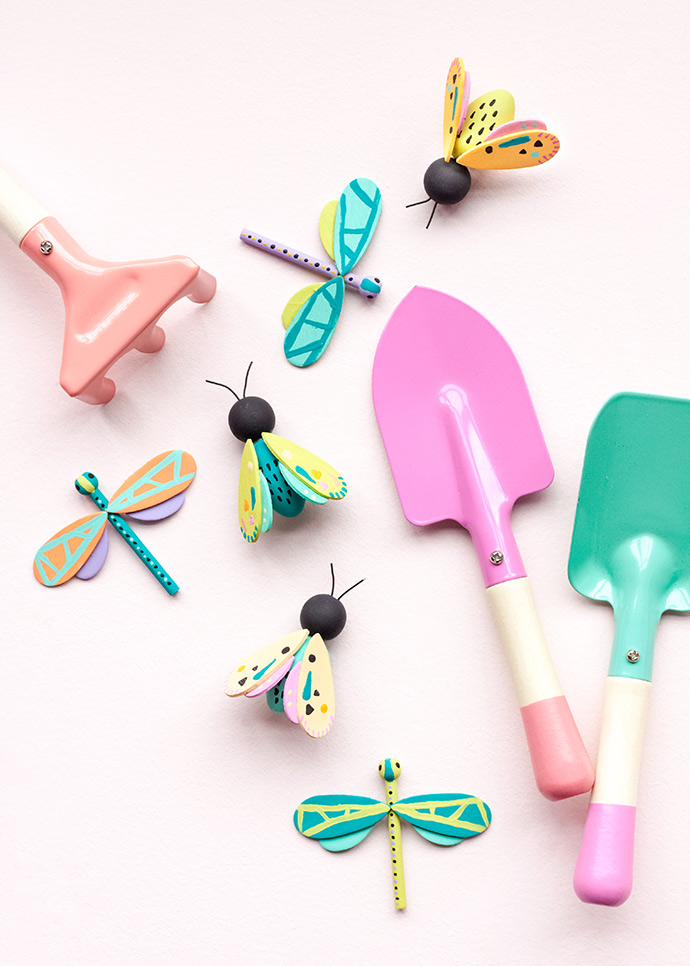
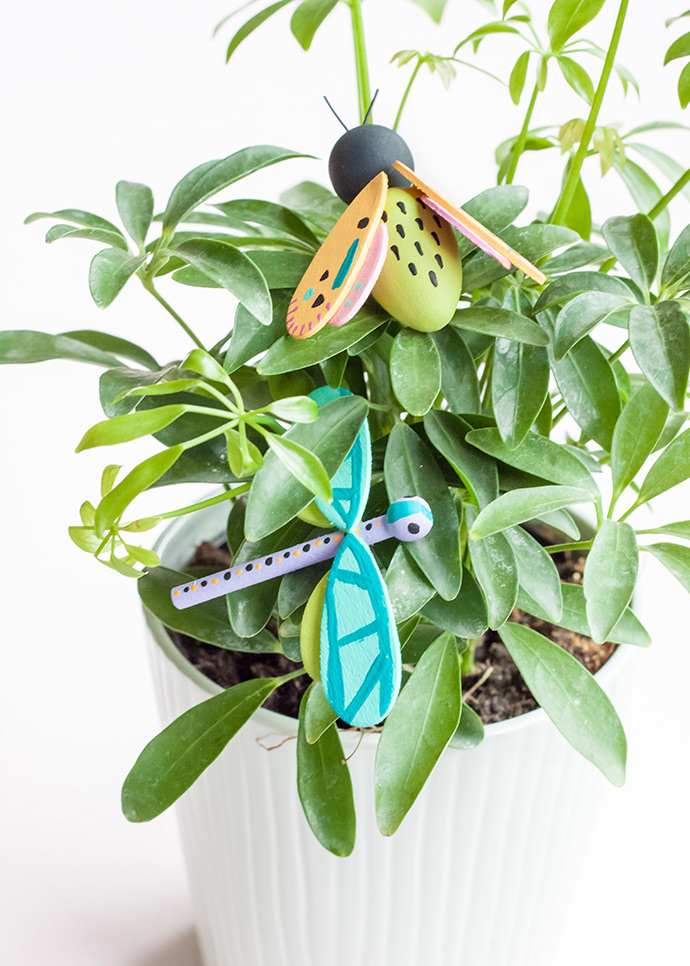
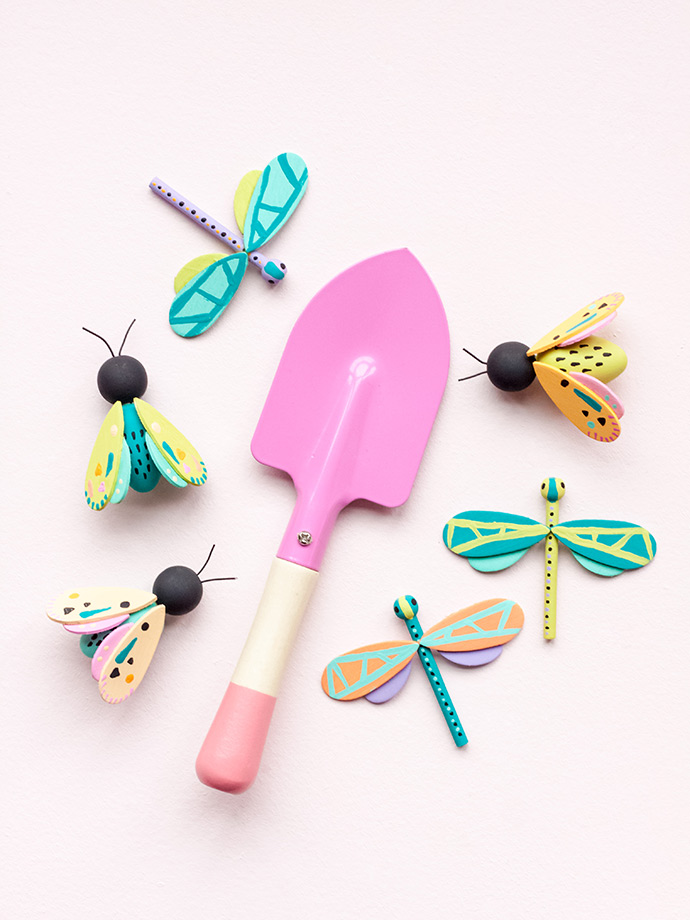
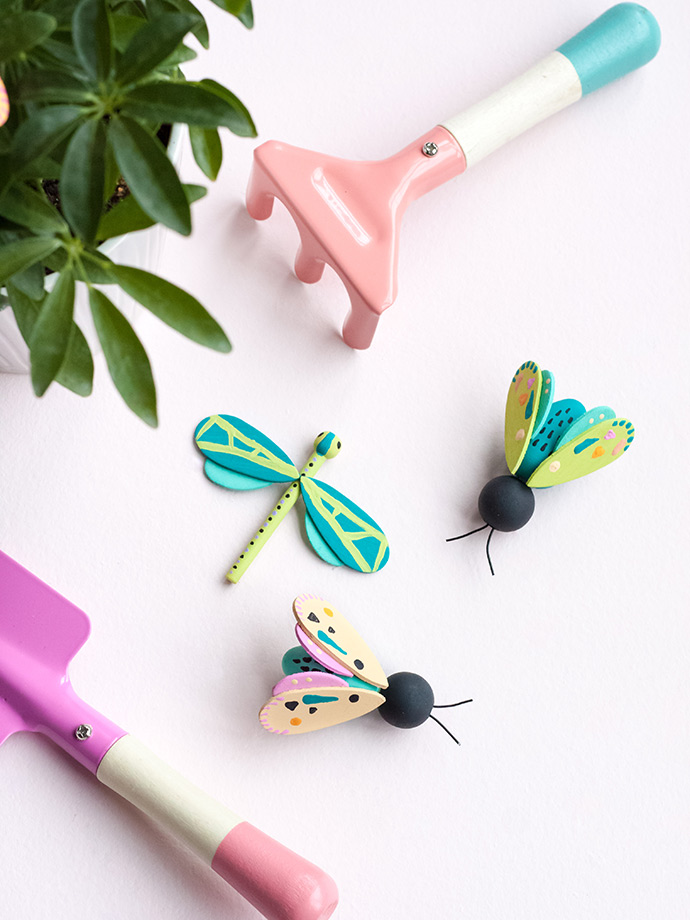
When the occasional bug would enter my first apartment, I would put a cup over it until my boyfriend (now husband) could come over to “take care of it”. I never was a big fan of anything creepy crawly, but there’s nothing wrong with moths and dragonflies! …Especially the cute, wooden kind. These are adorable as indoor plant décor, but they would also be sweet glued onto wooden boxes, picture frames, or anything else that needs a little pizzazz!
I designed mine to coordinate with an adorable kids’ sheet set from Tarjay, and they would be sooo darling in a kids’ room. They could work as place cards or decorations at a gardening or insect-themed party as well!
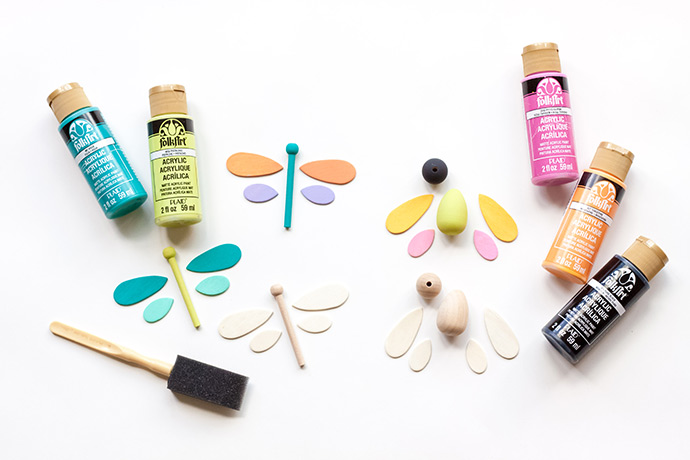
what you need:
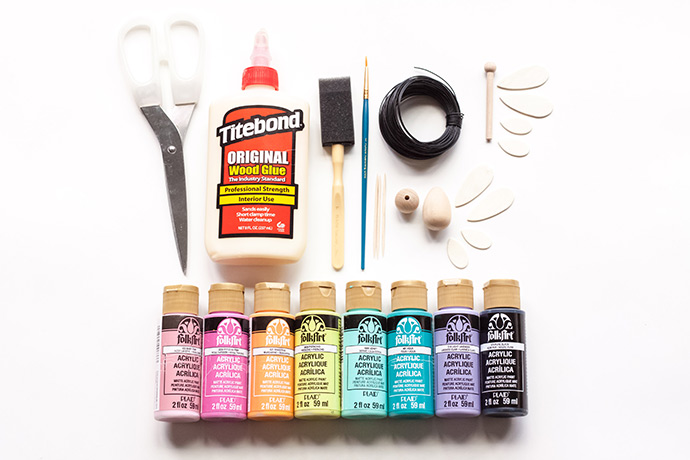
- Folk Art Acrylic Paint
- Sponge brush
- Paintbrush
- Toothpicks
- 24 GA (.51mm) black vinyl coated bead wire
- ¾” wooden bead
- 7/8” x 1.286” wooden egg
- 3/8” x 2 3/8” tie rack peg
- Wood shapes (raindrops)
- Wood glue
- Scissors
what you need:
Step 1
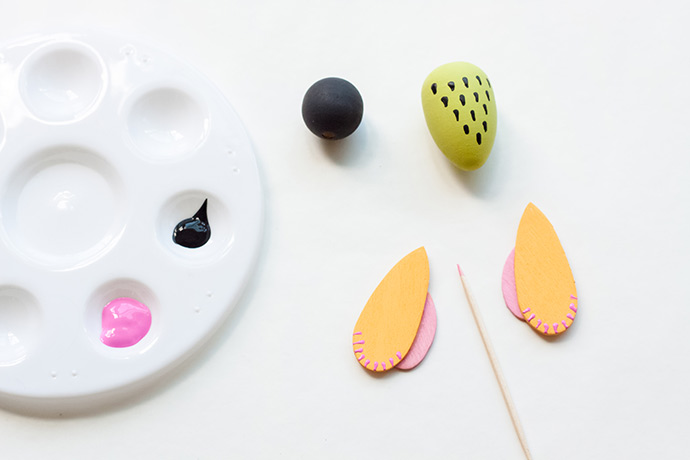
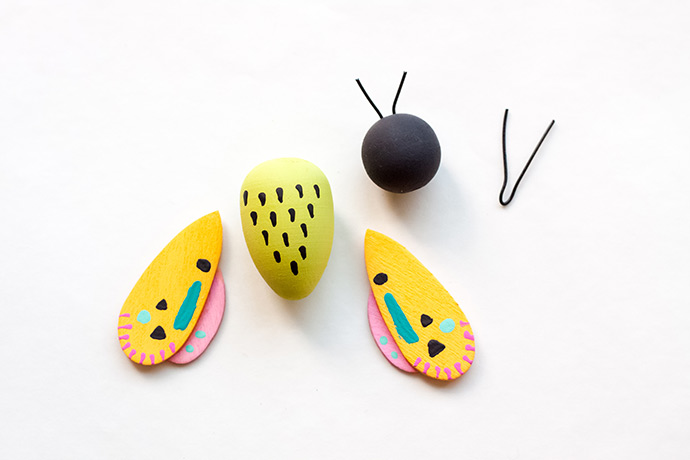
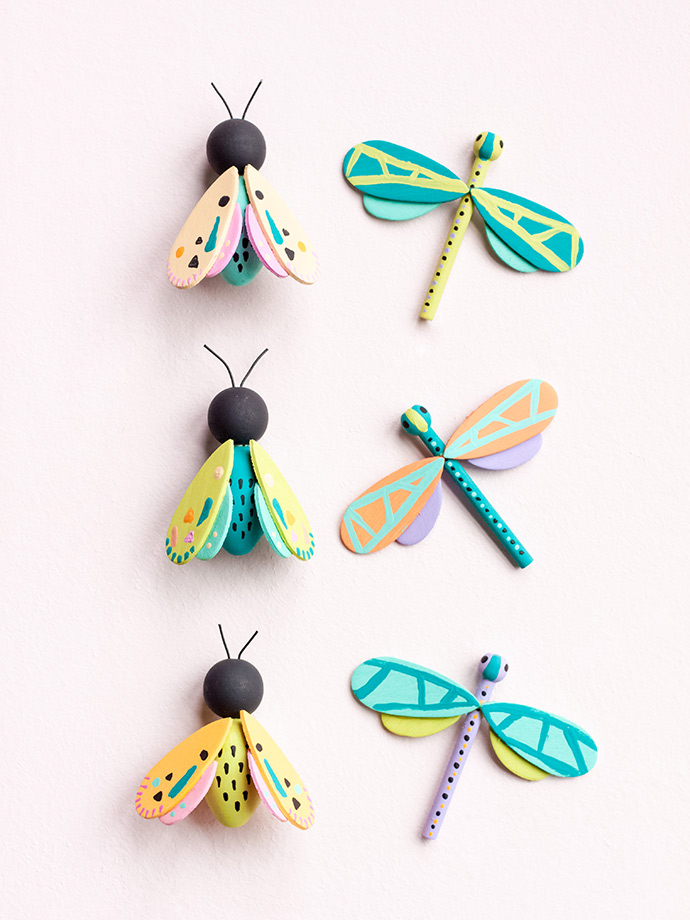
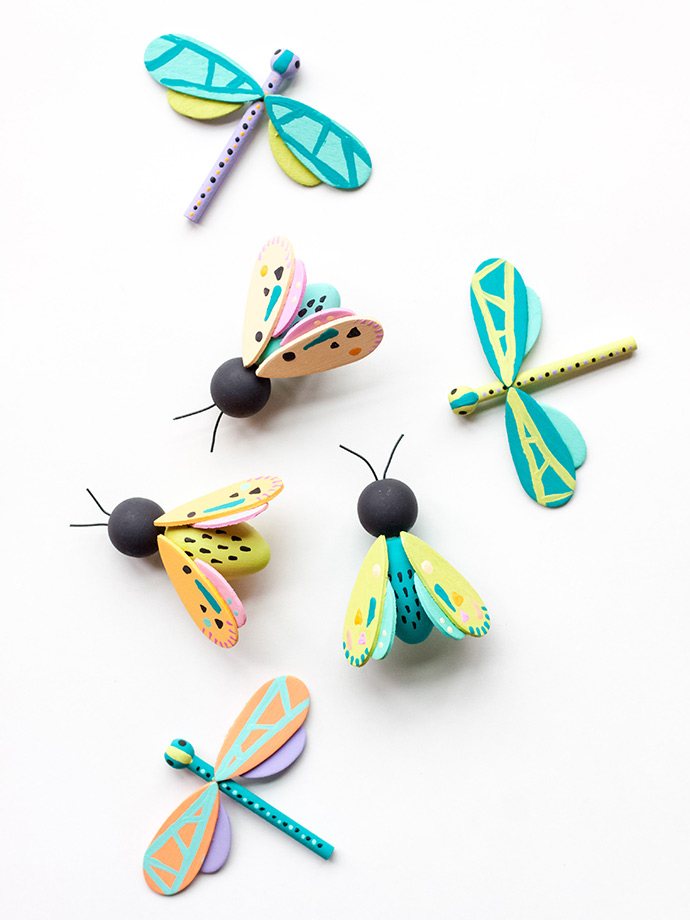
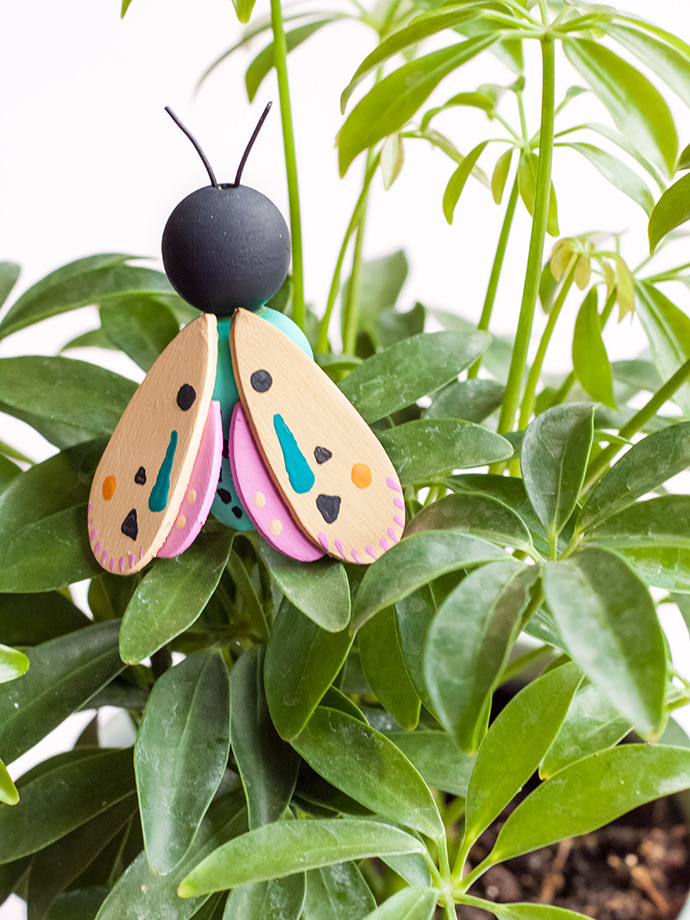
Use a sponge brush to paint your wooden bead black. Paint the egg (moth’s body) in the color of your choice. Paint the tie rack peg (dragonfly’s body) in the color of your choice. Paint two large wooden raindrops the same color, and two small wooden raindrops in another color. These will be the moth’s wings. Paint another set in two different colors, as the dragonfly’s wings. Allow to dry.
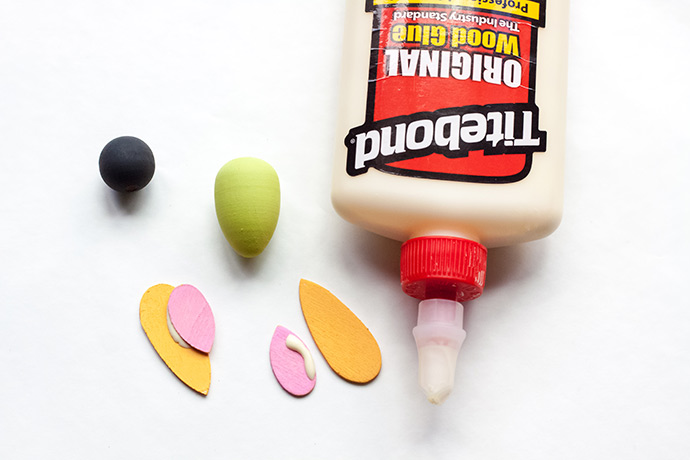
Step 2: Moth Wings
Squeeze out a small strip of glue on the top edge of a small wooden raindrop. Place it on a larger wooden raindrop, near the opposite end of the point, with both points facing the same direction. Half of the small raindrop should cover the larger one, and half should hang off the edge. Repeat this step with a second set of raindrops, and glue them together to mirror the first set. Set aside to dry.
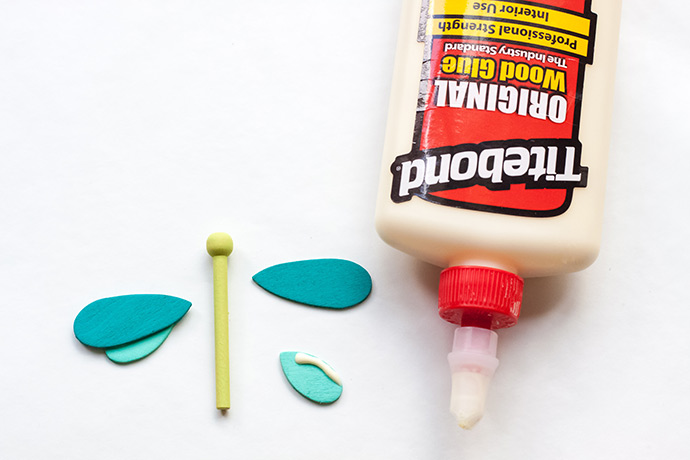
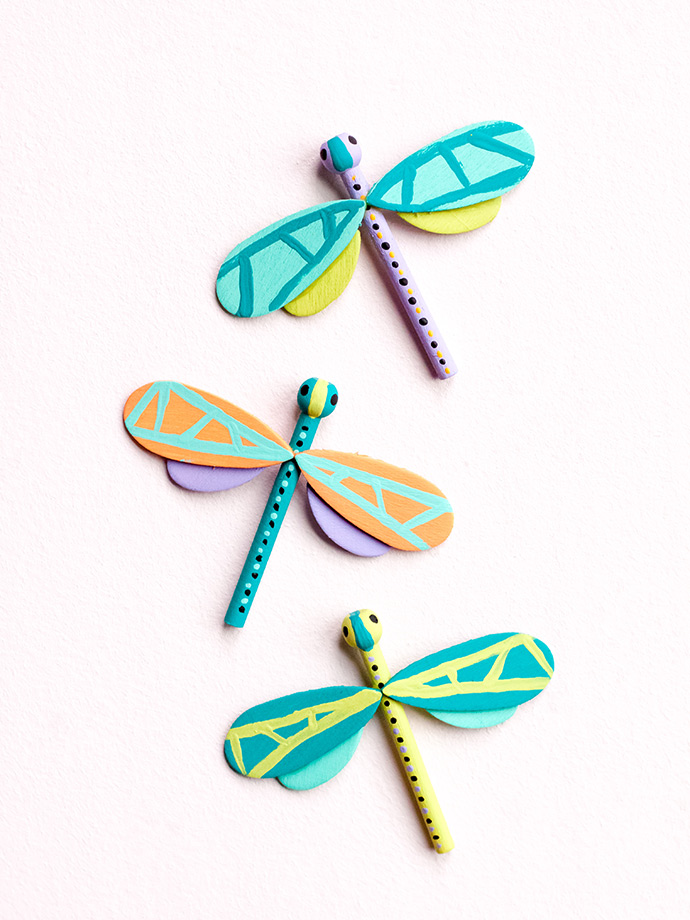
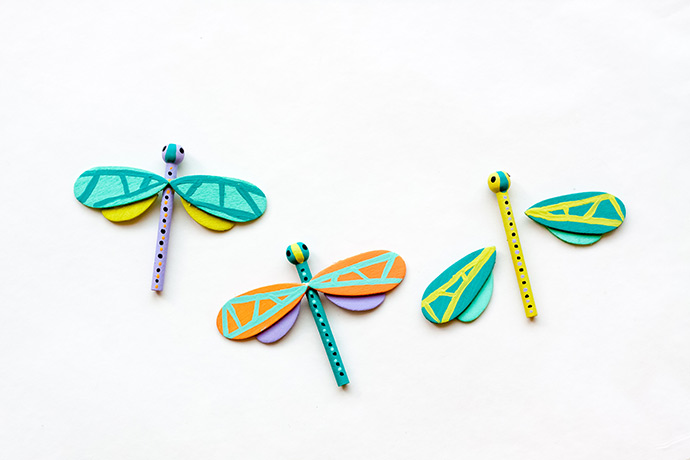
Step 3: Dragonfly Wings
Repeat step 2 with your other sets of raindrops.
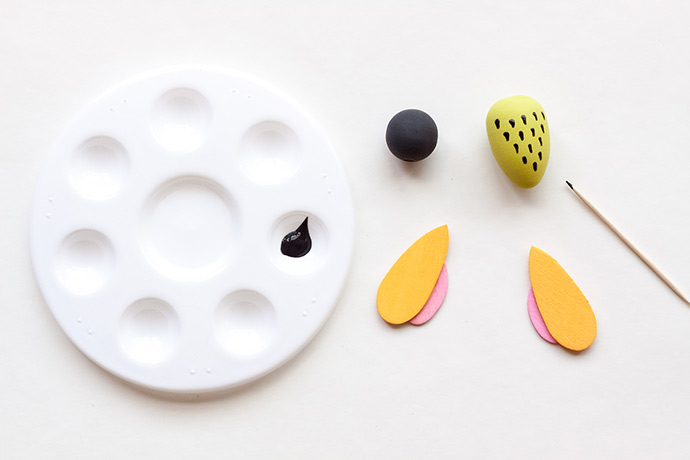
Step 4: Moth Body
Use the end of a toothpick to paint short lines in a triangular pattern in the middle of the wooden egg. For example, you will paint one line at the narrow end of the egg, and work your way up to five or more lines at the wide end of the egg.
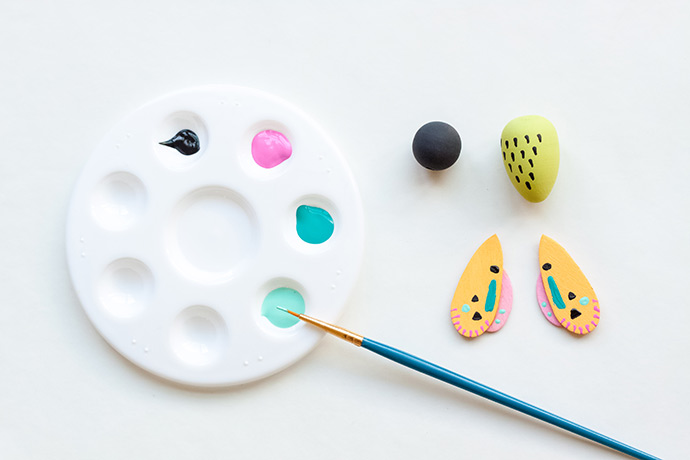
Step 5: Moth Wings
Use a second toothpick end to paint short lines all around the bottom edge of the large raindrop on your moth wings. Use a paintbrush to paint small circles, triangles, lines, etc. in different colors on both moth wings. Mirror each shape from the first wing, on the second wing.
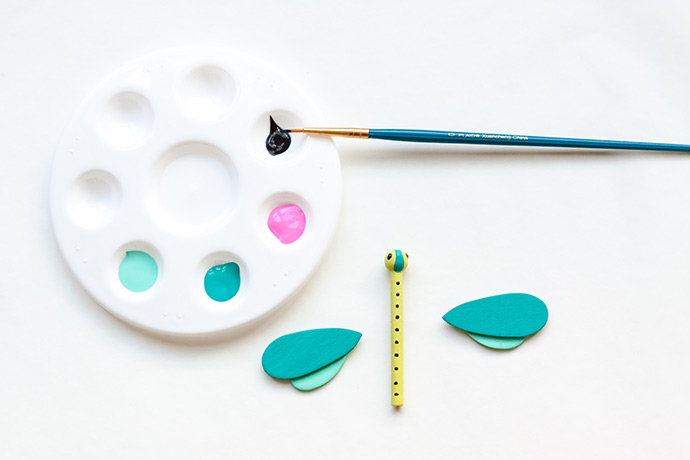
Step 6: Dragonfly Body
Paint a strip of color over the middle of the head on the wooden peg. Add a black dot on each side of the strip for eyes. Paint small dots in alternating colors in a line on the pin part of the peg to decorate the body.
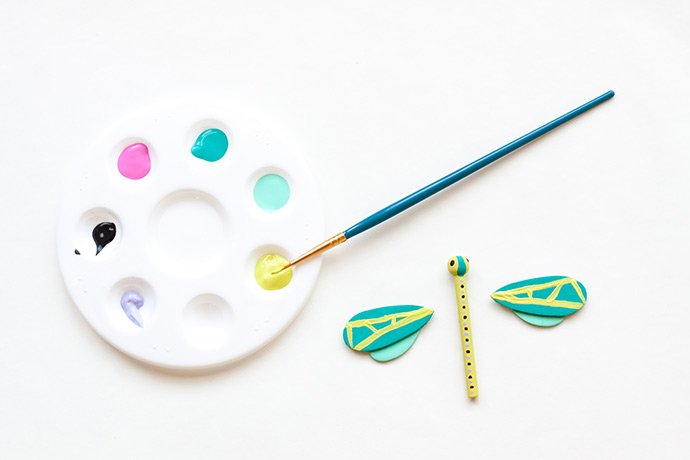
Step 7: Dragonfly Wings
Paint two lines from the point of the large wooden raindrops, out to the opposite ends at an angle. Paint a few short lines in between the two lines at different angles.

Step 8: Moth Head
Cut a 1 ¾ – 2” piece of black wire, and bend it into a “v” shape. Place it in the hole on one side of your wooden bead, until it stays in place. Use wood glue to stick the other end of the bead to the wide end of your wooden egg. Hold in place, and allow to dry.
Step 9
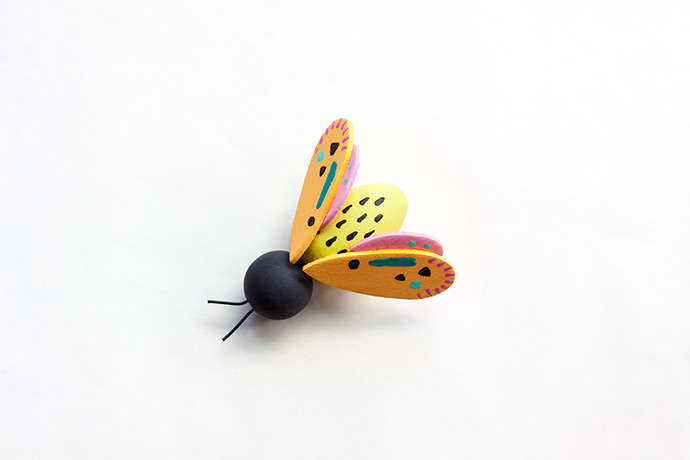
Glue your moth wings to the wooden egg, with the pointy ends pretty close to the head, and to each other. Make sure they fan out a bit, away from the body. It is easiest to place the glue near the pointy end of the wings, and then stick them to the body. Glue the other set of wings to the dragonfly body by placing a tiny dot of glue at the point of the raindrops, and placing the pointy ends together on the dragonfly body – down from the head just a tiny bit. Allow to dry.
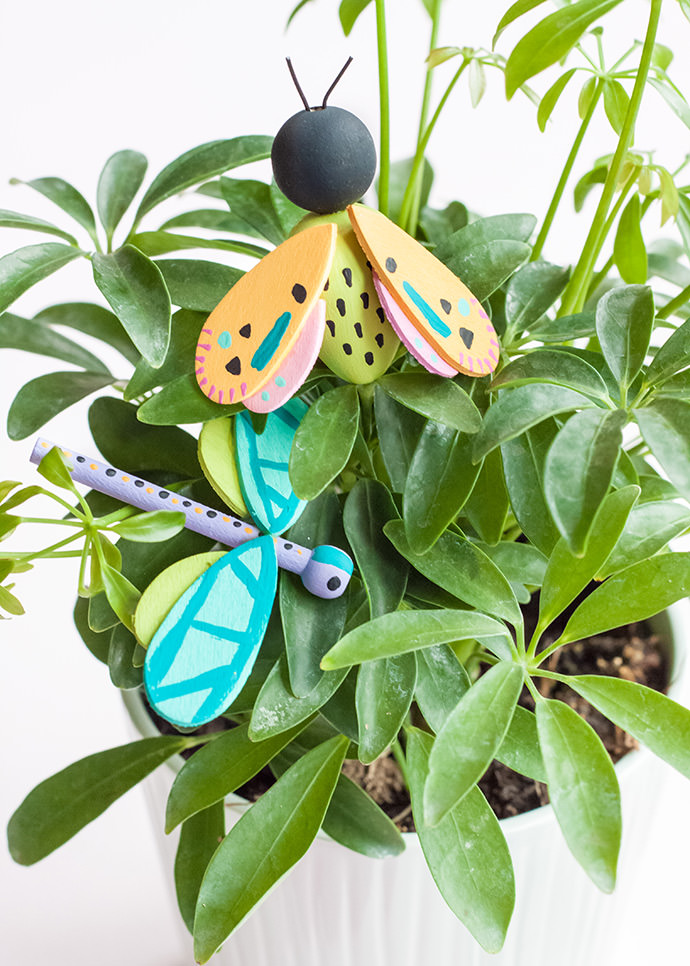
Place your little insects in a plant. Happy crafting, friends!
Happy crafting!