
My husband tells me that I should really stop bragging about how “I used to be on a bowling league”, and that “I had my own shoes and monogrammed ball” because based on my recent scores, you would probably conclude that I’m a first-timer! Whether you bowl a two-seventy-five, or a two, bowling is such a great way to bring family and friends together for some good old-fashioned fun. You can get in a little friendly competition, but there is also time to sit around and chat, or snack on bowling alley food, like nachos and mozzarella sticks. Yum!
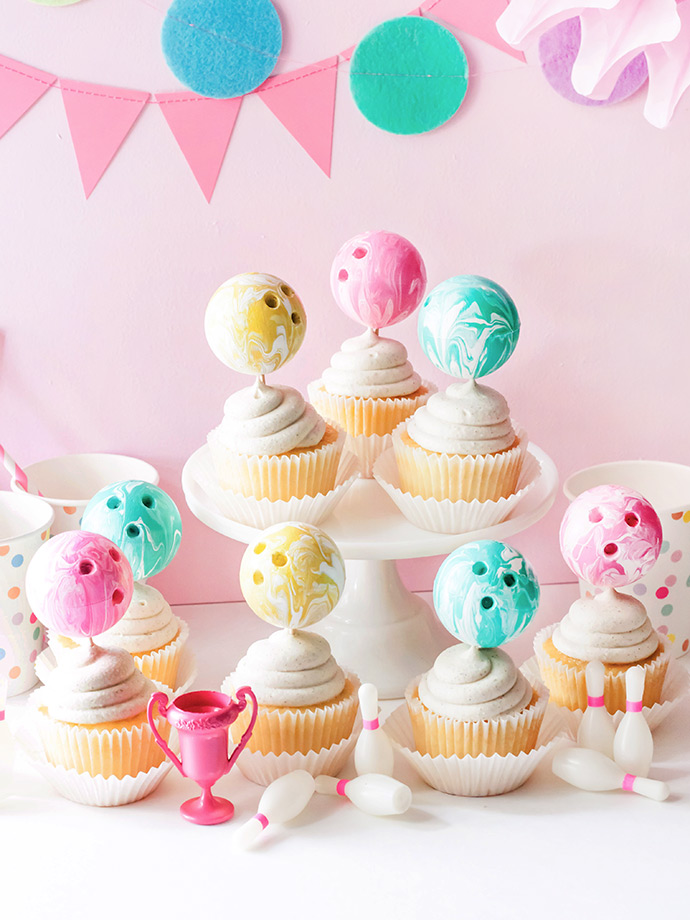
A friend from work decided on a bowling theme for her daughter’s birthday, and I thought it would be fun to make bowling balls out of Styrofoam. I REALLY wanted to make them look marbled like the real deal, and we were thrilled with the results. I just might have to throw a bowling party for my son this month, and we will definitely have to include this adorable Bowling Alley Cake!
what you need:

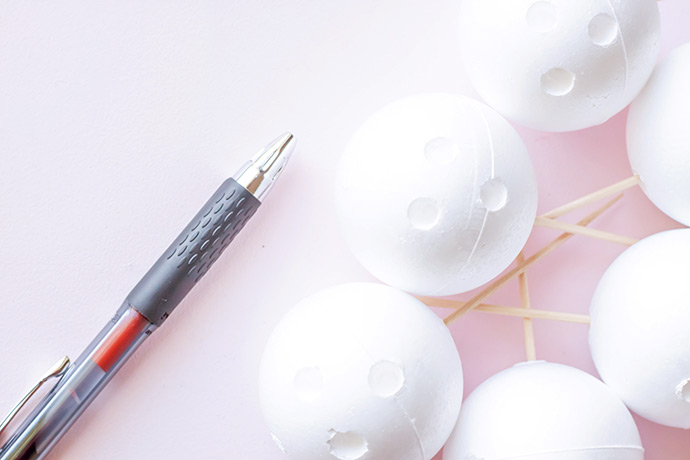
• 2” smooth Styrofoam balls
• Extra-long toothpicks
• Foam sponge brush
• Paint brush
• Apple Barrel Multi-Surface Acrylic Paint (colors of your choice + white)
• Wax paper
• Styrofoam block
• Pen with retractable tip (bulbous is best!)
• Mod Podge super gloss-brilliant
how-to:
Step 1
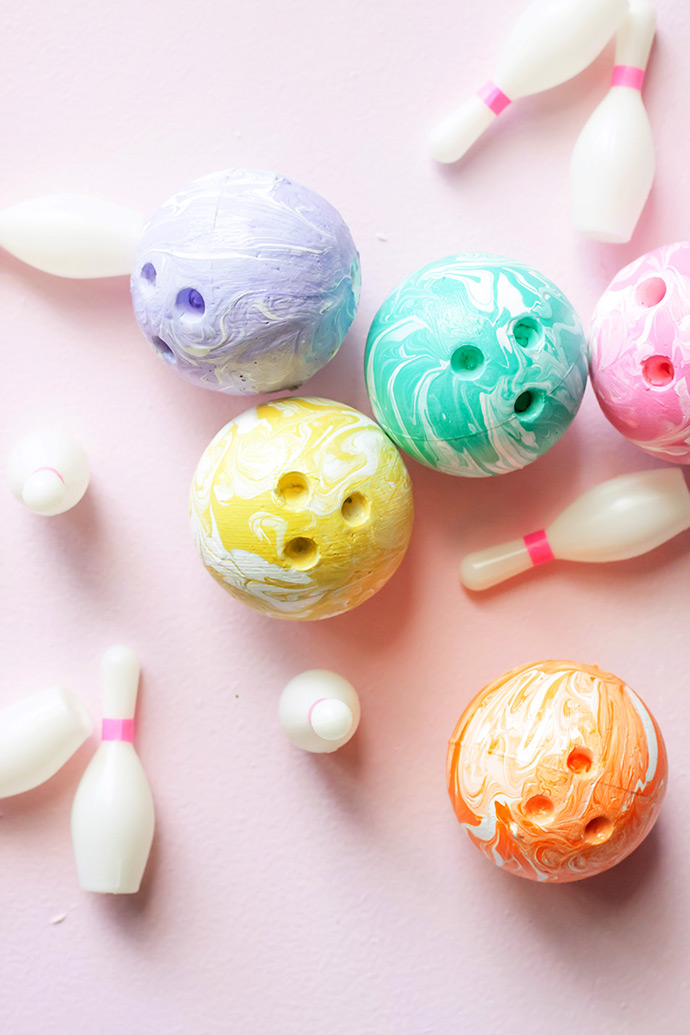
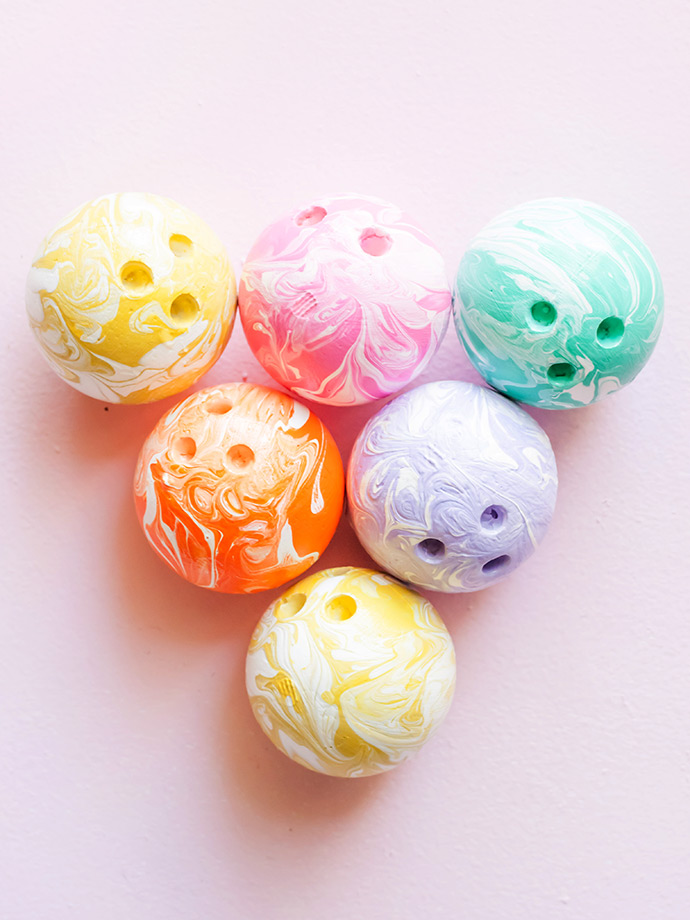
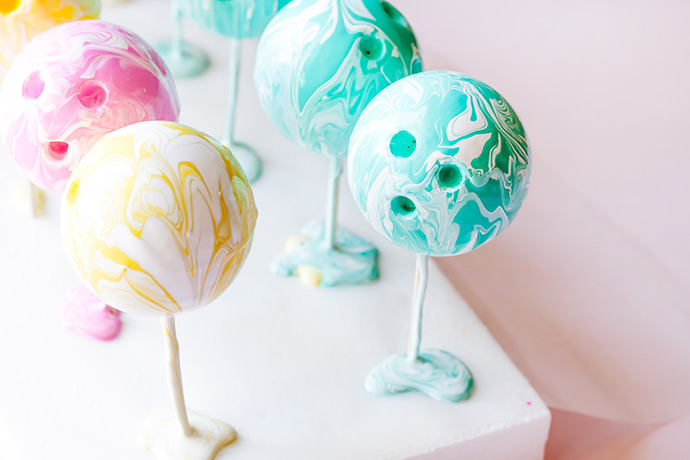
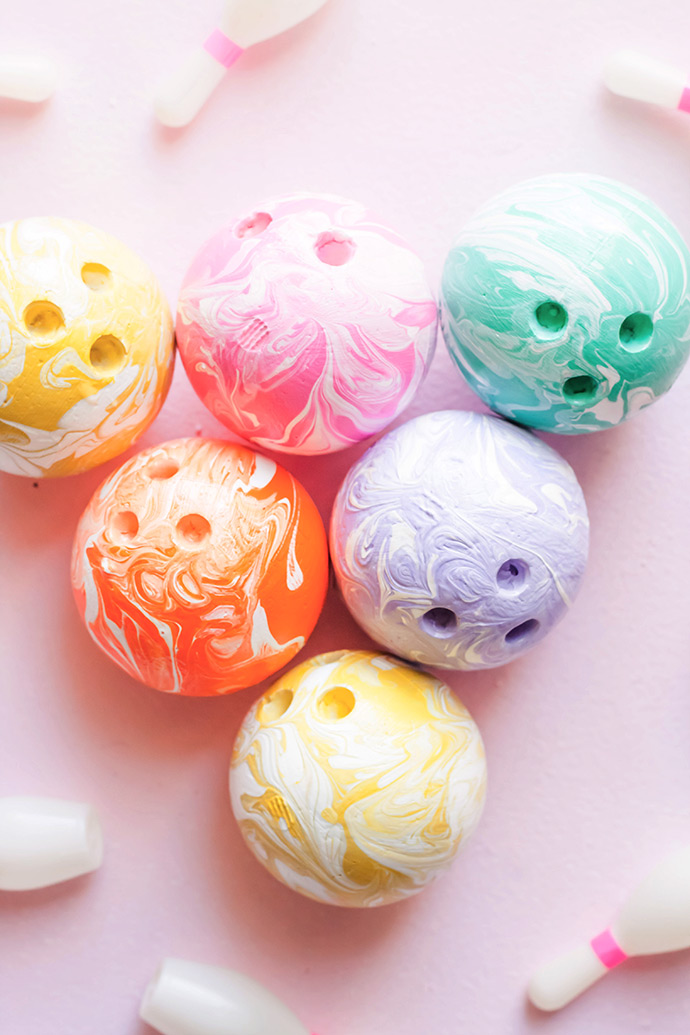
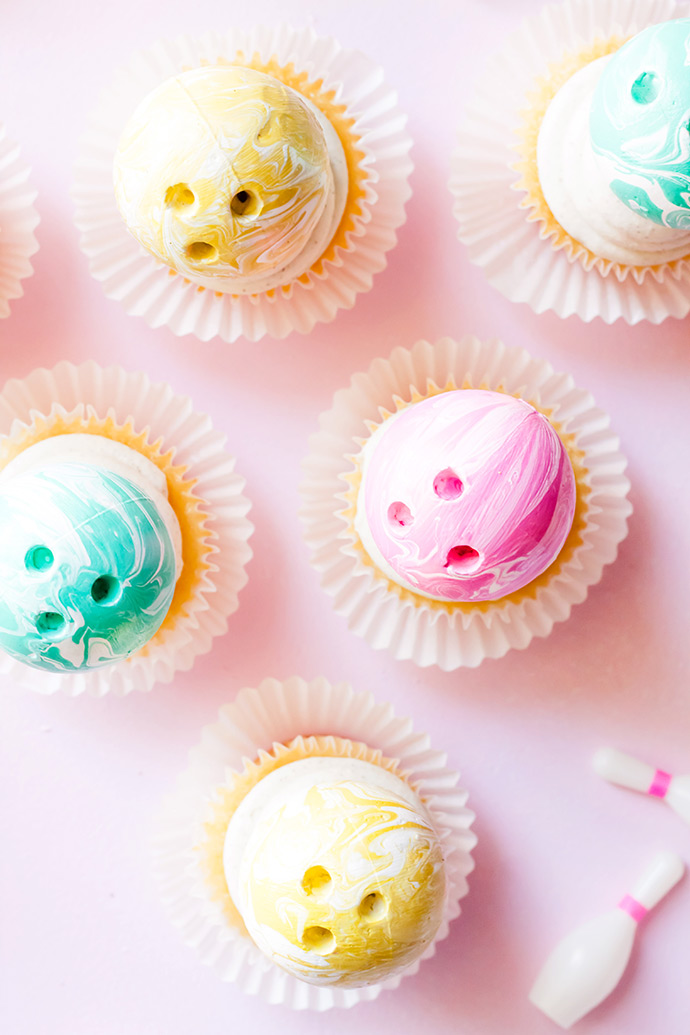
Stick an extra-long toothpick in the bottom of your Styrofoam ball. Ours had a pre-drilled hole already, but if your ball does not, create your own. Make sure you push it in far enough to hold the ball securely on the toothpick. You do not want the ball to slide around while you are painting. Next, use the tip of your retractable pen (without the ink), and twist it into the “equator” of your ball to make a hole. Keep twisting until you have enough width and depth to give it a genuine bowling ball appearance. Create two more holes slightly above the first, so that they form a small triangle. See bowling ball photos for reference. Depending on how you plan to display your cupcakes, you may prefer to place the finger holes on top of the ball, instead of on the side.

Step 2
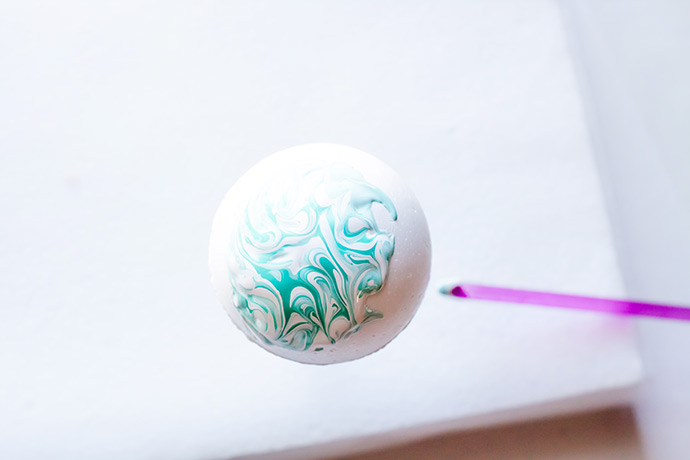
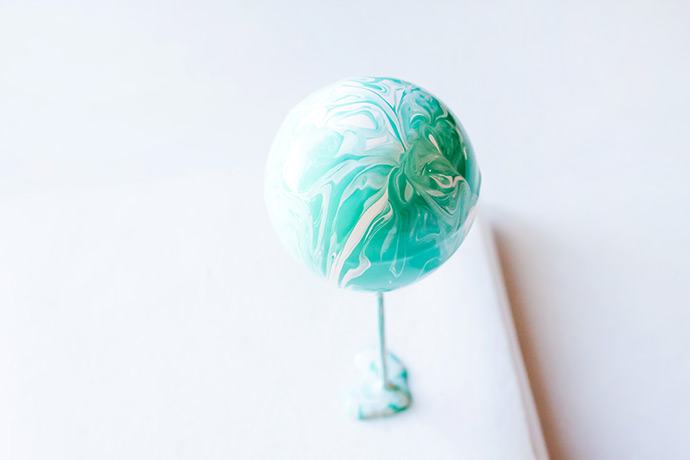
Hold the bowling ball by the toothpick, and over a piece of wax paper, pour a small puddle of acrylic paint on top, in the color of your choice. Pour a slightly smaller (or equal) amount of white acrylic paint next to it, and slightly overlapping. Use the handle of your paint brush to mix the white and colored paint together, using a circular motion. You can also try zig-zag motions, and even allow the paint to run together on its own, while you tilt the ball in different directions. Repeat this step on all sides of the ball, until it is completely covered in paint. Use different swirling techniques to create unique marbling on each ball. No two bowling balls are the same! Using a toothpick, scoop any excess paint out of the “finger holes”, allowing it to run down the side. It blends into the marbling.
Step 3
With a piece of wax paper over your Styrofoam block, stick the toothpick into the block until the ball stands on its own. Allow the ball to drip dry, with the wax paper catching the mess. You may need to check on the paint before it dries completely. If there are any paint “bulges” at the bottom of the ball, use a finger to lightly dab off the excess paint, and use another finger to slightly swirl the paint around in a circular motion to blend it as much as possible. Although you will want to get rid of the drips, do not touch the paint more than necessary.
Step 4
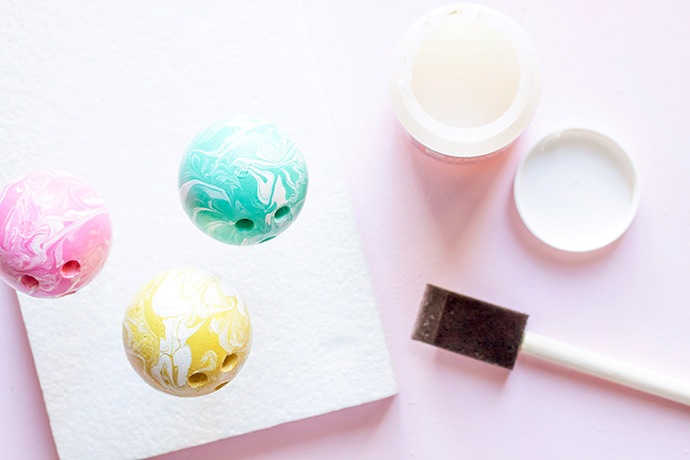
Once the paint is completely dry, spread a coat of Mod Podge Super Gloss-Brillant over the entire ball using your foam brush. This will give it a glossy finish. Stick it in your Styrofoam block to dry once again.
Step 5
Once the Mod Podge is completely dry, replace the toothpick with a fresh one, and stick it in a cupcake.

Happy crafting, and good luck bowling!