NOTE: This Part 10 of an 11 part series – Eva really went for it with this project! Here are the links to all the parts in the series: Part 1, Part 2, Part 3, Part 4, Part 5, Part 6, Part 7, Part 8, Part 9, Part 10, and Part 11.
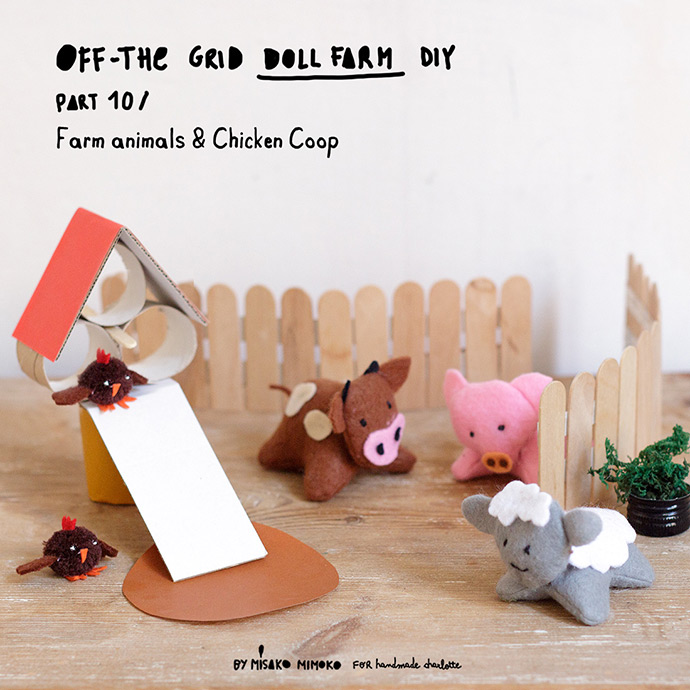
In today’s tutorial, we’ll be creating cute and simple farm animals! Grab some felt, yarn, pompoms, stuffing, toilet paper rolls, and empty cereal boxes and we can start making your favorite animals, a farm fence, and a cozy little hen house. You can make as many animals as you like and fill your farm with a herd of sheep, cattle, and pigs. Ready? Let’s craft!
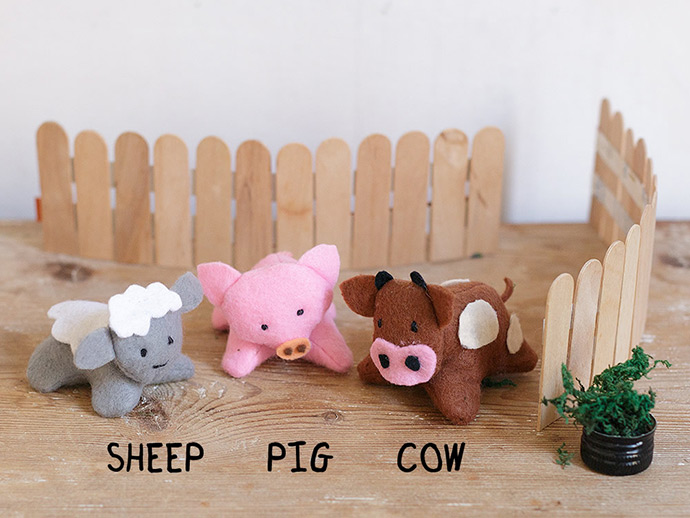
ANIMALS:
what you need:
- Felt
- Pink yarn
- Cotton batting
- Water-soluble fabric marker
- Fabric glue
- Scissors
- Pins
- Needle
- Thread (black and to match felt)
- Printable template
HOW-TO:
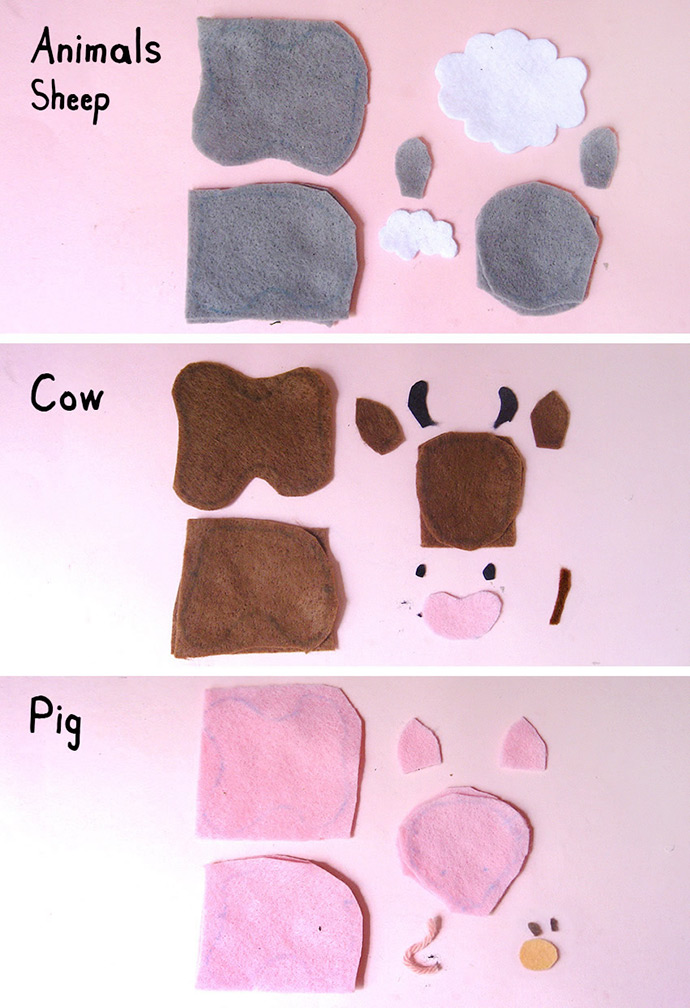
- Download, print, and cut out the paper patterns for the animal shapes. Use the marker to transfer the shapes onto felt and cut out. For each animal, make sure to cut 2 head pieces, 2 side body pieces, and 1 bottom body piece leaving a 3/8” of seam allowance around each piece you cut. You’ll also need to cut out 2 ears for each animal (no seam allowance required).
- For the sheep, cut out 1 wool body piece and 1 wool head piece from white felt.
- For the cow, cut out 2 horns, 2 nostrils, 1 nose piece, several spots, and a tiny strip of felt for the tail.
- For the pig, cut out 2 nostrils, 1 nose piece, and a short piece of pink yarn for the tail.
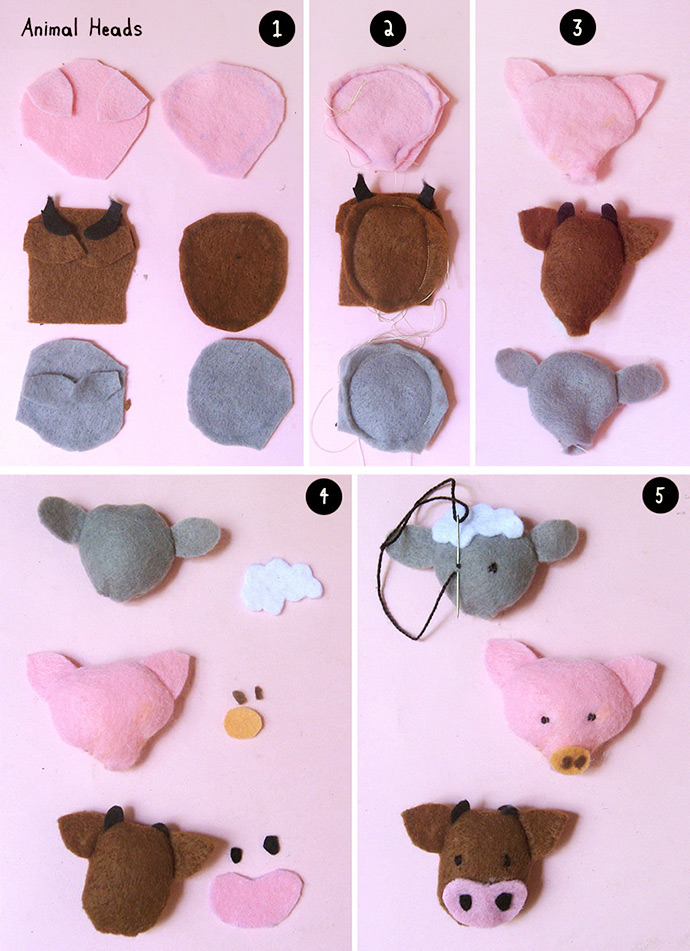
For the animal heads:
- Place the ears (and horns for cow) between the two head pieces of each animal and pin as shown.
- Stitch (by hand or machine) all around heads leaving an opening at the bottom edge of each.
- Turn the heads inside out.
- Stuff each with cotton batting and hand stitch the opening closed.
- Glue or stitch the nose and nostrils onto the heads. Use black thread to make tiny stitches for the eyes.
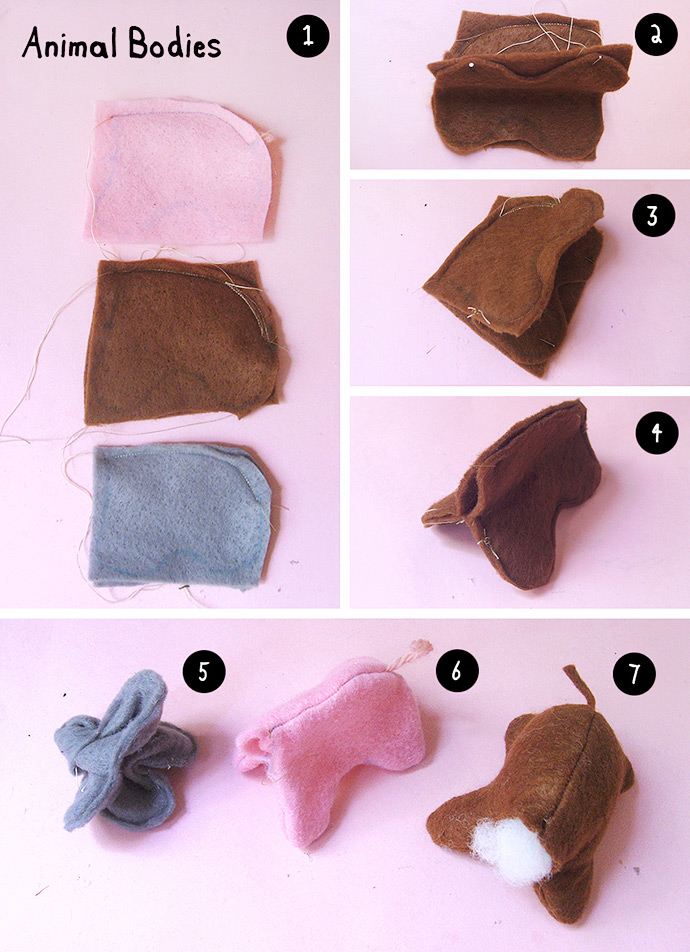
For the animal bodies
Step 1
Place the tails for pig and cow between the two side body pieces of each animal near the Y marking, as shown on the template, and then stitch the two side bodies together from X to Y.
Step 2, 3, and 4
Stitch the bottom piece to the inside of each side of the side-bodies piece, sewing around the underpart and the legs from Y to Z – you’ll also want to leave a gap in this seam at the front of the body for stuffing later (from Z to X).
Step 5 and 6
Turn the bodies inside out.
Step 7
Stuff with cotton batting and hand stitch the opening closed.
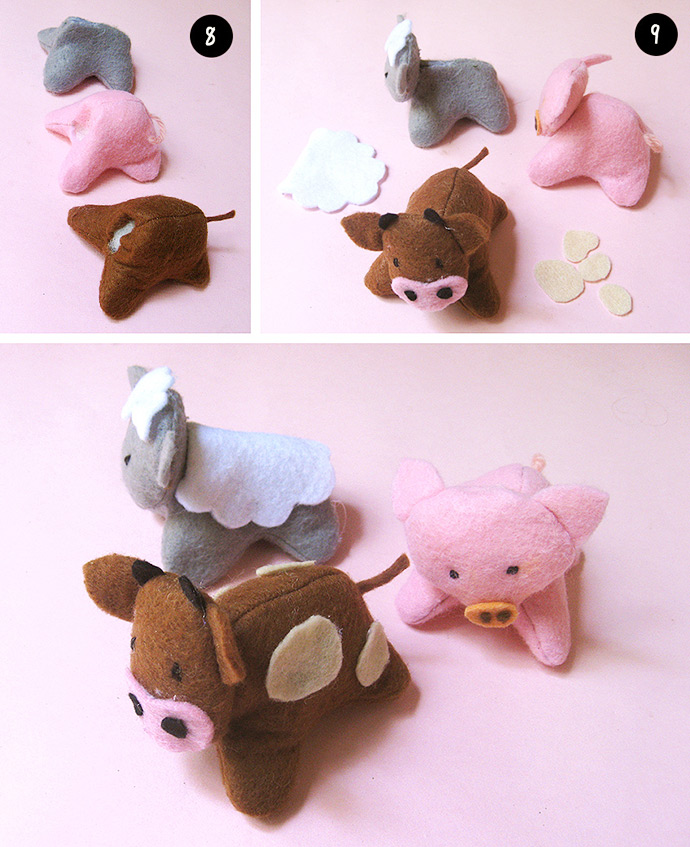
Step 8
Fold each body along center of bottom piece from the back to the front of body, bringing the legs closer together. Ladder stitch the felt together along this fold to help hold the legs in this position.
Step 9
Position the head and body as shown and sew them together. Stitch or glue the wool body piece centered on top of the sheep’s body. Lay out the spots all over the cow’s body and glue or stitch to secure.
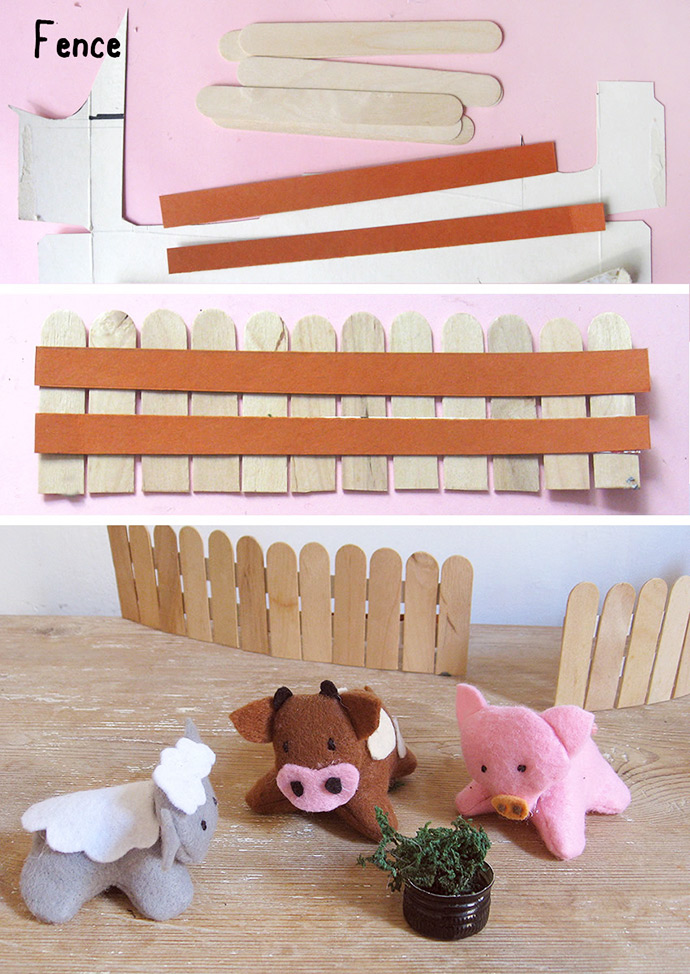
FENCE:
what you need:
- Jumbo popsicle sticks
- Pen
- Ruler
- Scissors
- Empty cereal box (or any cardboard)
HOW-TO:
Cut the jumbo popsicle sticks in half and cut out long cardboard strips at ½” wide. Lay down about 12 (or more!) popsicle stick halves with the bottoms lined up evenly and then glue two cardboard strips centered all along the sticks to attach them together. Let dry and then cut off any excess of cardboard. Gently curve the fences so that they can stand up on their own. As an added bonus, use an empty bottle cap filled with dried moss to feed your animals!
CHICKS:
what you need:
- Small pompoms
- Felt
- Fabric pen
- Scissors
- Glue
- White paint
- Toothpick
how-to:
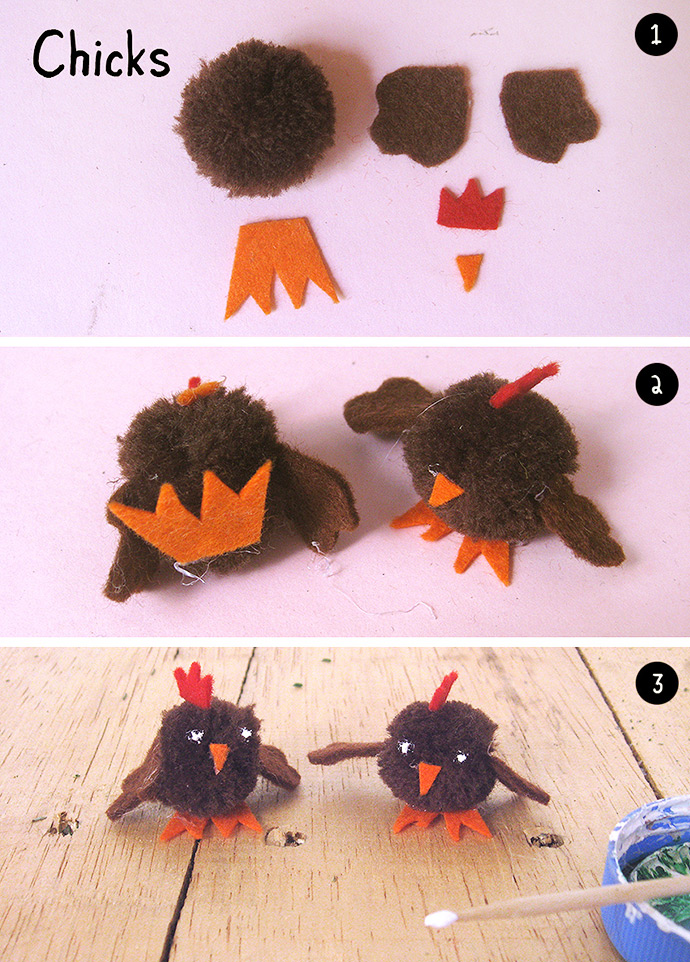
Step 1
Print and cut out the paper patterns for the chick shapes. Use a pen to transfer these paper shapes onto felt and cut out 2 wing pieces, 1 comb, 1 beak, and 1 leg piece for each of the chicks.
Step 2
Take one pompom and glue the leg pieces to the bottom of it, and then glue one wing to each side of the pompom. Add the comb on top of the pompom and center the beak at the front.
Step 3
Paint one eyes using a toothpick and a tiny drop of white paint.
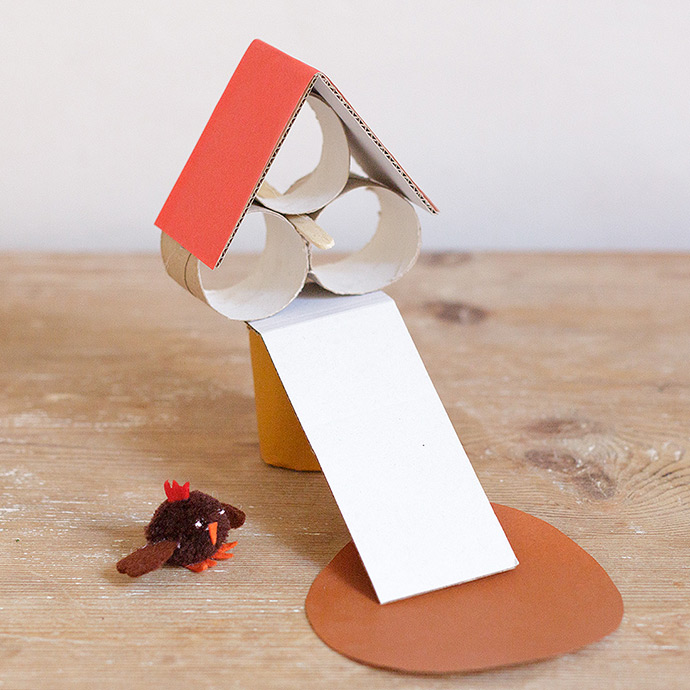
CHICKEN COOP:
what you need:
- Toilet paper rolls
- Empty cereal box
- Colored paper
- Mini popsicle sticks
- Pen
- Ruler
- Scissors
- Hot glue gun
how-to:
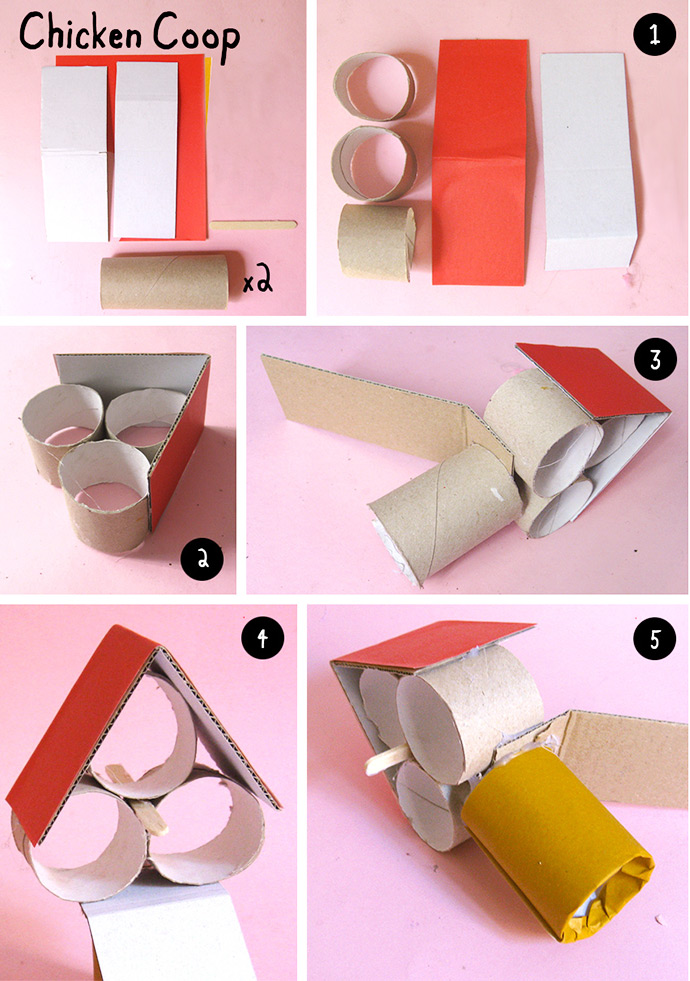
Step 1
Cut two pieces of cardboard into 2″ by 5 1/2″ rectangles. Cover one with red paper and glue, or paint red, and then fold in half. Take the other rectangle and fold at 1 3/8” from the top edge. Cut one of the toilet paper rolls into three equal slices.
Step 2
Arrange the three paper roll slices into a triangle shape and glue them together. Glue the folded red rectangle on top of the triangle to make a roof.
Step 3
Position the other cardboard rectangle at the bottom of the triangle, centering the top folded edge and then gluing in place. Cut a 5 1/2” slice off of another paper roll and glue it to the bottom of the chicken coop.
Step 4
Apply some glue onto the center of a mini popsicle stick and insert it into the center of the triangle, through the space between paper roll slices. This will be a perch for the chickens!
Step 5
Wrap the bottom paper roll with colored paper or paint.
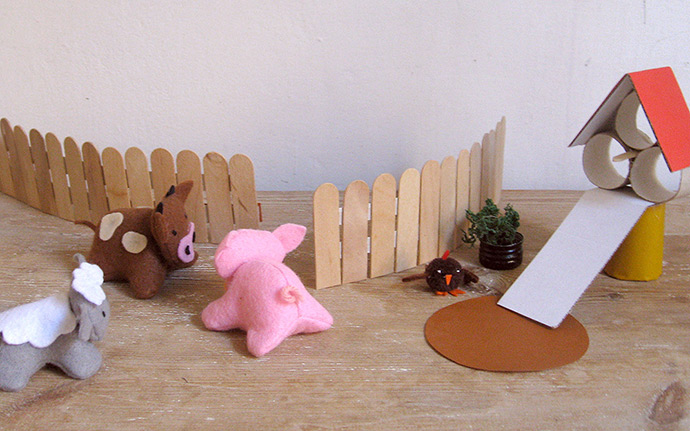
To finish the chicken coop, add a 4” circle of brown paper at the bottom of the ramp and it’s now ready for chicks to live in! Set up the fence, the chicken coop, and all your new friends and start having fun with your new farm.
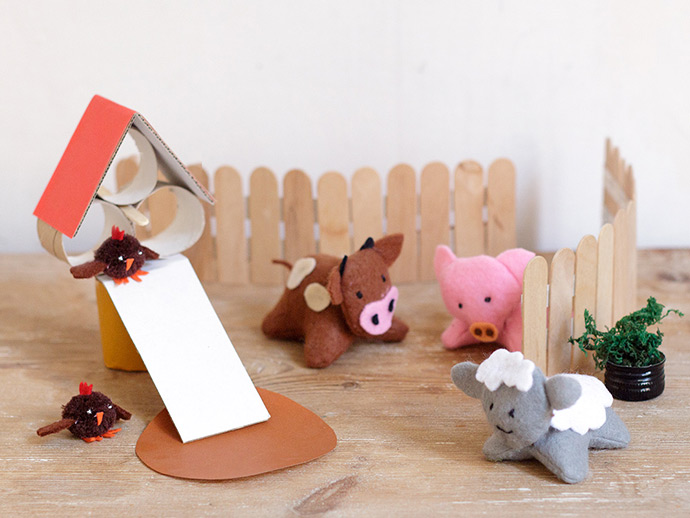
Happy crafting!