NOTE: This Part 8 of an 11 part series – Eva really went for it with this project! Here are the links to all the parts in the series: Part 1, Part 2, Part 3, Part 4, Part 5, Part 6, Part 7, Part 8, Part 9, Part 10, and Part 11.
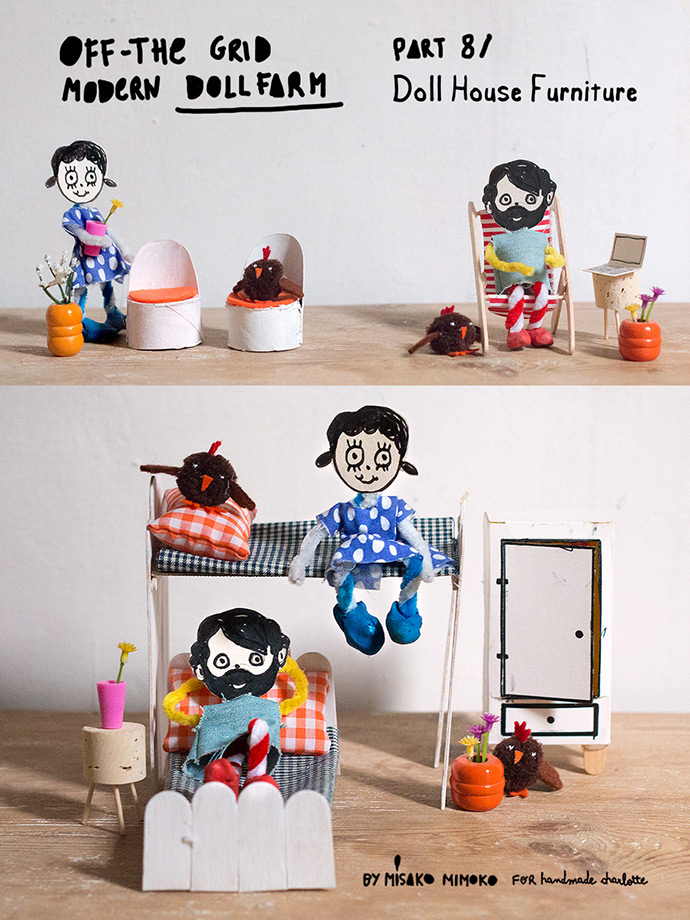
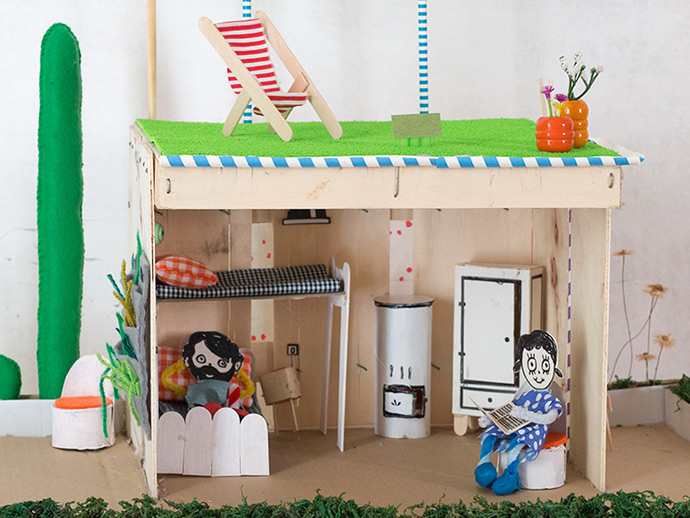
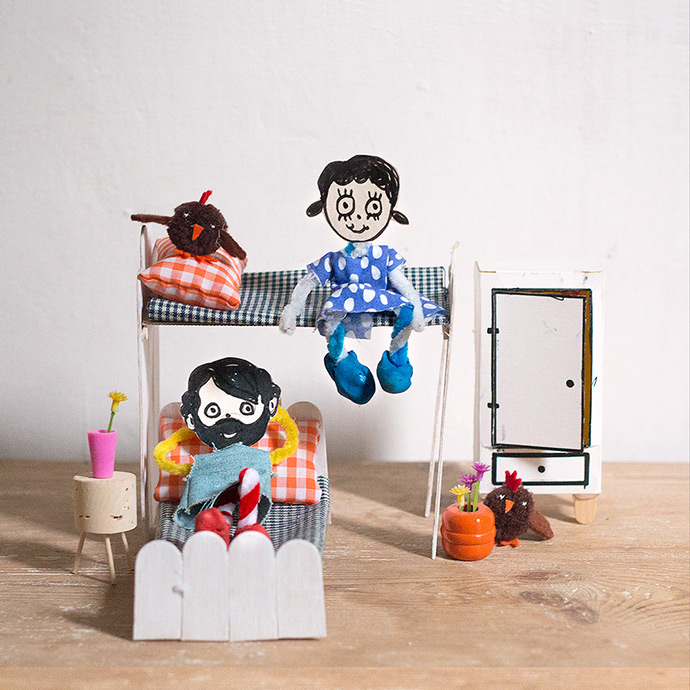
Today we’ll be tackling part eight of our off-the-grid dollhouse series and crafting some furniture and wall decor for the dollhouse. Not only is this dollhouse self-sufficient but it’s also going to be cozy! That means a comfy bunkbed for the bedroom and lounge chairs to relax on the terrace! Don’t forget to use recycled or eco-friendly materials as much as possible when making your dollhouse. Let’s get crafting!
what you need:
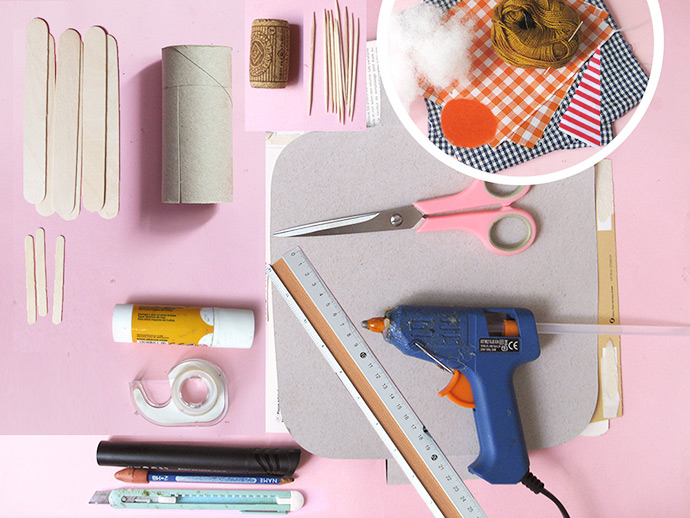
- Popsicle sticks (small and large)
- Toilet paper rolls
- Felt
- Fabric scraps
- Stuffing
- Needle
- Thread
- Empty cereal boxes (and other small empty boxes)
- Markers
- Paint
- Paintbrushes
- Hot glue gun (or white glue or tape)
- Scissors
- Craft knife
- Ruler
- Printable templates
- Cork
- Wooden toothpicks
how-to:
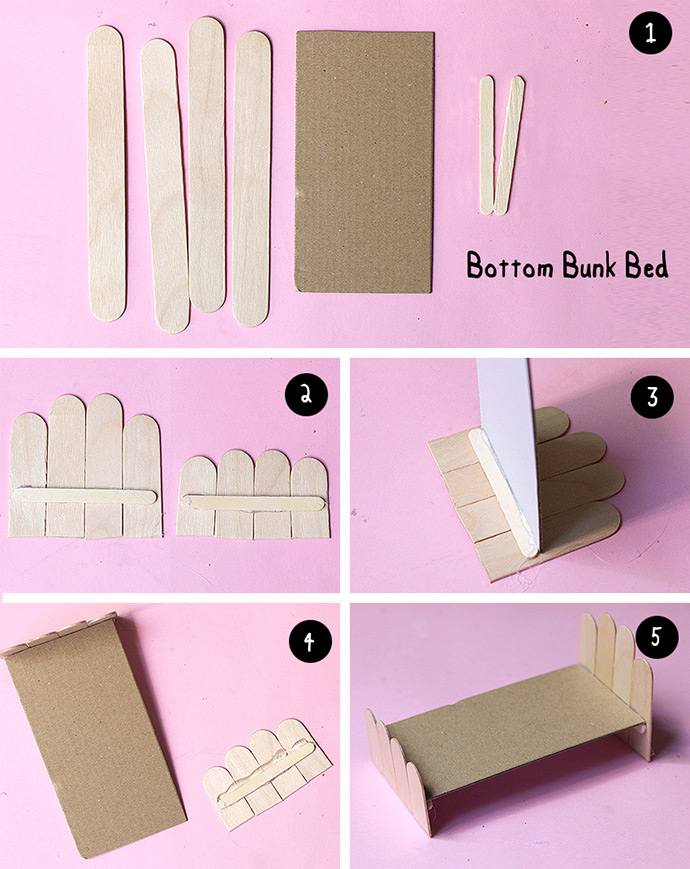
Bottom Bunk Bed
- For the bottom bed, start by gathering 4 large and 2 mini popsicle sticks (for the bed posts) and cut a piece of card stock into a 2 ¾” by 5″ (7cm by 13cm) rectangle.
- Cut 2 large popsicle sticks into 2 3/4″ (7cm) pieces for the headboard, keep the cut-off pieces for the footboard. Take 2 more large popsicle sticks for the headboard and cut them into 2 1/2″ (6cm) pieces, again keeping the cut-offs for the footboard. Line up the cut edges of the popsicle sticks, leaving the rounded ends as the top of the scalloped headboard and footboard. For each end of the bed, glue one mini popsicle stick across the lined-up popsicle sticks, 1″ up from the cut edge bottom.
- Attach the cardboard rectangle onto the headboard by gluing it along the top edge of the mini popsicle.
- Do the same for the footboard and the other end of the cardboard rectangle.
- Before the glue dries completely, make sure the bed is sitting squarely and then set to the side to let dry.
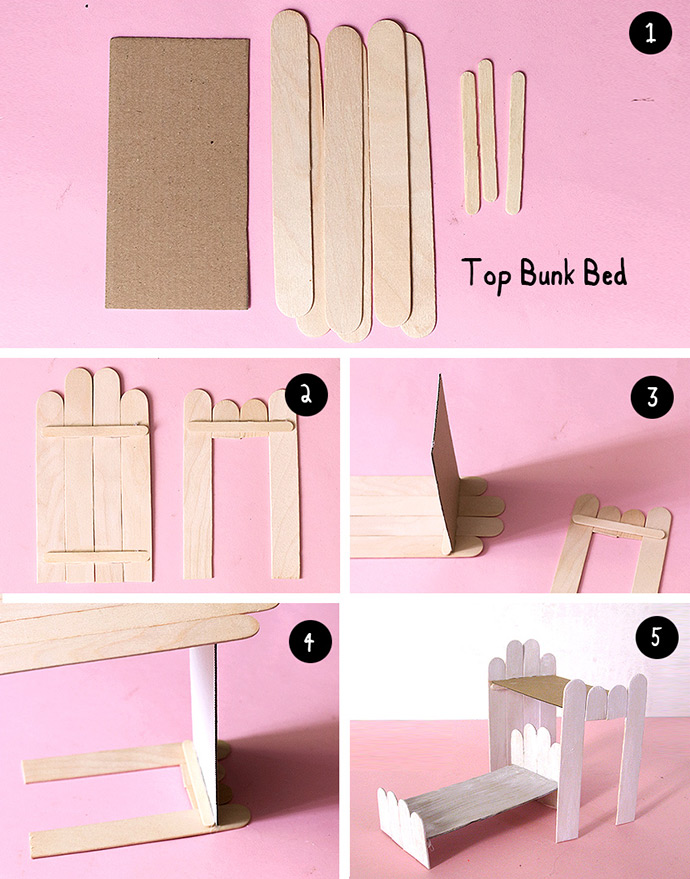
Top Bunk Bed
- For the top bed, gather 6 large and 2 mini popsicle sticks for the bed ends. Also, cut a piece of cardstock into a 2 ¾” by 5″ (7x13cm) rectangle.
- Take 2 large popsicle sticks and cut off one of the rounded ends so that you have pieces 5 1/2″ (14cm) long for the headboard. Take 4 more large popsicle sticks and cut them into 5″ (12.5cm) pieces. Two of these pieces are for the headboard and the other two will be for the footboard. Add the two cut-off pieces for the footboard as shown. Line up the cut bottoms leaving so that the rounded ends of the popsicle sticks form the top of the scalloped headboard and footboard. For each bed end, glue one mini popsicle stick horizontally across the lined up large popsicle sticks, 3 ¾” (9.5cm) up from the cut bottom.
- Attach the cardboard to the headboard by gluing it to the top edge of the mini popsicle.
- In the same way, glue the footboard to the other end of the cardboard.
- Line up the bed ends and make sure the bed is square before the glue dries. Let the glue dry and then paint the bunk bed in white, or any other color you like.
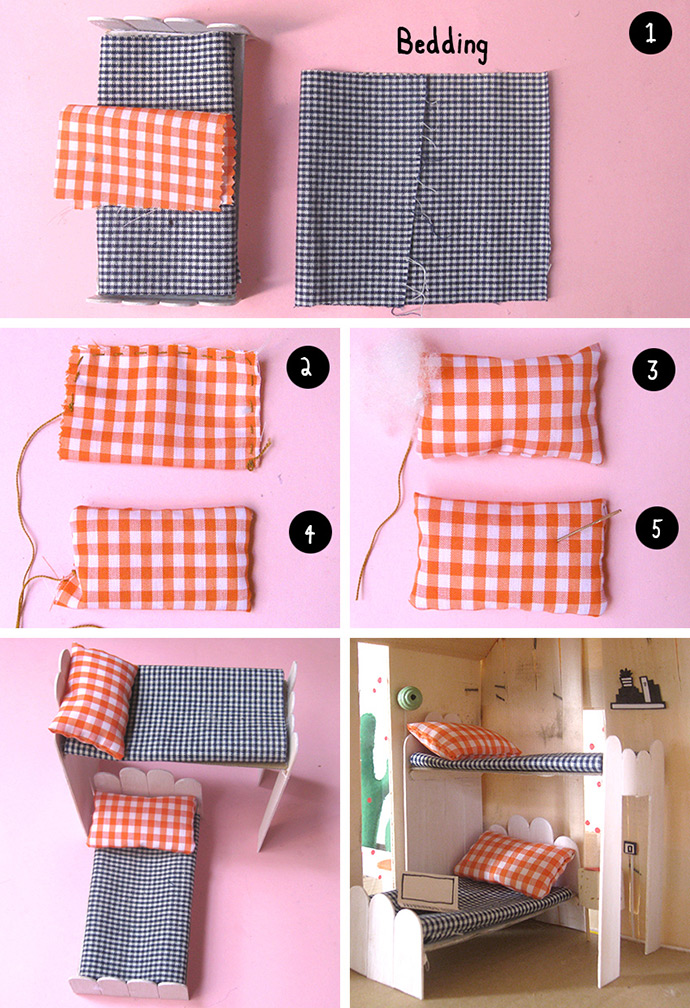
Bedding
- Gather two fabric scraps about 5” by 8” each (13cm x 21cm) and fold each one in three (like putting a letter into an envelope) to make the bed sheets. Make pillow cases from a patterned fabric by cutting two 3” by 3 ¾ (7.5cm x 9.5cm) rectangles.
- Fold each piece of patterned fabric in half, with the wrong sides together, and sew all along the border using a running stitch, leaving an opening on one end.
- Turn the pillow case inside out.
- Fill with stuffing.
- Stitch the opening closed. Now you can set up bunk beds with their brand new folded sheets and pillows.
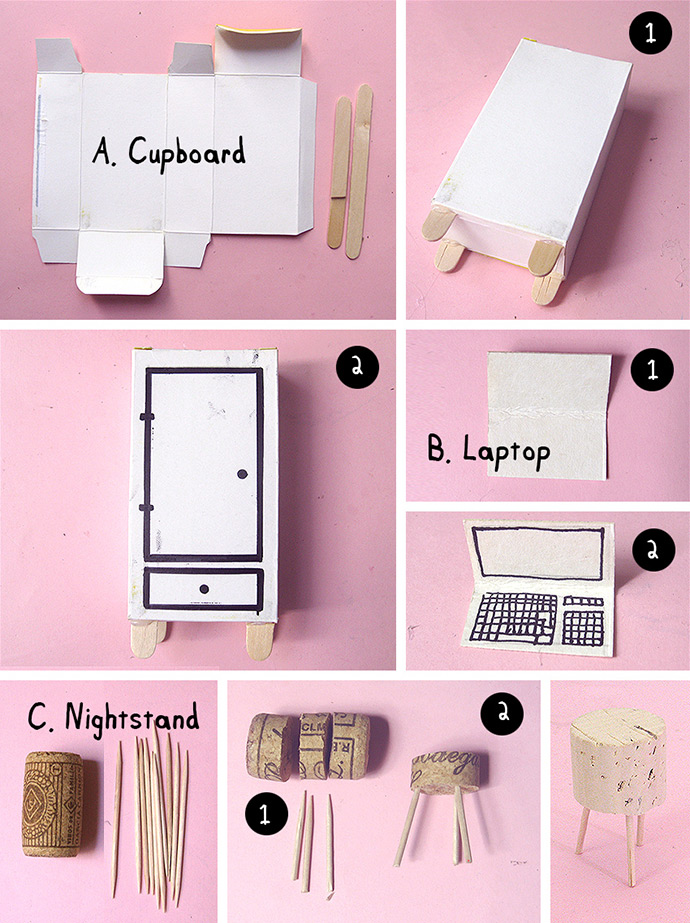
Cupboard
- Disassemble an empty chocolate or butter box that measures about 2″ by 4″ by 1″ (5.5cm x 10cm x 3cm) and gather two medium popsicle sticks.
- Assemble and glue the box with blank sides out. Cut the round ends off of popsicle sticks so that you have 4 pieces about 3/4″ long and glue them onto the bottom of the box.
- Using a thick marker, draw a door and drawer on the front of the box, or download and print the cupboard template and cut it out and glue onto the box.
Laptop
- Cut a piece of cardstock into a 1 1/4″ by 1 1/2″ (3.3cm x 3.7cm) rectangle.
- Download and print the laptop templates, cut out the laptop shape and glue it to the cardstock rectangle, folding it down the middle.
Nightstand
- We’ll be making this simple nightstand the same way we made kitchen stools previously, but with a bigger cork. Gather some wooden toothpicks and a bottle cork. Cut the cork into a piece almost 1” long (2 cm) and cut the toothpicks into halves.
- Poke three pieces of toothpick into the bottom of the cork slice. Adjust the toothpicks positions to balance the nightstand. Paint it white, or any other color you like.
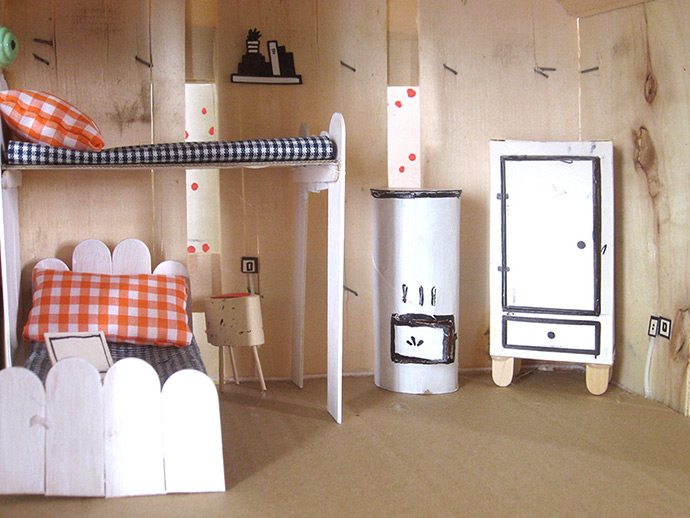
Decorate the room! Set up and lay out the bunk beds, nightstand and cupboard in the bedroom.
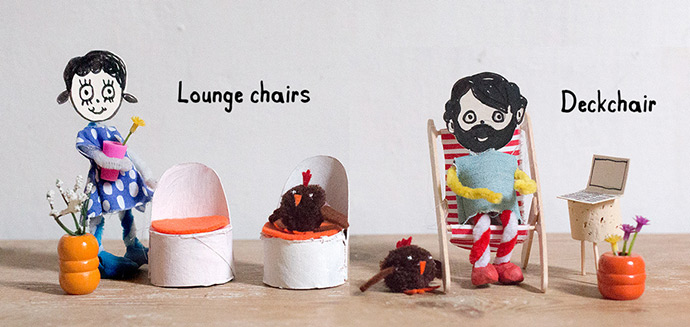
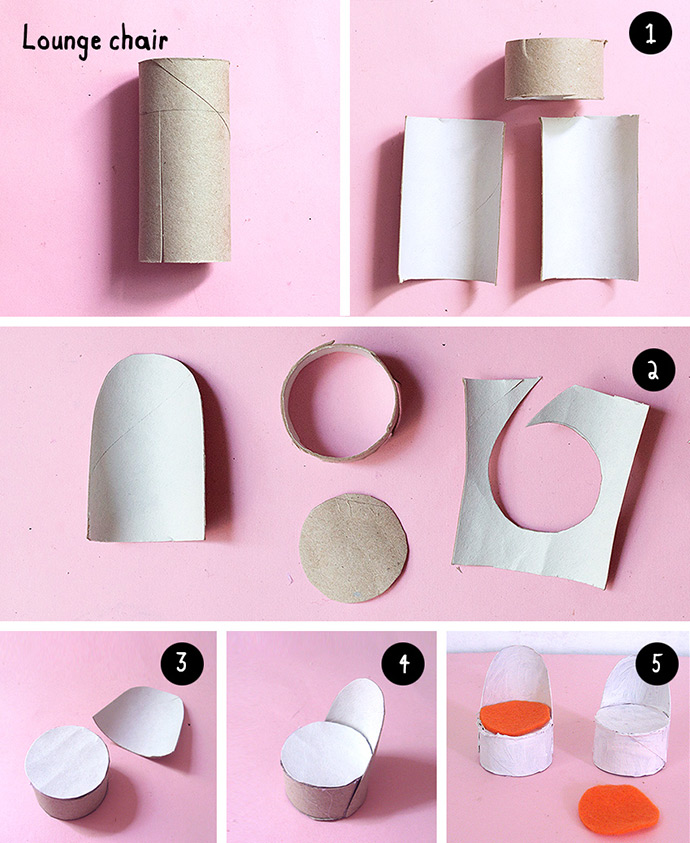
Lounge Chairs
- Take a toilet paper roll and cut off a slice about 1″ (2.5 cm) and then cut the rest of the paper roll in half.
- On one of the halves, draw and cut out a circle (using another toilet paper roll slice as a template). On the other half, cut the top edge into a rounded shape.
- Glue the circle piece on top of the 1″ tall toilet paper roll.
- Place the rounded half as a back rest of the chair, and modify the length if needed. Glue it around the sliced seat piece, let dry, and paint the chair in white.
- Again using a toilet paper roll as a template, cut out a felt circle for each chair. Put them on top of the seats of your new lounge chairs!
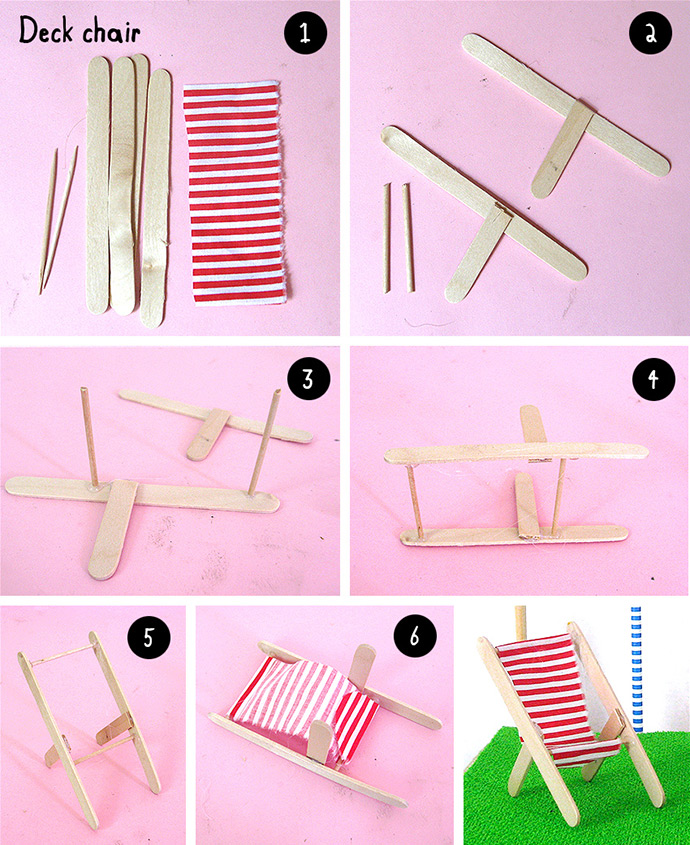
Deck Chair
- Take two toothpicks, three medium popsicle sticks and cut a piece of fabric into a 1.57” by 4.33”(4 x 11 cm) rectangle.
- On two popsicles, put a pencil tick at the 1.77” (4 cm) mark. Then cut the third popsicle stick in half. Attach one of each of the halves to the uncut popsicle sticks at the marks you made, keeping a right angle.
- Cut toothpicks sharpen ends. Lay down one popsicle stick with the junction up. Put a pencil tick at 0.4” (1cm) from top of each long stick and another tick 1” below junction. Glue toothpicks at the marks you made, keeping again a right angle.
- Glue the other popsicle stick frame, with the junction down and centered on top.
- Stand up the chair structure and check stability.
- Let’s add the sling! Fold and glue one end of fabric piece to the top toothpick. Lay down deckchair and fold the other end of the fabric to the bottom toothpick.
- That’s it! You can place it on the green roof and enjoy the view!
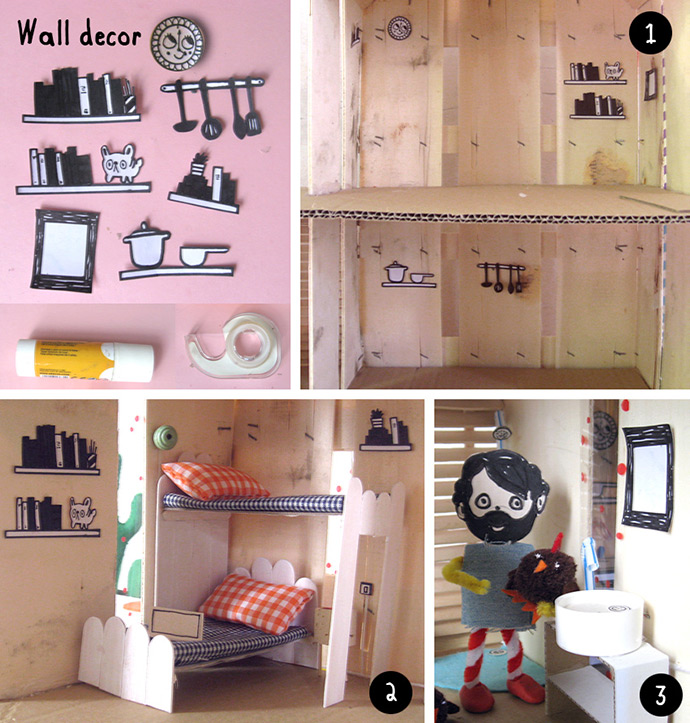

Wall Decor
Time to decorate the walls of our dollhouse with cute stuff! You can draw shelves, clocks, framed pictures, mirrors … whatever you like onto plain paper. You can also make cool collages to decorate too, but if you want a super easy option simply download and print the wall décor templates included above. Cut them out and glue them on, or use some colored tape to decorate your dollhouse walls.
- Stick your wall decor onto the empty rooms’ walls or combine them with your cute furniture.
- Distribute bookshelves on bedroom walls.
- Add a mirror into the bathroom.
- Place a clock, cookware shelves, and rack on the kitchen walls. Ta da! The dollhouse interior decoration is already finished!
In the next chapter we’ll learn how to make an amazing orchard and kitchen garden!
Happy crafting!