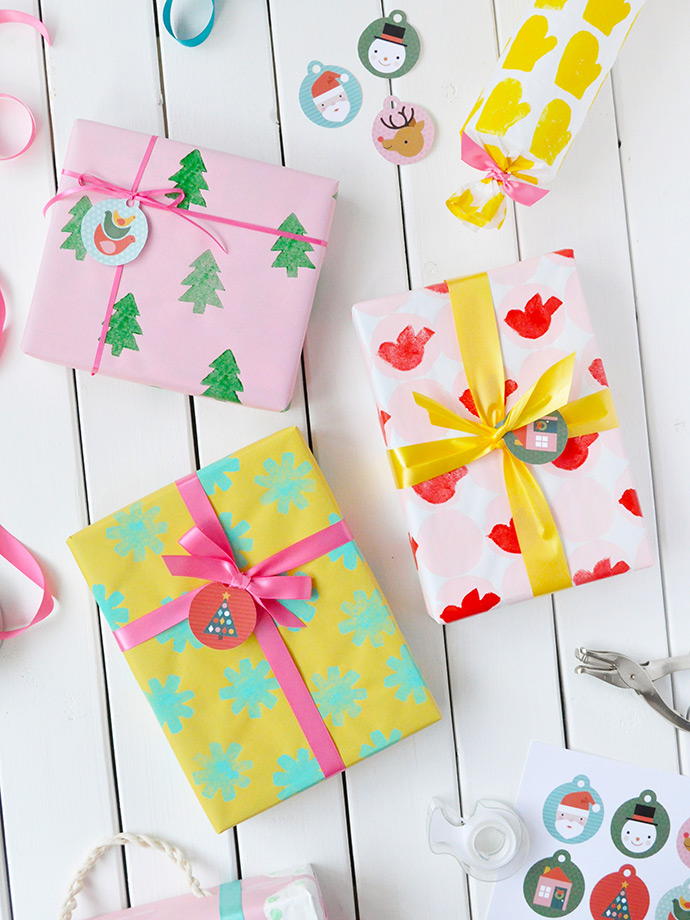
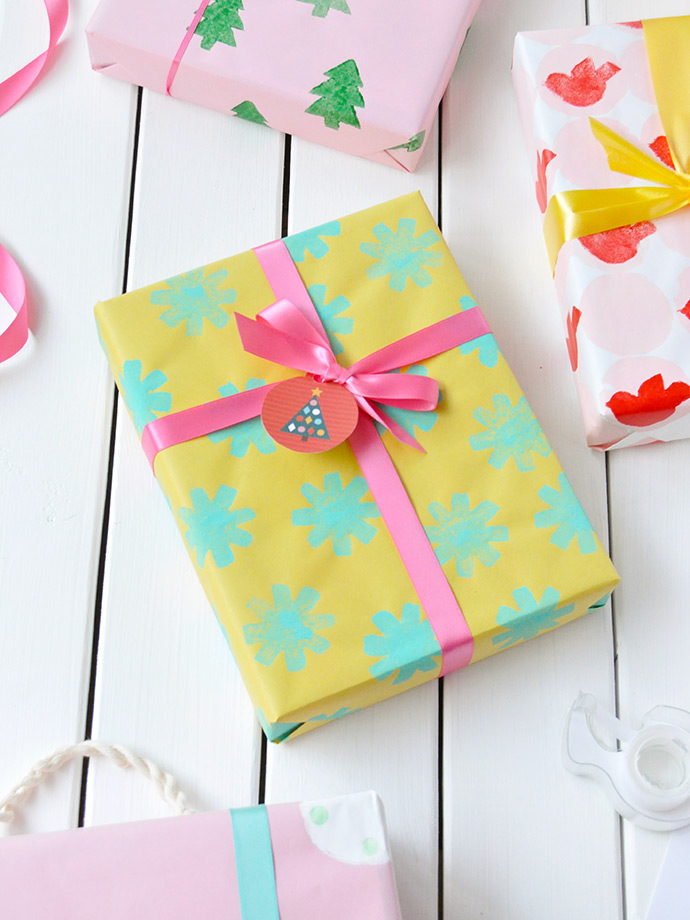
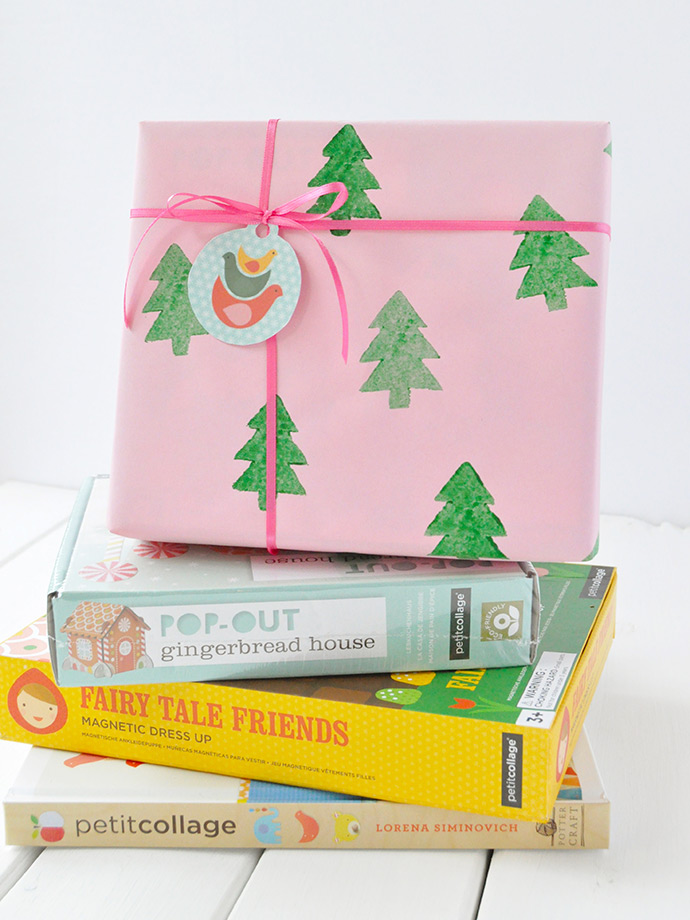
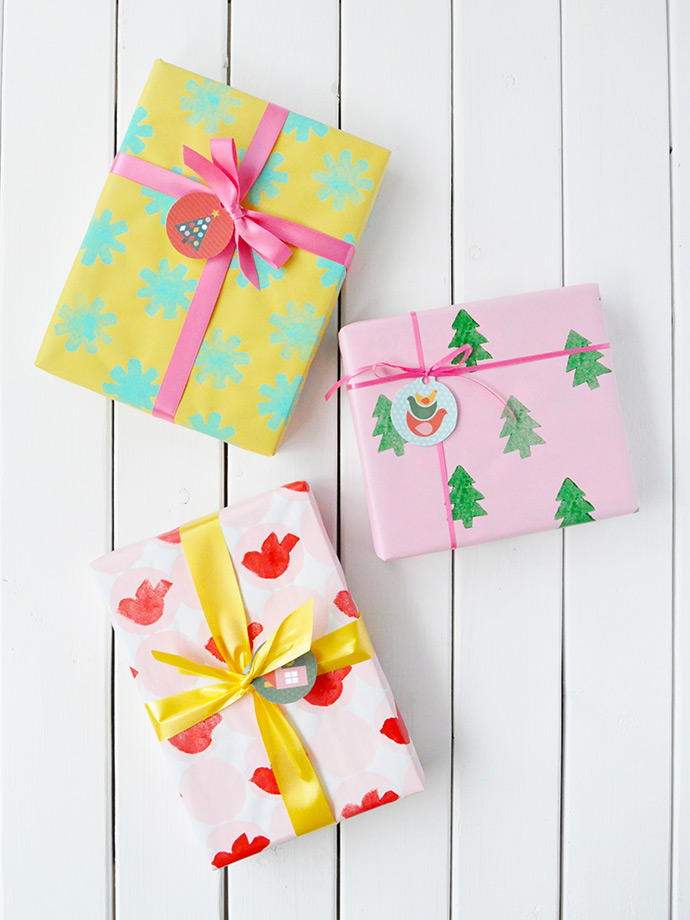
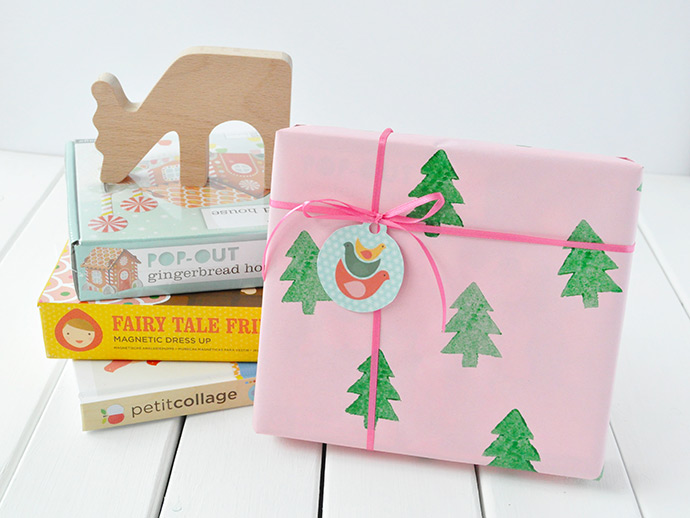
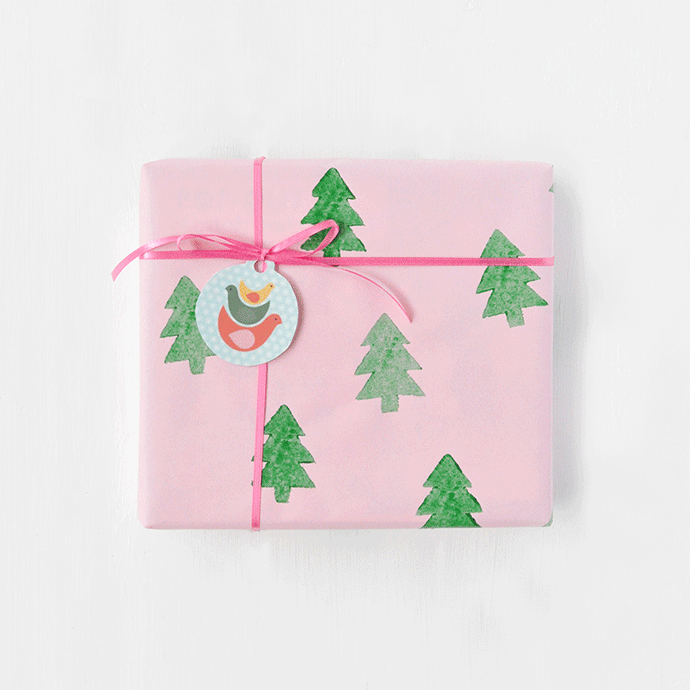
Have you ever made your own wrapping paper before? It’s a really simple way to add a completely custom touch to your Christmas gifts this year! Today we’re sharing three ways to use potato stamps to craft your own gift wrap. We were inspired by the adorable designs and toys from Petit Collage – it was so fun to wrap the toys and puzzles with paper that matches them perfectly!
We are big fans of Petit Collage – not only are their products beautifully designed, they also have a huge focus on sustainability. These are toys you can give and feel great about! In case you missed it last week, we shared a few of our favorite gifts from Petit Collage.
Keep reading to learn all about potato stamping, three different techniques we used, and to download the adorable printable gift tags!
what you need:
- Solid-colored wrapping paper
- Potatoes
- Cutting board
- Craft knife and/or kitchen knife
- Paper towel
- Acrylic paint
- Paintbrush
- Paper plate
- Tape (clear and washi)
- Cardboard scraps
- Ribbon
- Scissors
- Permanent marker
- Printable potato stamp templates
- Printable gift tags
how-to:
Potato Stamping 101Time to learn the basics of making homemade stamps out of potatoes!
Step 1
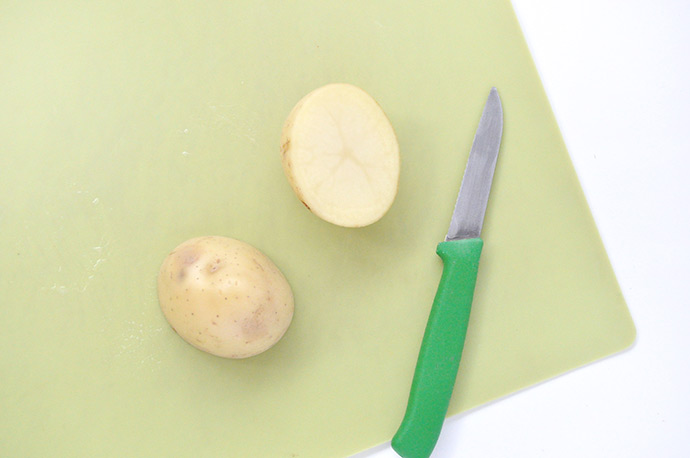
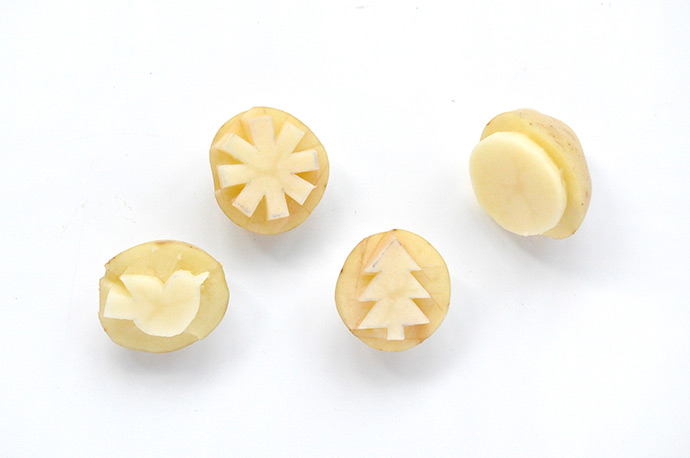
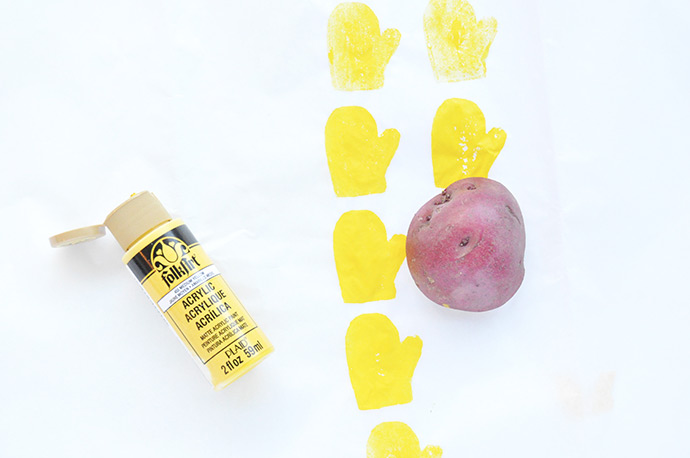
Select a potato that is the same size or bigger than the provided potato templates, cut in half, and dry each cut half with paper towel.
Step 2
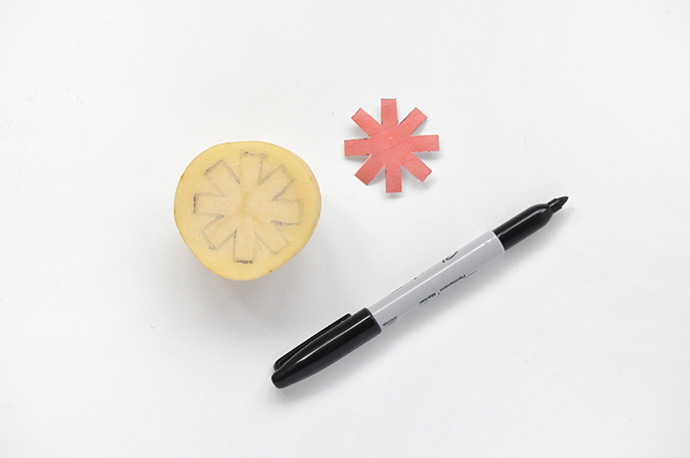
Print and cut out the templates and trace onto the potato.
Step 3
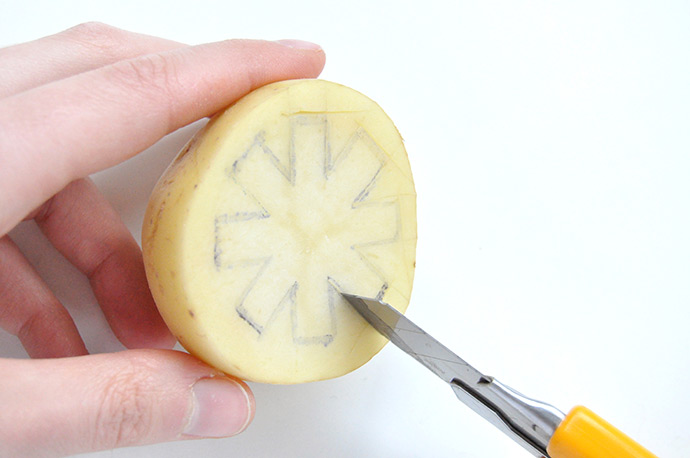
Use a craft or kitchen knife to carefully cut along the marker lines, about ½” deep.
Step 4
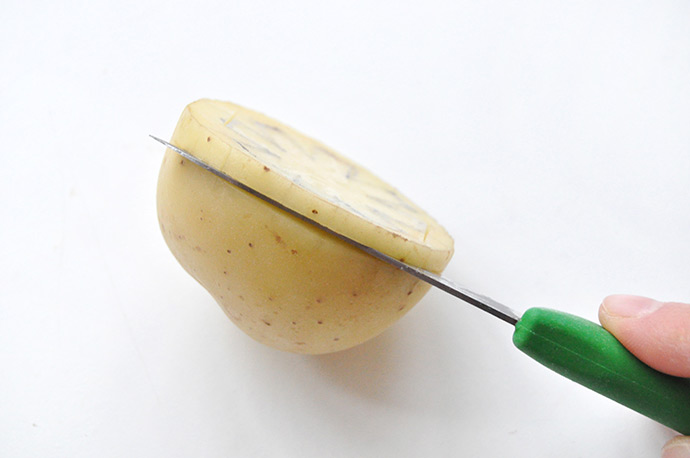
Then cut along the outside edge of the potato about ½” deep. Don’t cut all the way through the potato, but just until the spot where the marker lines start.
Step 5
Pull the excess potato away and you’ll have a stamp! Repeat with as many designs as necessary but keep in mind the stamps only last a few hours, so it’s best to cut them as you need them.
Step 6
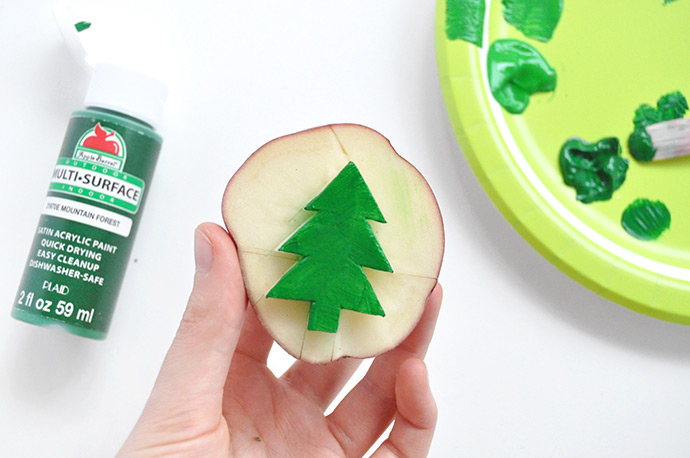
Apply paint onto the stamp with a brush, testing and dabbing off the excess on a paper plate or scrap of paper. Do a few practice stamps to get the feel of how much paint to apply, how hard to press, etc.
Step 7
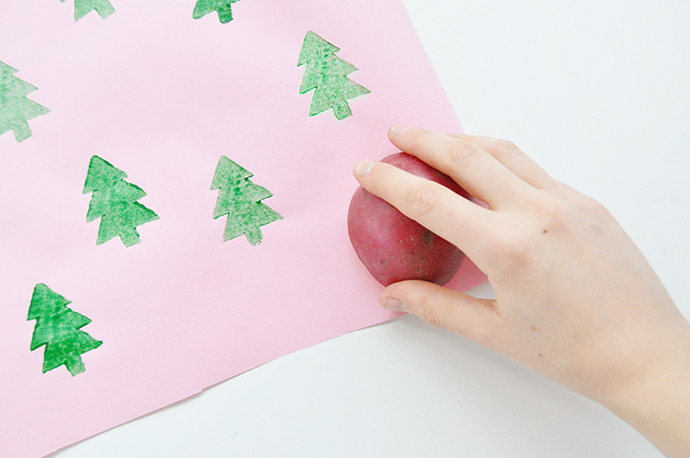
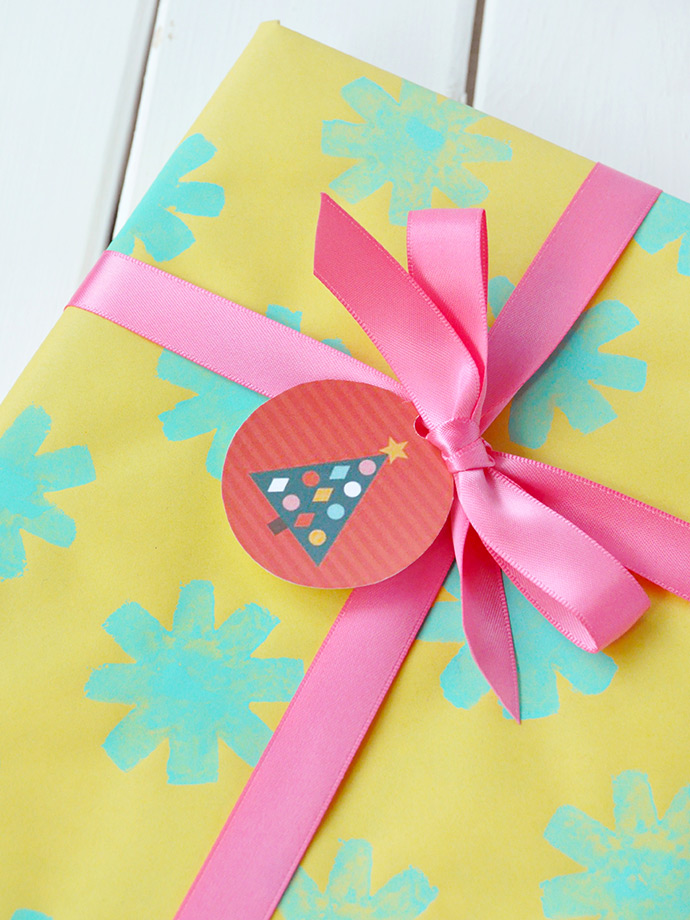
Stamp your design all over your wrapping paper. If you already have a specific box to wrap, you can precut the paper to fit that box, or you can just stamp a large amount of paper now and cut it down later. Let dry and repeat with other stamps and colored paper.
Step 8
Cut the paper to fit your present and wrap normally. Top with colored ribbon and the printable tags provided.
Embrace the shape

Step 1
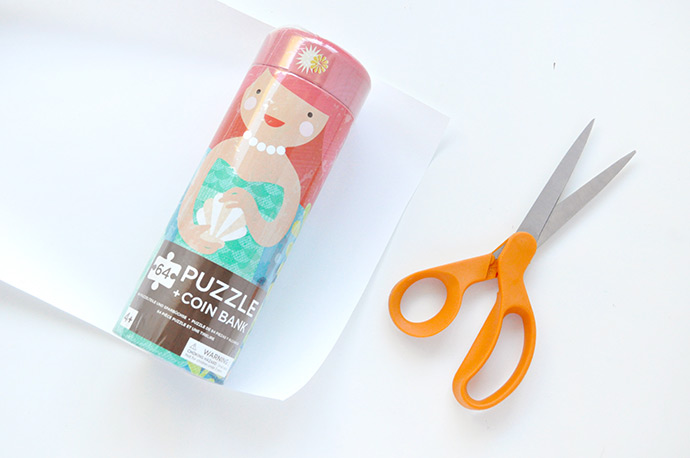
For the round tin: We decided the best way to wrap this was with potato stamped tissue paper. Since tissue paper will be a bit see-through, we started by wrapping the puzzle tin with plain white paper.
Step 2
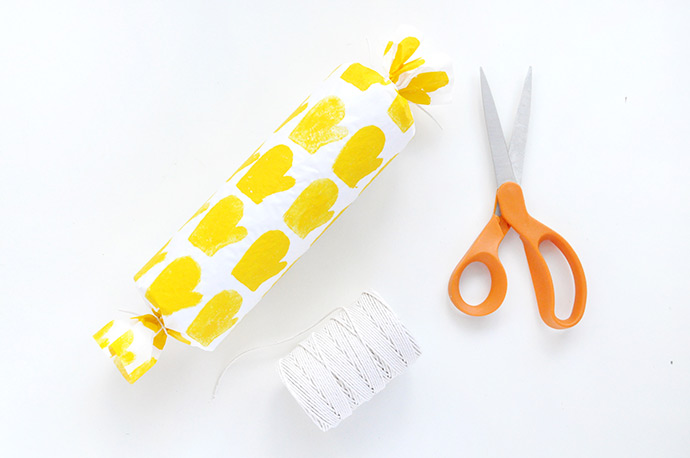
Next we did the same process as above for carving and stamping our design on the tissue paper. When stamping on tissue paper though, the paint may soak through a bit so make sure to protect your work surface with scrap paper or a plastic tablecloth.
Step 3
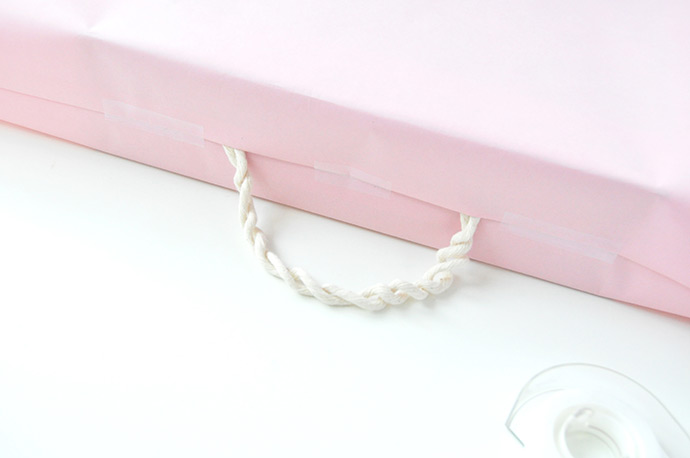
Let dry and then roll the tissue paper around the tin and tape to secure. Carefully cinch the ends and tie with string or ribbon. Voila! (If your gift is a shape that isn’t easily wrapped in paper, you can instead use the stamped tissue paper along with a gift bag to make life even easier.)
Step 1
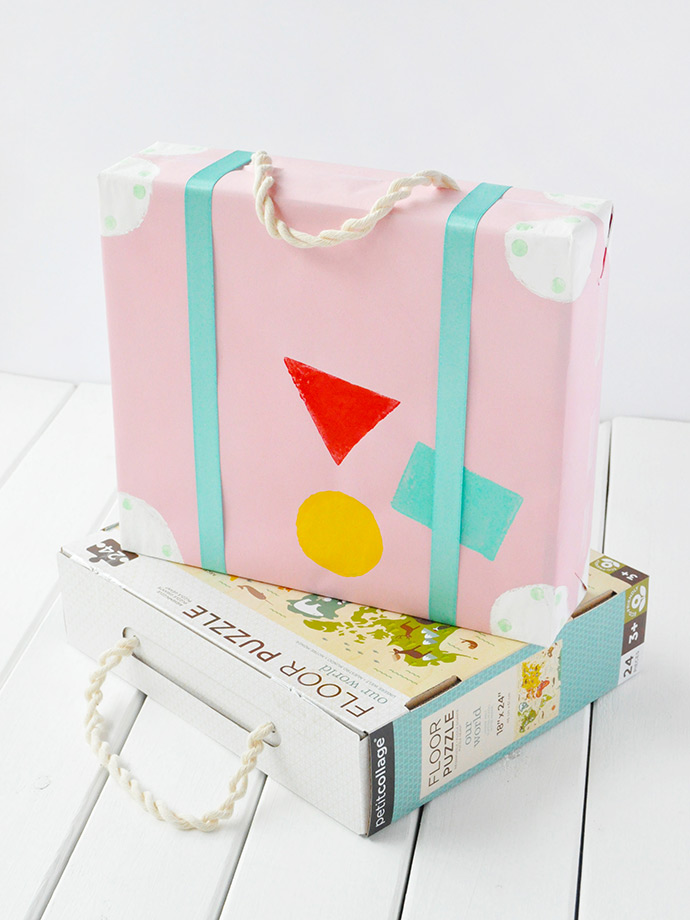
For the suitcase: The giant floor puzzle that we wrapped here has a rope handle on the top. Instead of covering it up, we used the box’s shape to inspire the wrapping paper design: a suitcase! Start by wrapping the box with solid colored wrapping paper, but instead of putting the seam along the back of the gift like you normally would, shift the seam up to the top so that the rope handle sticks out.
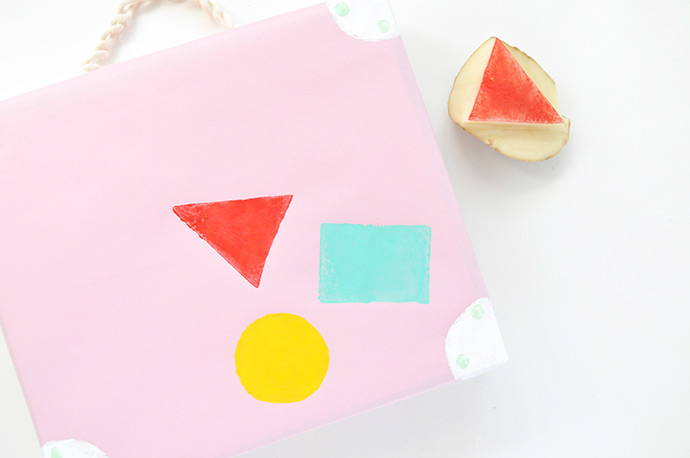
Step 2
Next you can have fun with potato stamping! We carved basic geometric shapes to make stamps for the covered corners and suitcase “stickers”. Let dry completely and then tape ribbon around the suitcase to look like strapping.
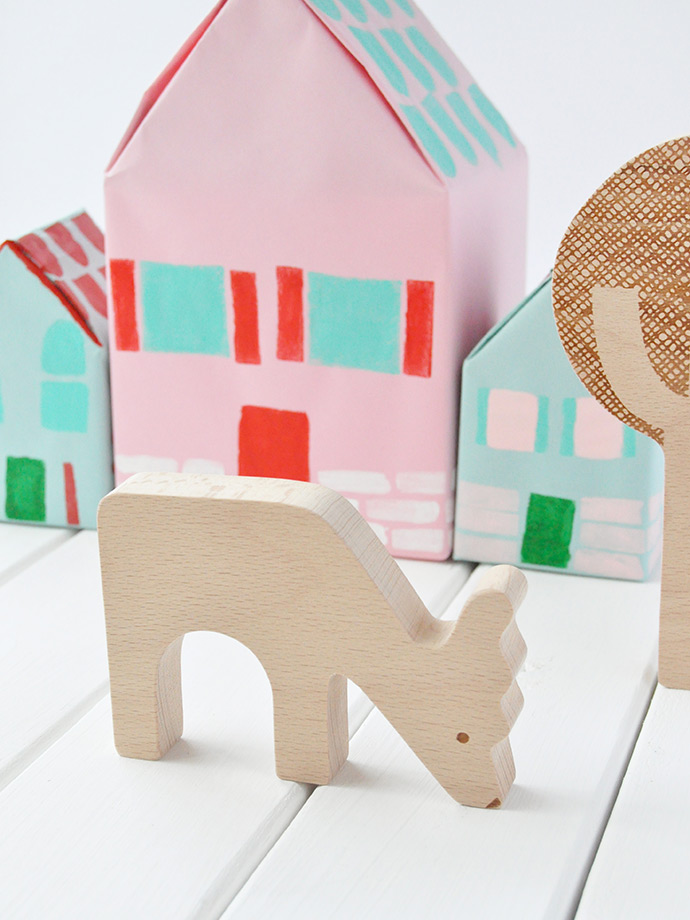
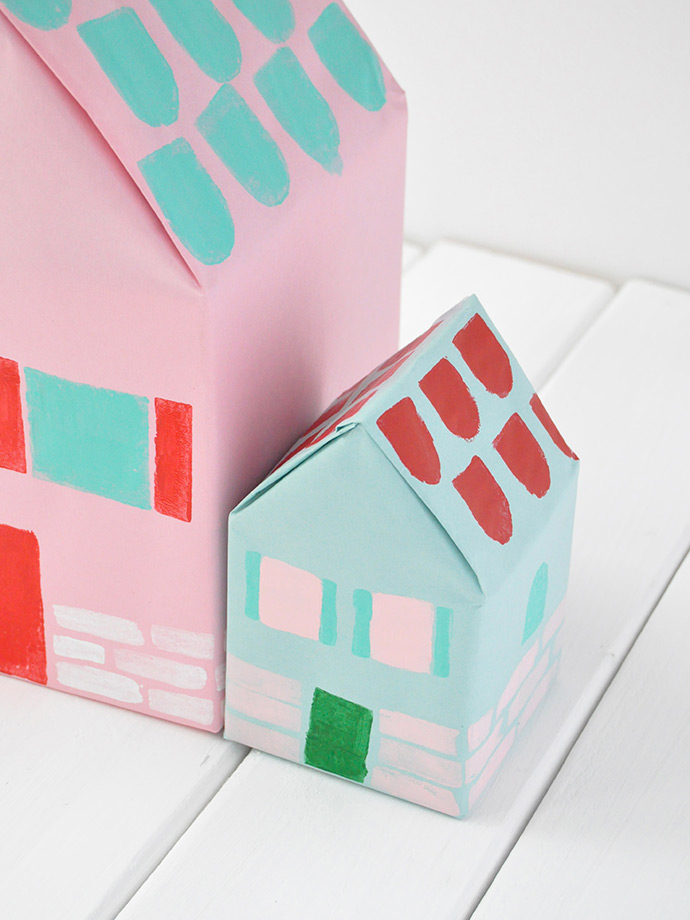
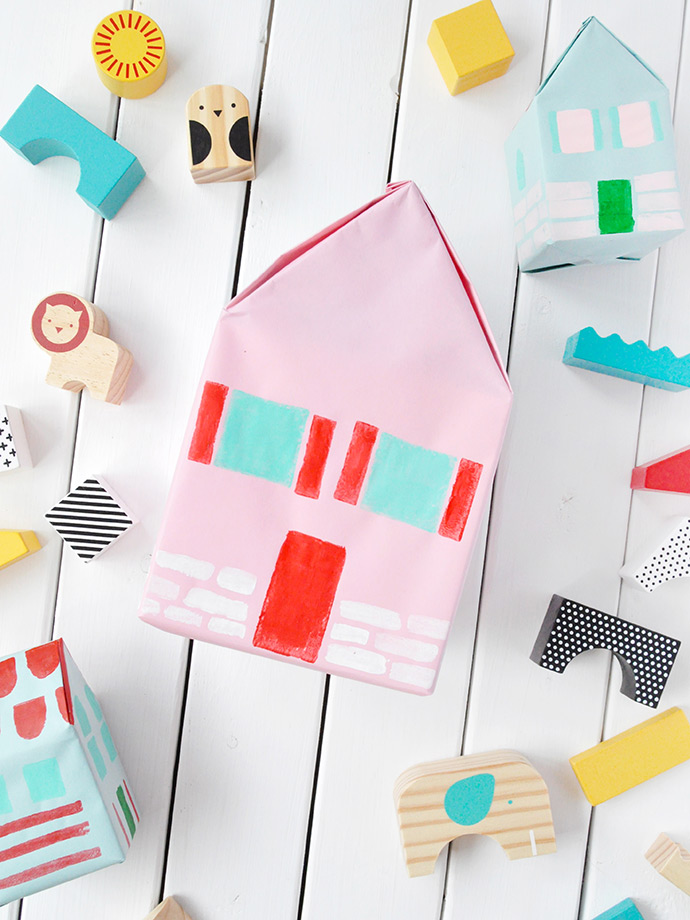
stamped christmas village
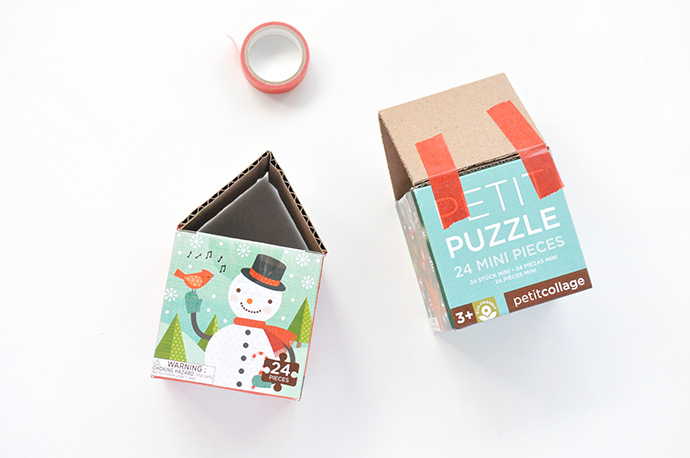
Another way to use potato stamps is to make your own colorful Christmas village! Almost any shaped box will work for this, but we used mini puzzles and nesting blocks from Petit Collage that come in cube-shaped boxes.
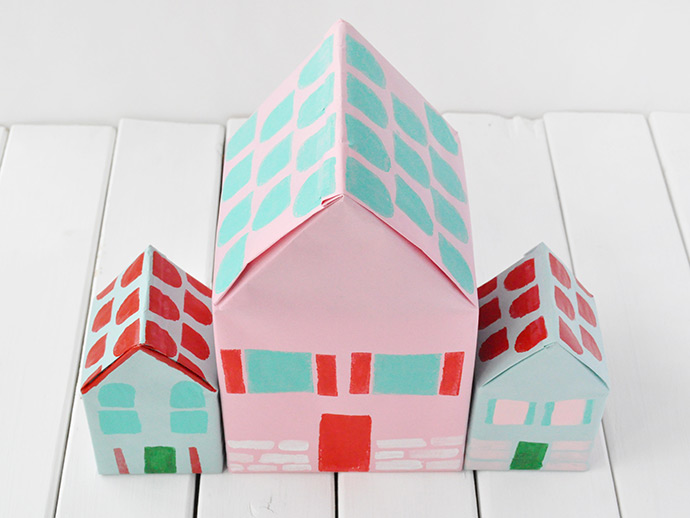
Step 1
Start by cutting and folding a piece of cardboard to sit as a little triangle roof atop the gift. Use washi tape to attach so that it can be removed from the gift without any peeling/damage.
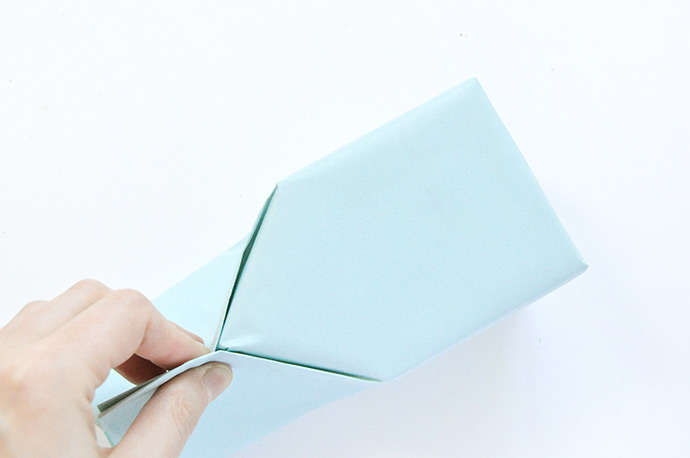
Step 2
Wrap the gift with solid-colored wrapping paper as you normally would on the bottom of the house, centering the paper seam on the back of the house, not the side. To wrap the roof, pinch and fold the paper on the front so that the excess paper is folded inside alond the sides of the roof – it will kind of look like a milk carton.
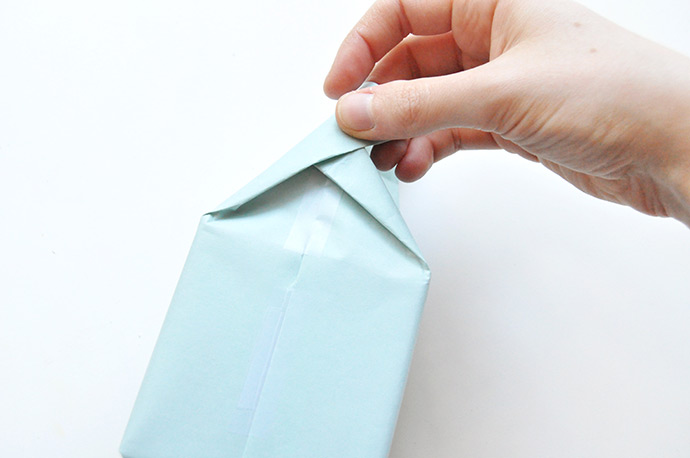
Step 3
For the backside of the roof, you can fold the excess paper back and in, taping it down to secure. (If the folded paper is bulky, you can trim away any excess if needed before taping down.)
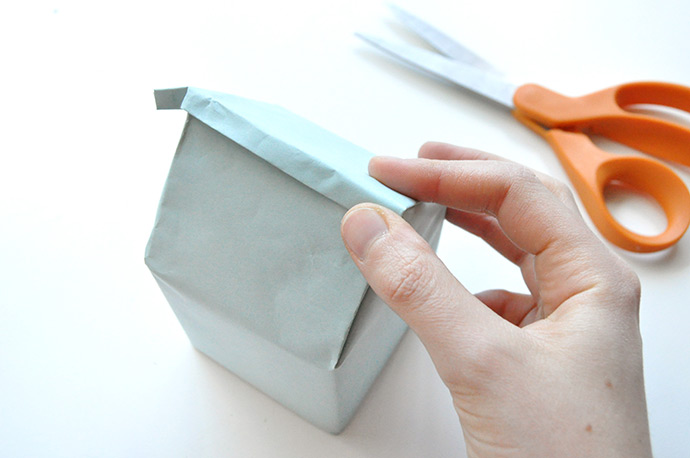
Step 4
Now that the front and back of the roof are both wrapped, trim a bit of the excess paper from the top and then fold the paper down so that it sits nicely along the peak of the roof, taping in place.
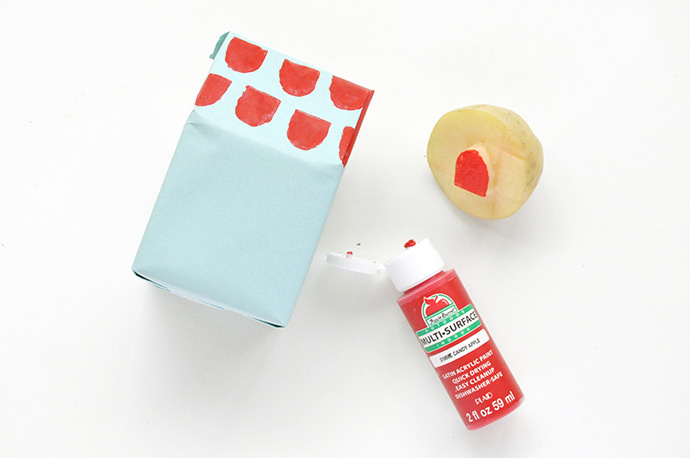
Step 5
And now the fun part – designing your Christmas village! Cut geometric shapes from potatoes to stamp as the roof, door, windows, bricks, shutters, etc. Mix and match colors and have fun with it!
This post was sponsored by Petit Collage.