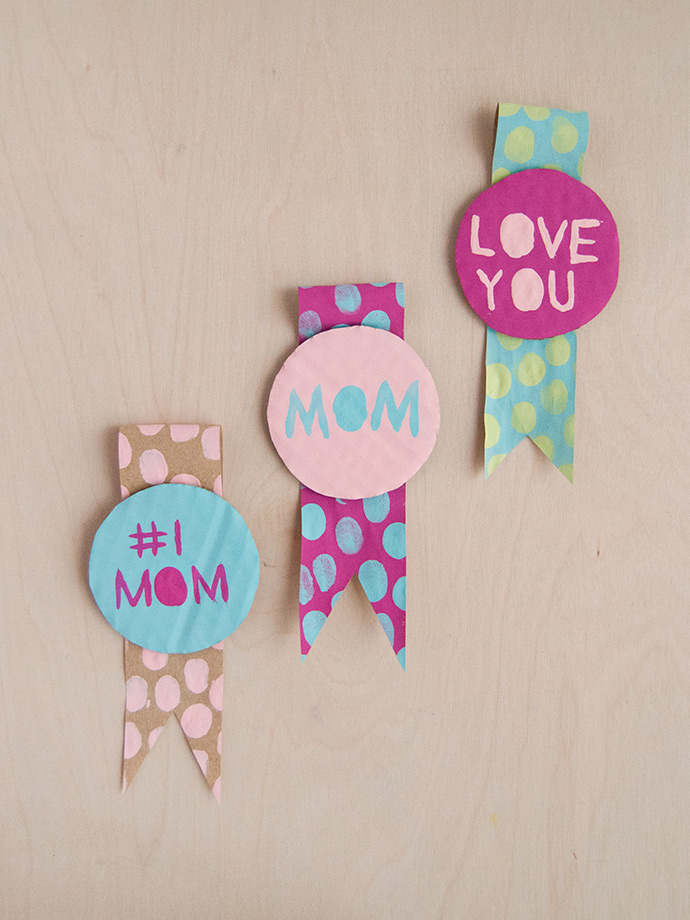
Looking for a quick and simple Mother’s Day craft idea using materials you already have at home? This is the project for you! Kids will love stamping their fingerprints onto these upcycled cardboard badges that any mom, grandma, or mother figure would love. Attach a pin onto the back to make these wearable or glue them onto a blank piece of cardstock to turn it into a DIY card!
If your little ones are too young to be dipping their fingers into paint, this method is a great alternative way to have them still help out with the process!
what you need:
- Corrugated cardboard scraps
- Kraft paper
- Paint
- Paintbrush
- Pencil
- Scissors
- Craft knife and cutting mat (optional)
- White glue
- Safety pins
how-to:
Step 1
Find a round object from around the house that you can use to trace for the badge’s center – I used a mason jar lid. Use the pencil to trace it onto cardboard, unprinted if possible to save time later.
Find a round object from around the house that you can use to trace for the badge’s center – I used a mason jar lid. Use the pencil to trace it onto cardboard, unprinted if possible to save time later.
Step 2
Pick out your paint color and brush a coat onto the traced circle. Let dry completely, applying more coats if needed, especially to cover up any words/photos on the cardboard.
Pick out your paint color and brush a coat onto the traced circle. Let dry completely, applying more coats if needed, especially to cover up any words/photos on the cardboard.
Step 3
Use a craft knife and cutting mat or a sharp pair of scissors to cut out the painted circle and set it aside for now.
Use a craft knife and cutting mat or a sharp pair of scissors to cut out the painted circle and set it aside for now.
Step 4
Pick another color of paint and apply onto one side of the kraft paper. Let dry. You can also choose to leave the kraft paper plain if you prefer, or use colored paper.
Pick another color of paint and apply onto one side of the kraft paper. Let dry. You can also choose to leave the kraft paper plain if you prefer, or use colored paper.
Step 5
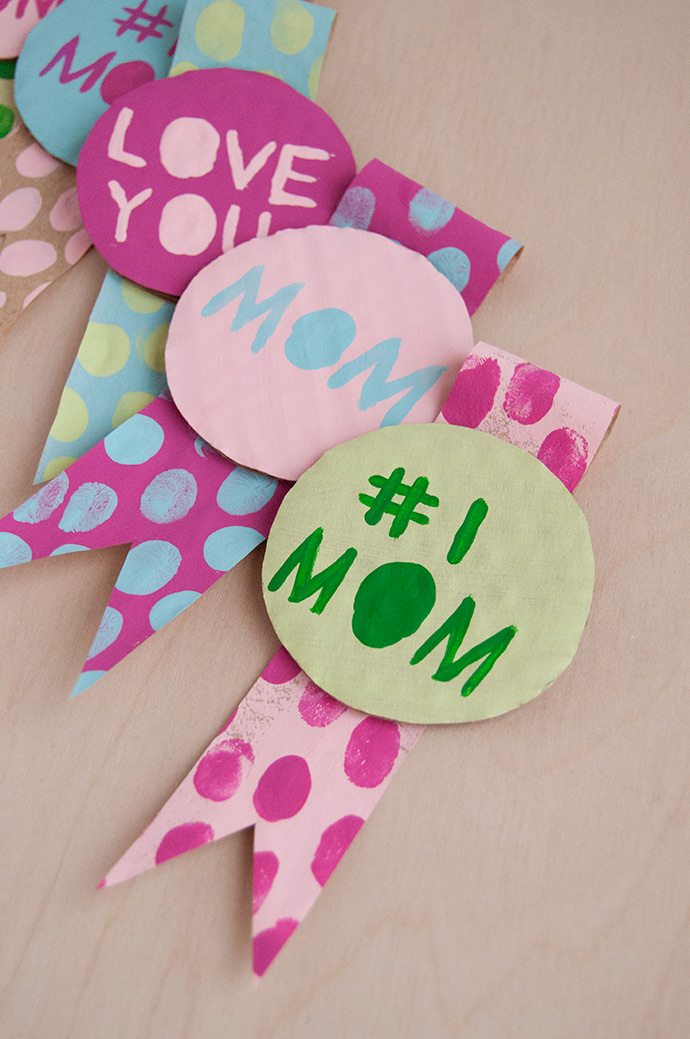
Pick a third color of paint – this will be the color for the fingerprint polka dots on the paper ribbon. Apply a blob of paint onto a palette or scrap of cardboard and have your kids carefully dip their fingers into it. Have them use their fingers as stamps on the painted paper, creating polka dots all over it. Set aside to dry completely.
Pick a third color of paint – this will be the color for the fingerprint polka dots on the paper ribbon. Apply a blob of paint onto a palette or scrap of cardboard and have your kids carefully dip their fingers into it. Have them use their fingers as stamps on the painted paper, creating polka dots all over it. Set aside to dry completely.
Step 6
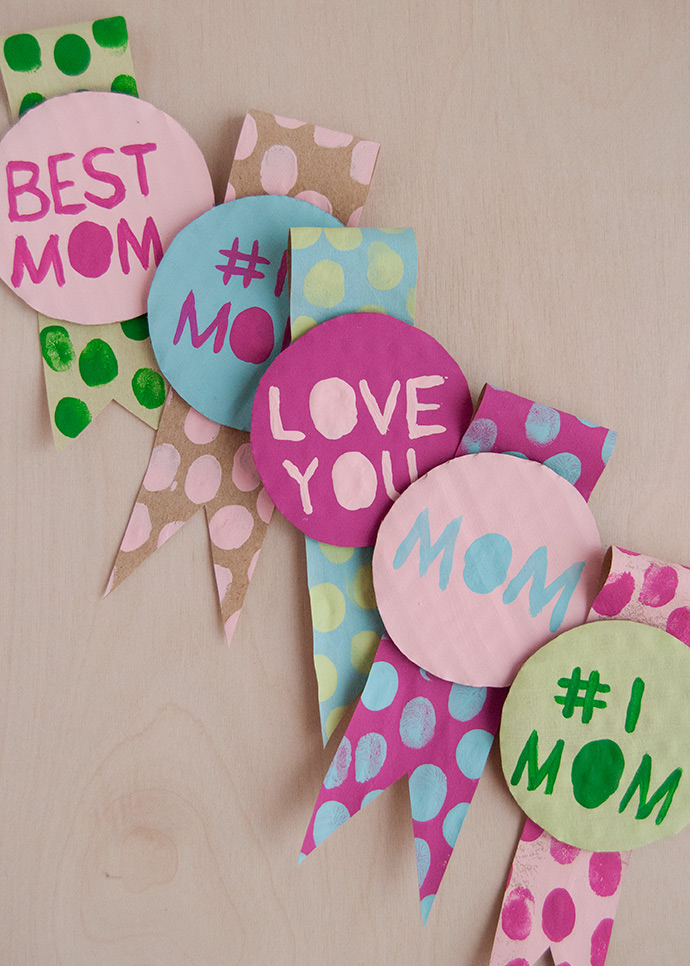
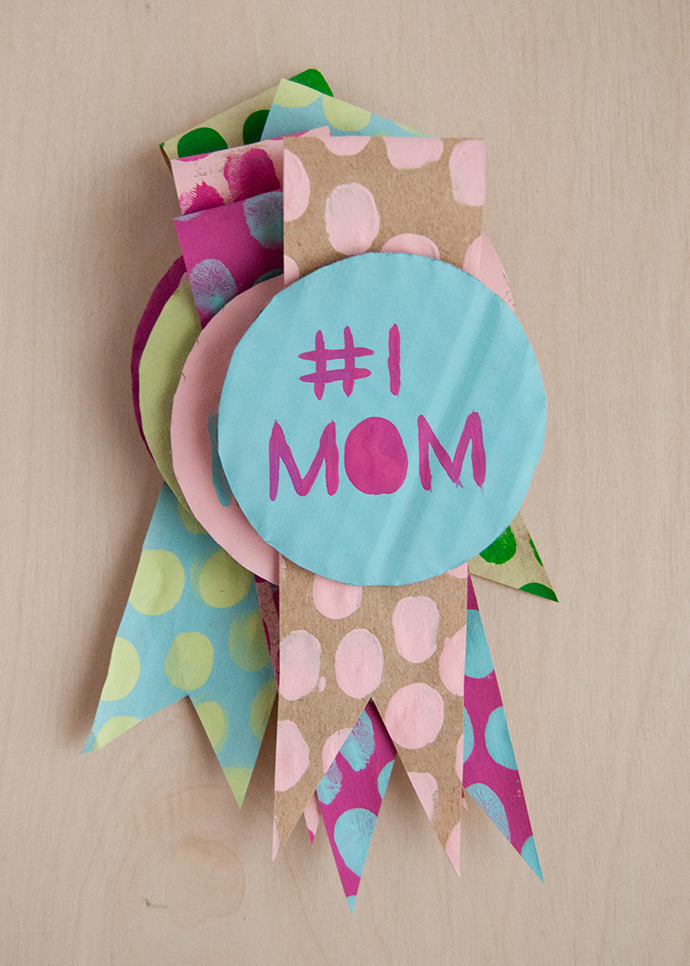
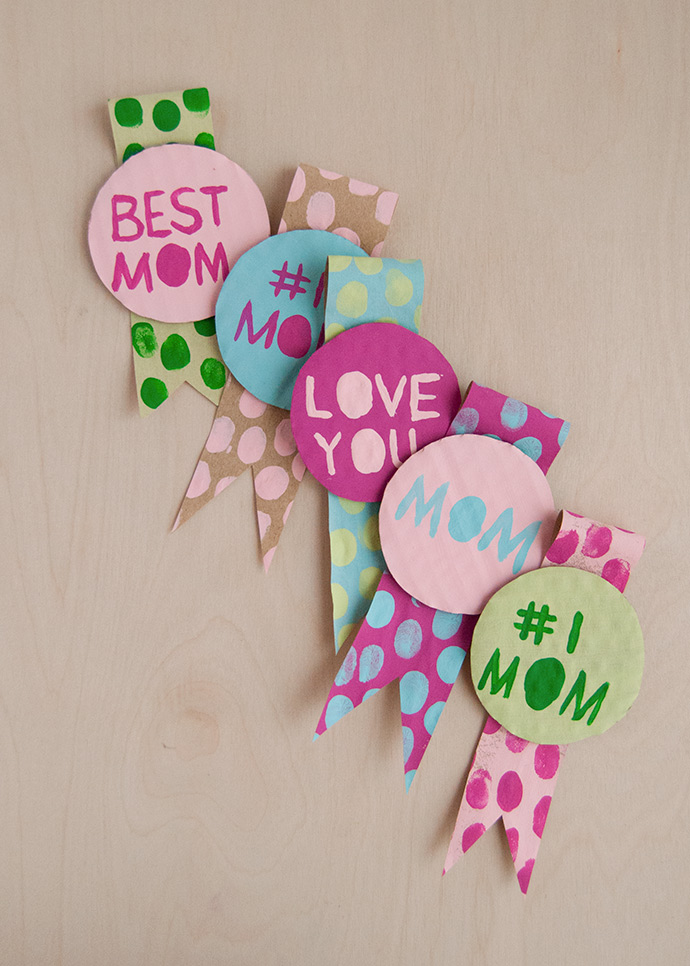
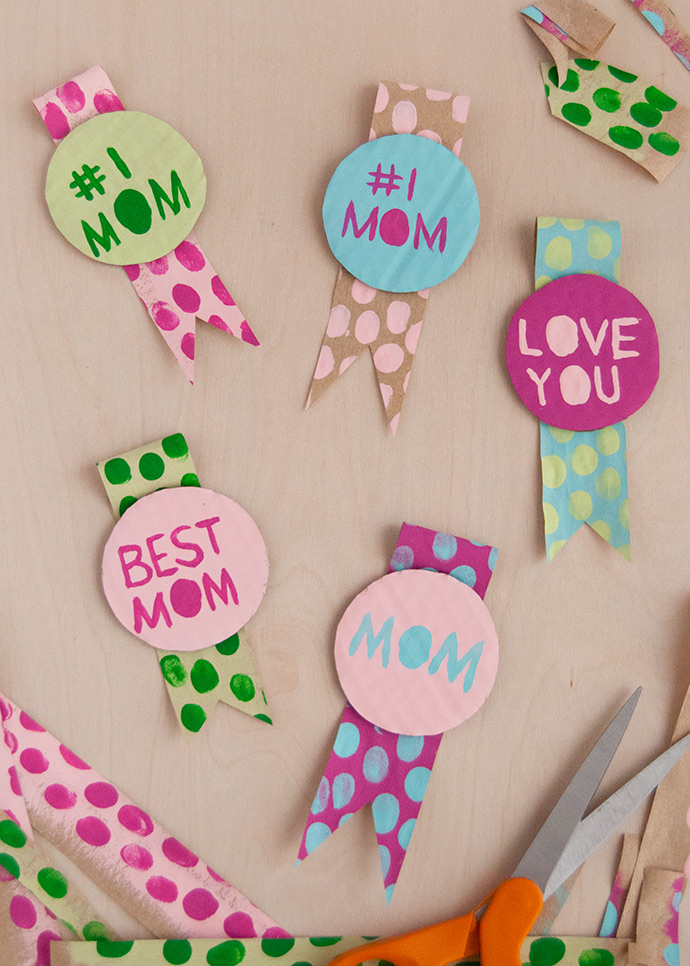
Using that same color, or another, apply as many fingerprint stamps on the circle to spell out your chosen message. A few ideas are “#1 MOM”, “LOVE YOU”, or “WORLD’S BEST NANA”. Replace any of the O’s with fingerprint stamps and use a paintbrush and matching paint to write out the rest. You can also choose to use a marker for this step. Let dry.
Using that same color, or another, apply as many fingerprint stamps on the circle to spell out your chosen message. A few ideas are “#1 MOM”, “LOVE YOU”, or “WORLD’S BEST NANA”. Replace any of the O’s with fingerprint stamps and use a paintbrush and matching paint to write out the rest. You can also choose to use a marker for this step. Let dry.
Step 7
Once all the paint is dry, cut the painted paper ribbon into an even rectangle. Roll the top end back on itself and use glue to secure it in place. Use more glue to attach the cardboard circle onto the paper ribbon, and then use scissors to trim a triangle shape from the bottom of the paper ribbon for the classic rosette/prize ribbon look.
Once all the paint is dry, cut the painted paper ribbon into an even rectangle. Roll the top end back on itself and use glue to secure it in place. Use more glue to attach the cardboard circle onto the paper ribbon, and then use scissors to trim a triangle shape from the bottom of the paper ribbon for the classic rosette/prize ribbon look.
Step 8
If you’d like the badges to be wearable, use glue or tape to secure a safety pin to the back of the cardboard badge. You can also turn these into magnets or glue one onto a piece of cardstock as a DIY card!
If you’d like the badges to be wearable, use glue or tape to secure a safety pin to the back of the cardboard badge. You can also turn these into magnets or glue one onto a piece of cardstock as a DIY card!
Happy crafting!