This post is sponsored by Plaid Enterprises.
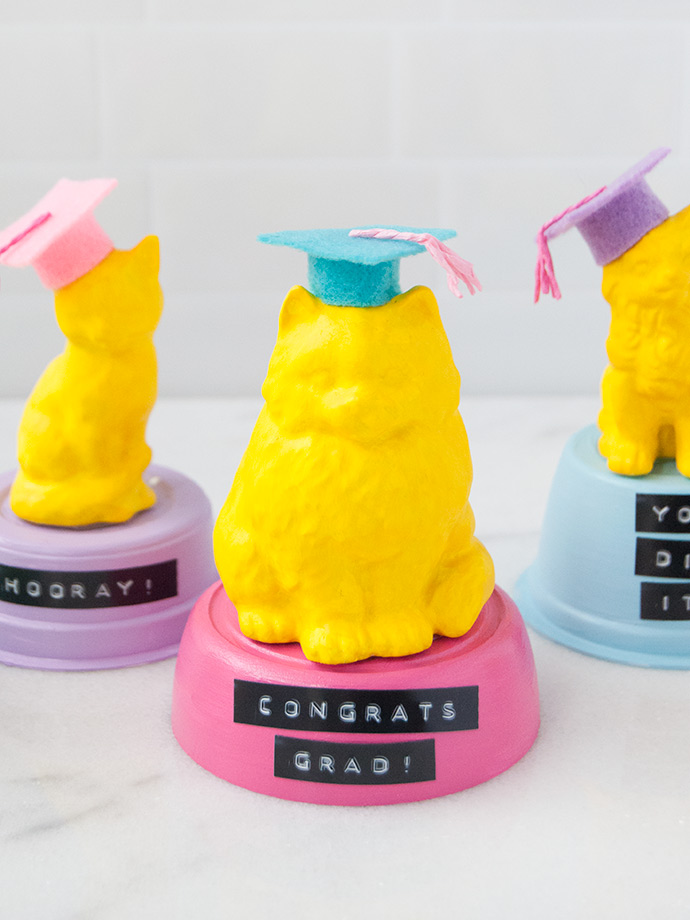
Oh how time flies – it’s already getting close to the end of the school year, so we’ve got celebration on the brain! When we saw these adorable printable bookmarks from Mollie last week, we knew right away that we’d found a way to put our thrifted animal figurine collection to good use! Over the past few weeks, mini cat and dog ceramic figures kept popping up at our local thrift store, and although we didn’t know exactly how we’d craft with them then, a quick coat of Apple Barrel acrylic paint has given them a whole new life!
We had so much fun putting these fun little trophies together and know you will too! They’re a great little surprise for kids finishing up school, or for any special occasion really! If you don’t happen to have a handful of ceramic figures like these, your dollar store is sure to have similar plastic toys that will work just as well here. For the pedestals, take a look in your recycling bin: you’ll likely find lots of lids or small plastic containers that are the exact right size. Keep reading for the full DIY below!
what you need:
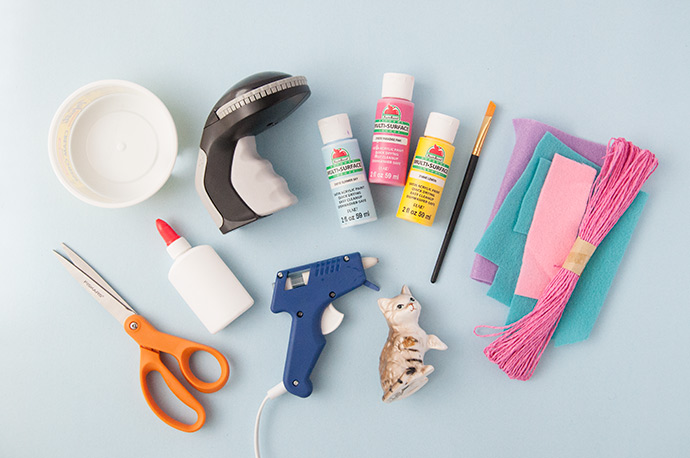
- Apple Barrel Acrylic Paint Set
- Paintbrush
- Animal figurines
- Empty lids or small containers
- Felt
- Cord/thread
- Hot glue gun
- Tacky glue
- Label maker
- Scissors
how-t0:
Step 1
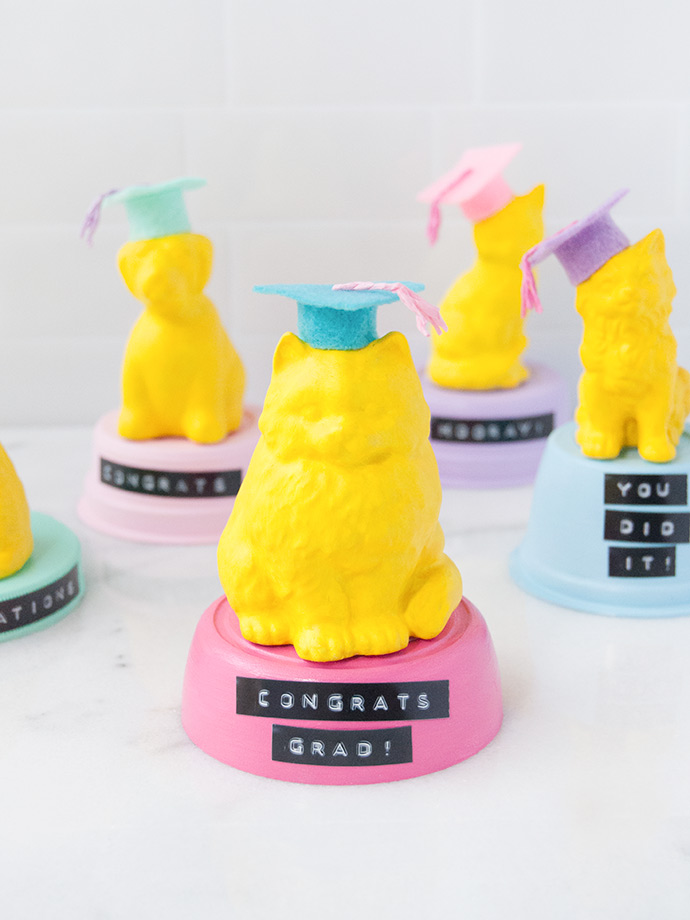
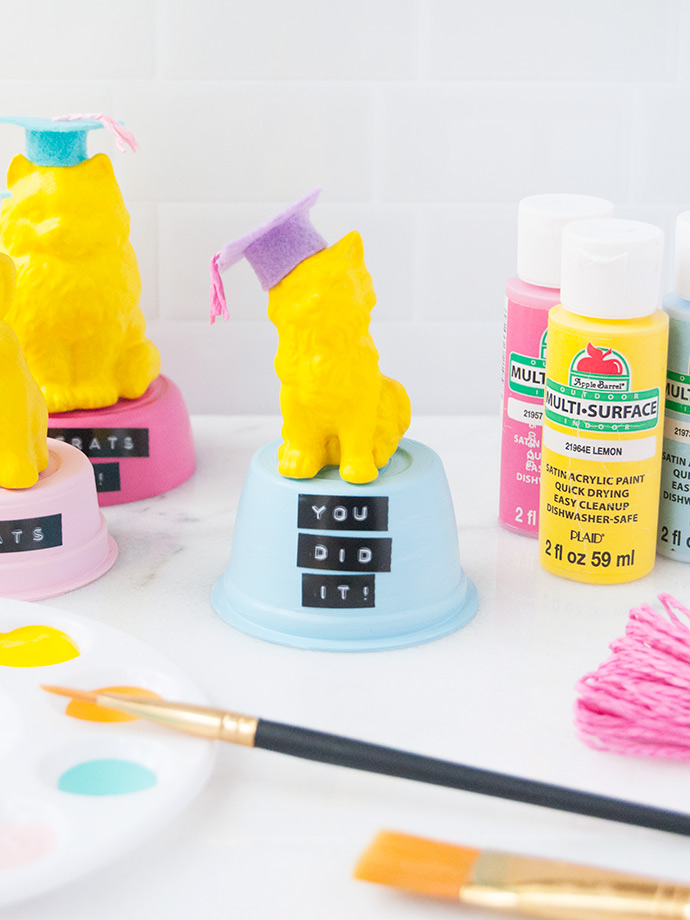
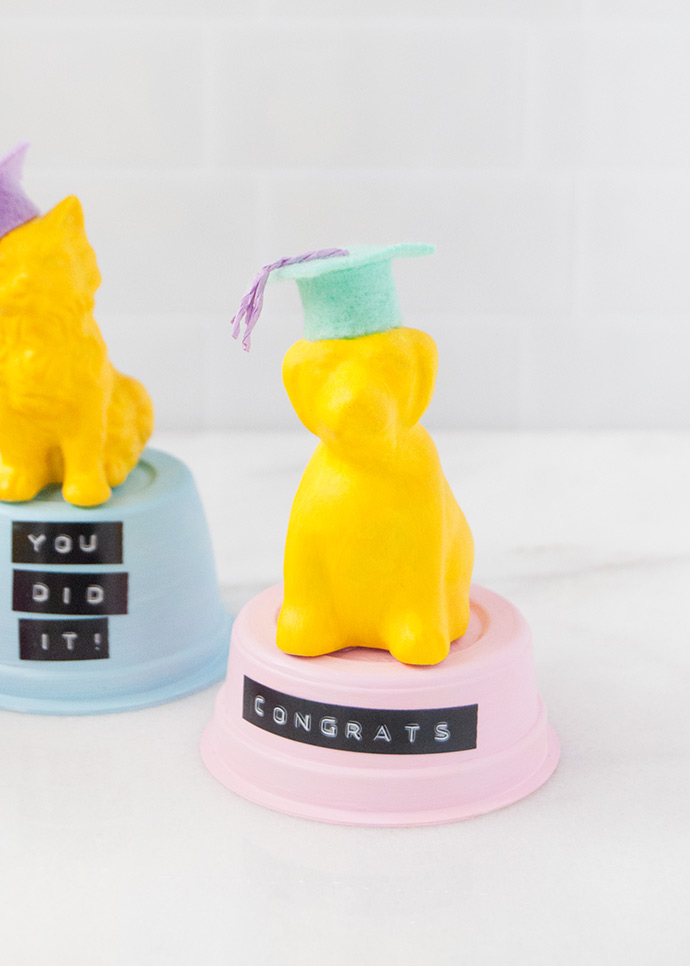
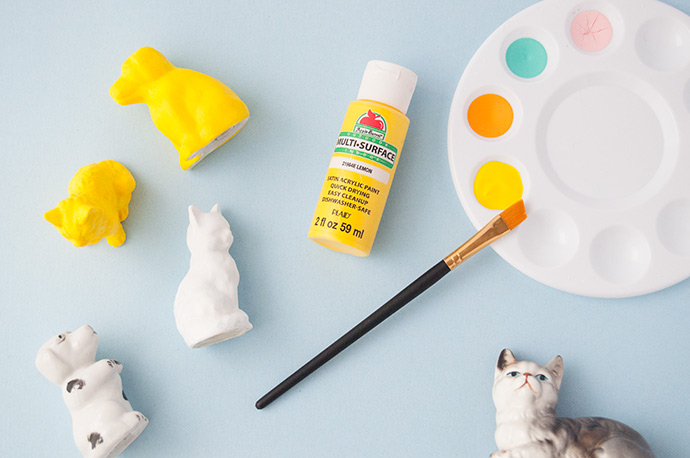
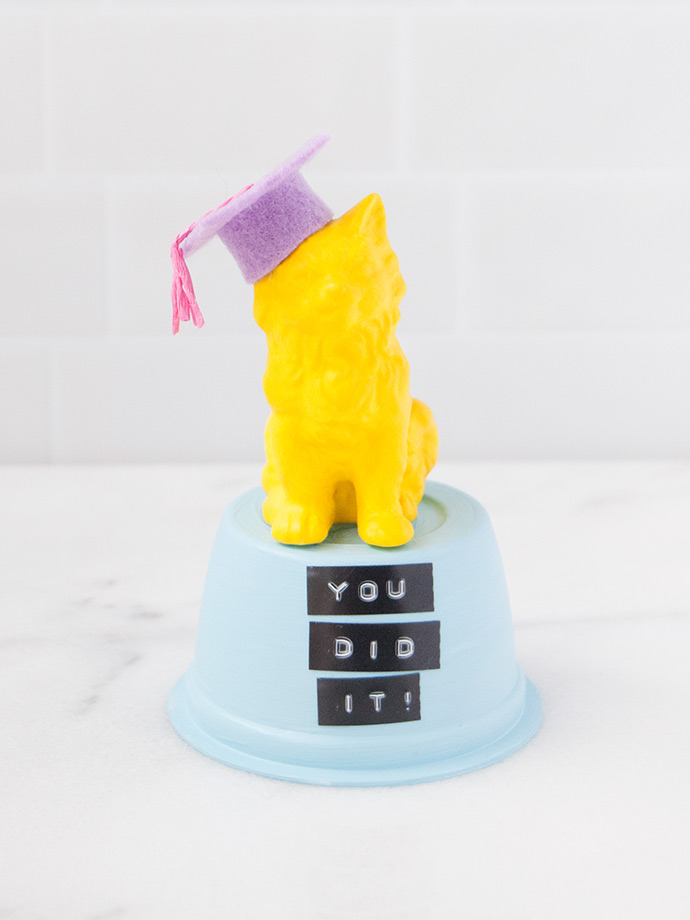
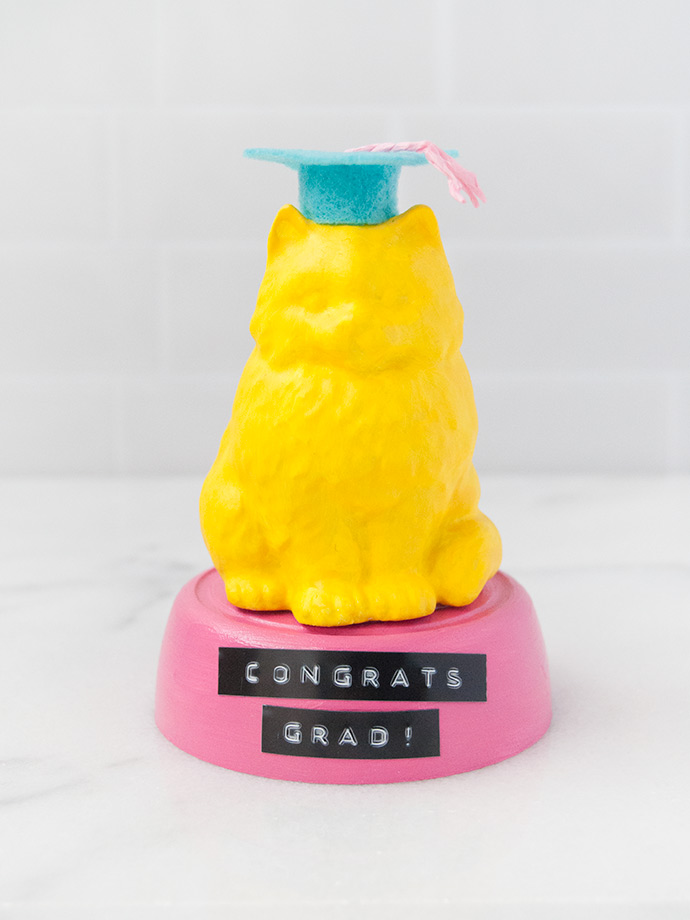
Paint your figurines! We found these ceramic ones at the thrift store – the dogs are actually salt and pepper shakers! If you don’t have any ceramic ones, you can definitely use plastic toys here instead. We painted them all yellow for more playful version of a gold trophy. Let dry completely.
Step 2
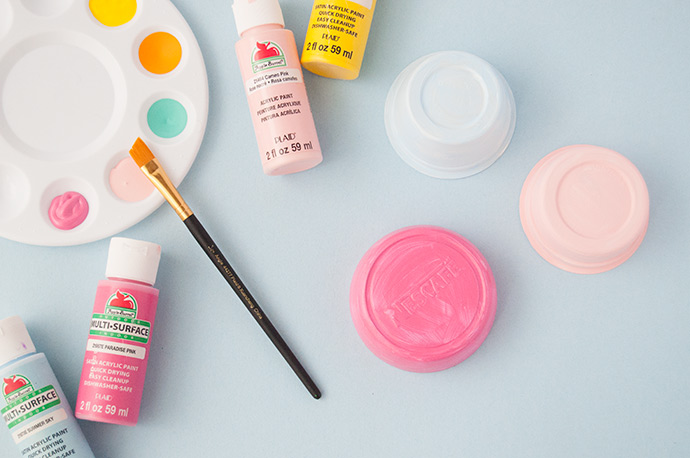
While the animals dry, paint the bases. We used a variety of lids and small containers from our recycling bin. Make sure that the animals fit on these pedestals and then paint them whatever colors you like. Let dry.

Step 3
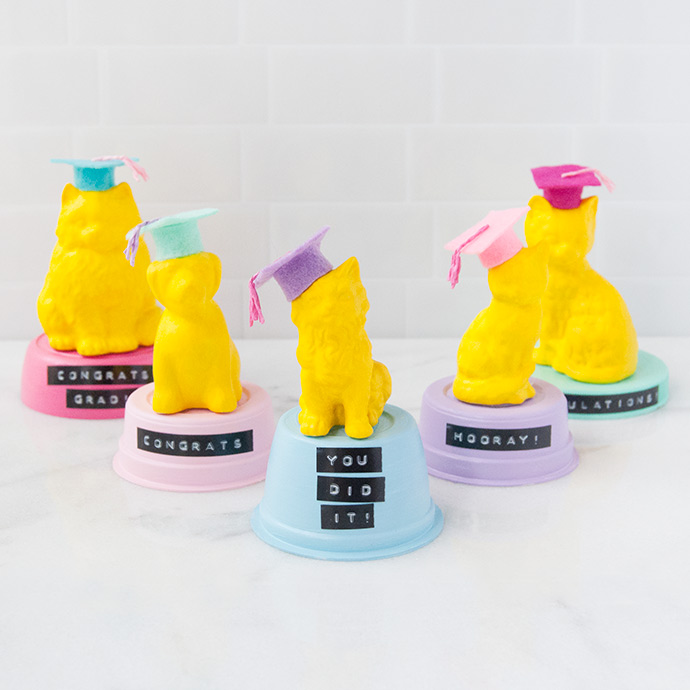
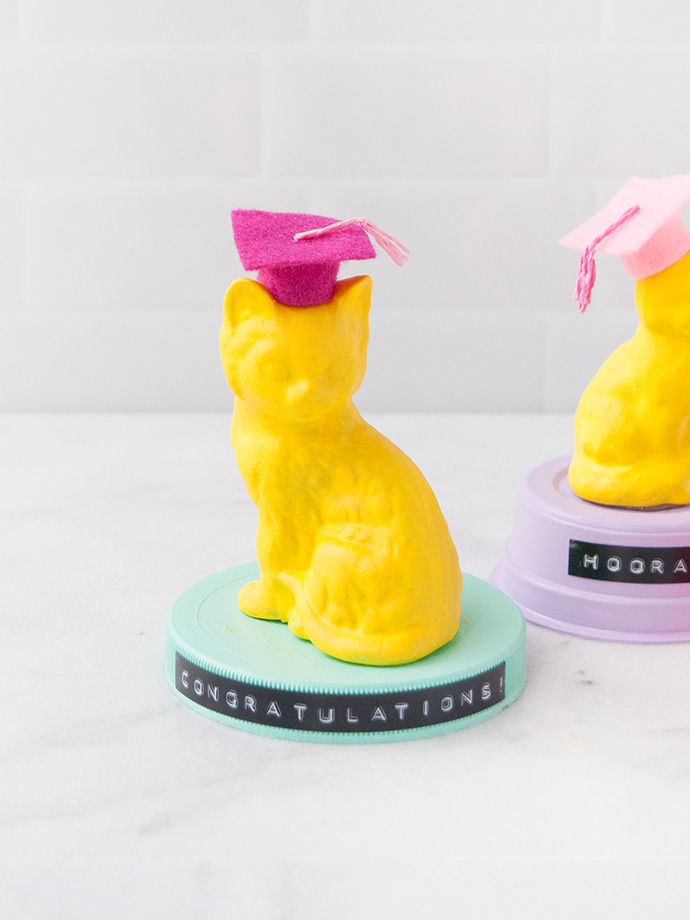
To make the mini graduation hats, cut a 1″ square of felt and a matching rectangle about 1/2″ wide by 2″ long. Glue the rectangle into a tube and glue to the square. To make the tassel, cut an almost 1 1/2″ piece of cord and bend one end at about 3/4″. If your cord is made up of two smaller strings, untwist those just to the bend – this will be the tassel. Cut two more 3/4″ pieces of cord and unravel them. Use a small dab of glue to attach them onto the “tassel” to make it look more full. Apply a small dab of glue to the other end of the cord and carefully attach to the center of the hat. Make sure to handle the hat carefully until the glue has dried.

Step 4
Use a label maker to create custom messages for your trophies. If you don’t have a label maker, use stickers or a permanent marker to write them instead. A few message ideas:
- Congrats grad!
- Congratulations!
- You did it!
- Hip hip hooray!

Step 5
To assemble, stick the labels onto the dried pedestals. Use hot glue to attach the felt caps onto the painted figures, and more hot glue to attach the figures onto the pedestals. Your trophies are now ready!


Happy crafting!!