All of a sudden it seems that all of the leaves on the trees have changed colors! There isn’t much that’s more satisfying than stepping on a crunchy leaf, but for today’s project you’ll want to collect your leaves soon while they’re still soft and freshly fallen. With just a pair of scissors and a glue stick, you can quickly create a mini pumpkin patch on your pumpkins! In case you missed it, last week I shared these mushroom pumpkins and these pumpkin pumpkins (ha!) are the same idea but even quicker. If you want to add on more detail, you can cut jack-o-lantern faces from deep red leaves and glue them onto each mini pumpkin. Or skip the pumpkin completely and have fun making decoupage fall leaf art right on paper. Whichever way you choose, keep reading for all our tips and tricks below.

what you need:
- Orange leaves
- Green leaves (or grass)
- Scissors
- Glue stick
- White pumpkin
how-to:
Step 1
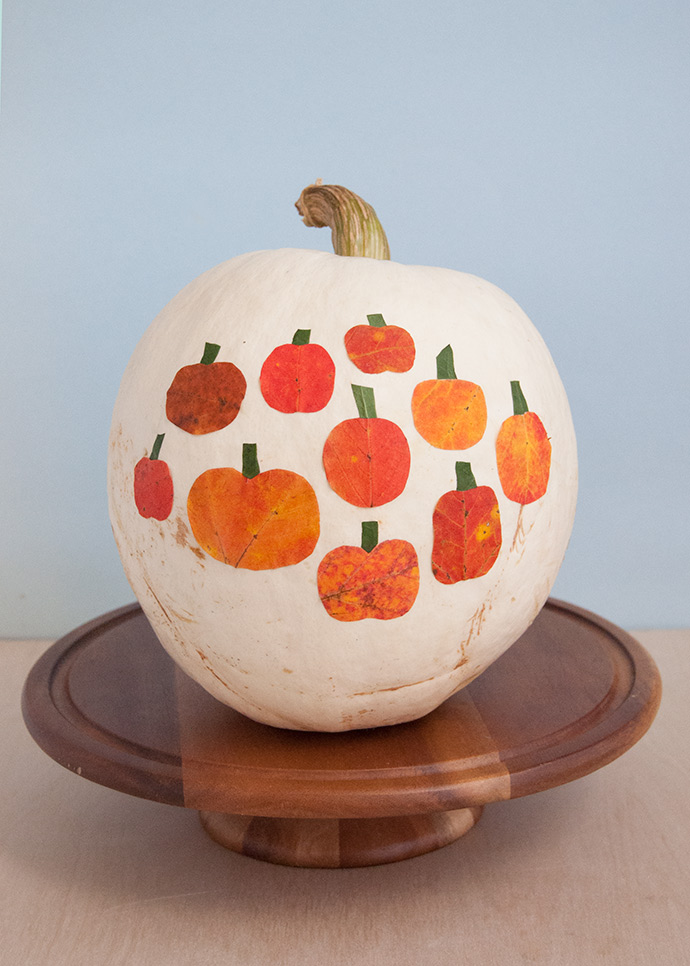
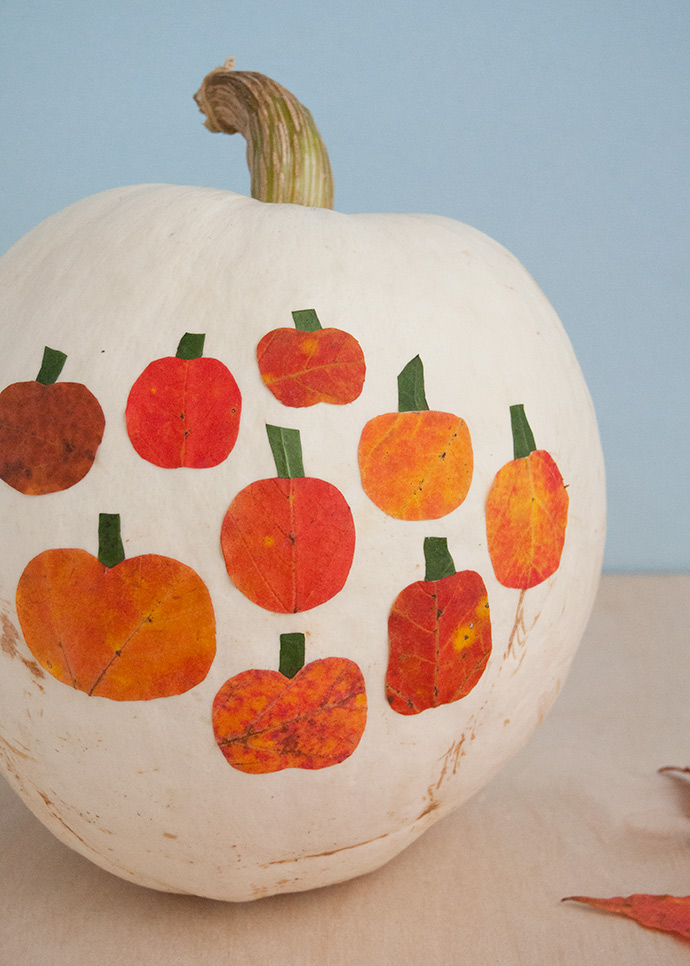
Wash and dry your white pumpkin to make sure any dirt or debris are wiped away. I used a white pumpkin here to give more contrast to the orangey-red leaves that will soon form the decoupage pumpkins but if you can’t find a white pumpkin, you can of course use a regular one but the decoupage art might not be quite as noticeable.
Step 2
Gather up fallen leaves! Aim for orangey-looking leaves to look as much like pumpkins as possible. Softer/pliable leaves will be easier to work with than crunchy ones.
Step 3
Use scissors to cut the leaves into miniature pumpkin shapes. Cut a variety of shapes and sizes.
Step 4
Apply glue to the back of each leaf pumpkin and adhere onto the surface of the white pumpkin.
Step 5
Cut green leaves into small stems and glue one above each pumpkin.
Step 6
Seal with Mod Podge or any waterproof sealer if you plan on leaving this pumpkin out in the elements. I plan on keeping this guy sheltered from the rain to help make the pumpkin last as long as possible.
Happy Halloween!