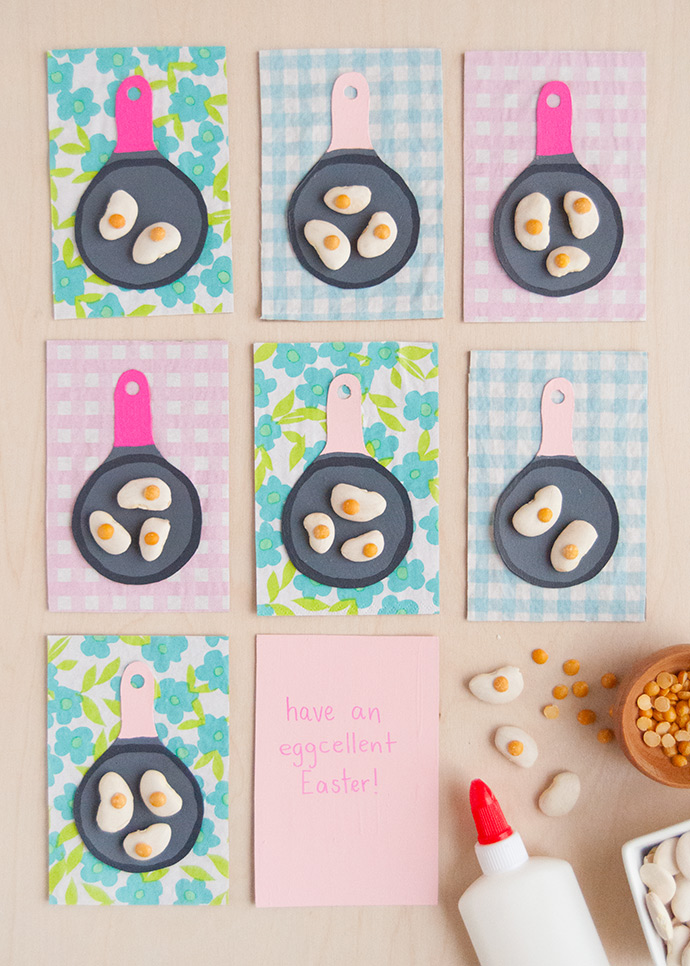
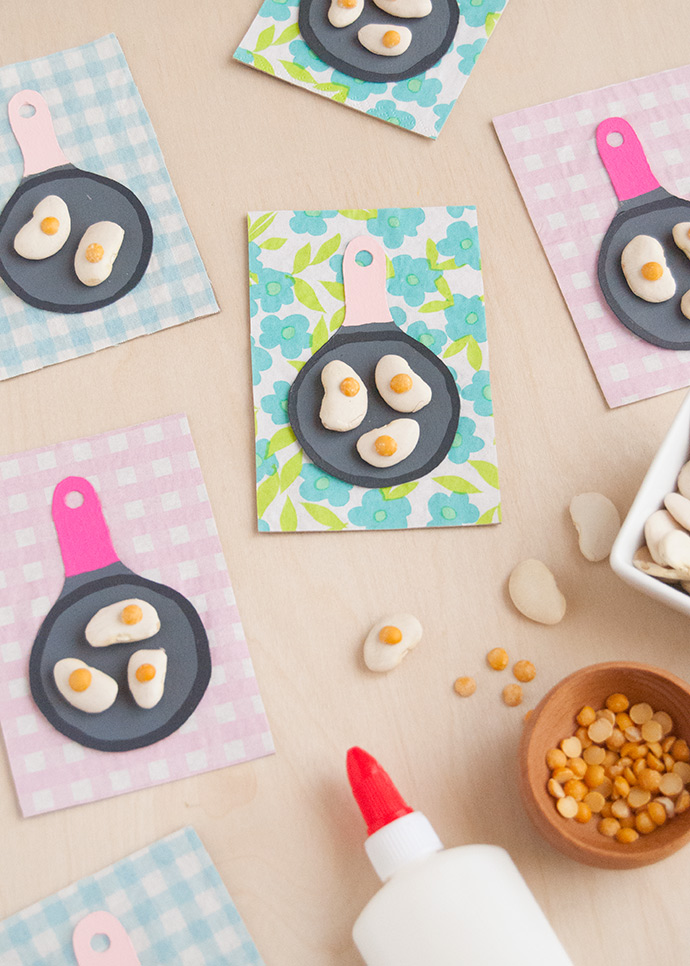
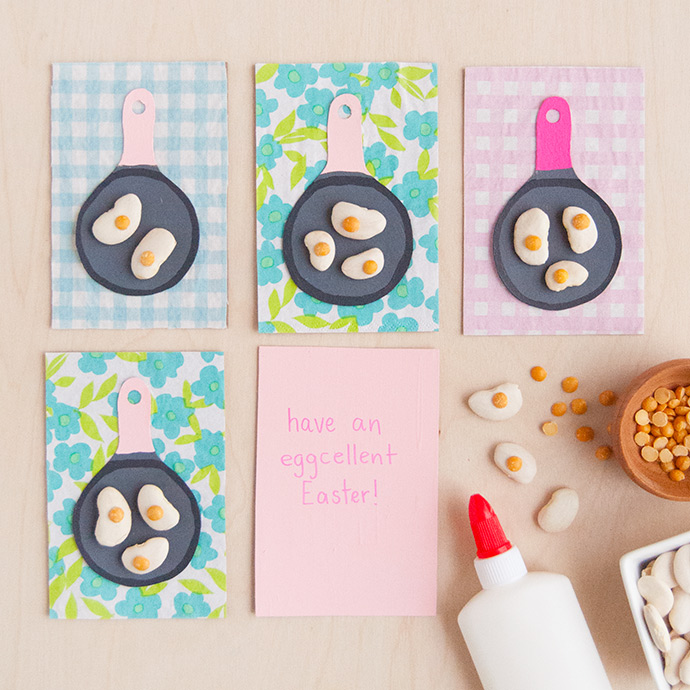
Easter is usually the time for making colorfully decorated eggs, but how about making these playful fried egg cards? They’re a fun way to wish your friends and family an EGGcellent Easter, and can you tell what they’re made of? Dried lima beans and yellow split peas! Over the years, I’ve made a few fried egg DIYs (these brunch invitations and these sunny-side-up Easter eggs) but these bean art eggs are definitely my favorite of the three.
what you need:
- Lima beans
- Split peas
- Cereal box cardboard
- Patterned paper (or fabric, napkins, tissue paper, etc)
- White tacky glue
- Double-sided tape
- Scissors
- Single hole punch
- Pencil
- Ruler
- Paint
- Paintbrushes
- Marker
how-to:
Step 1
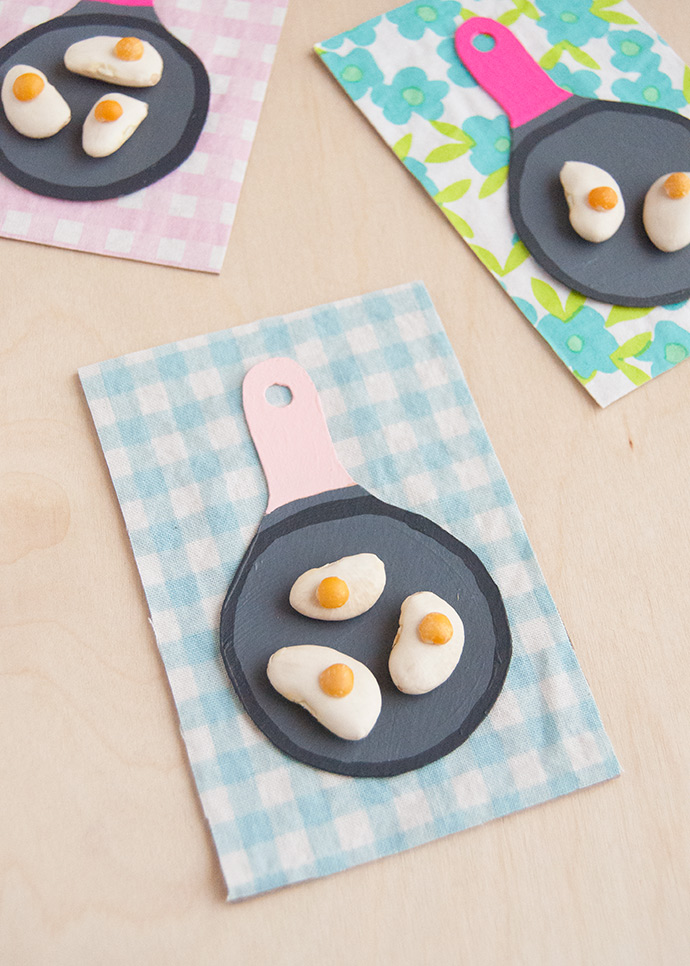
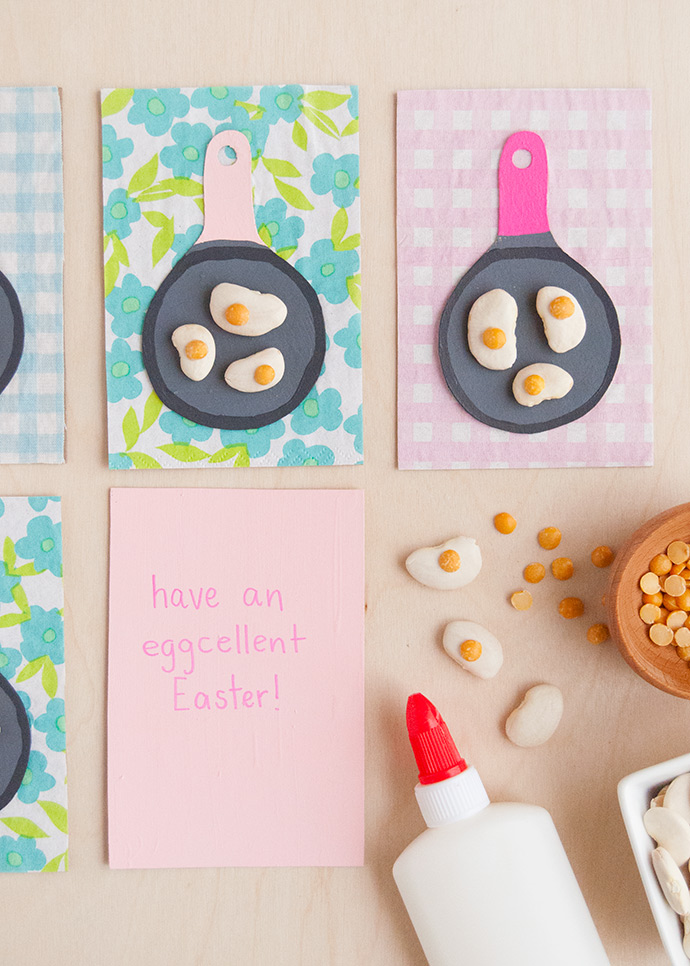
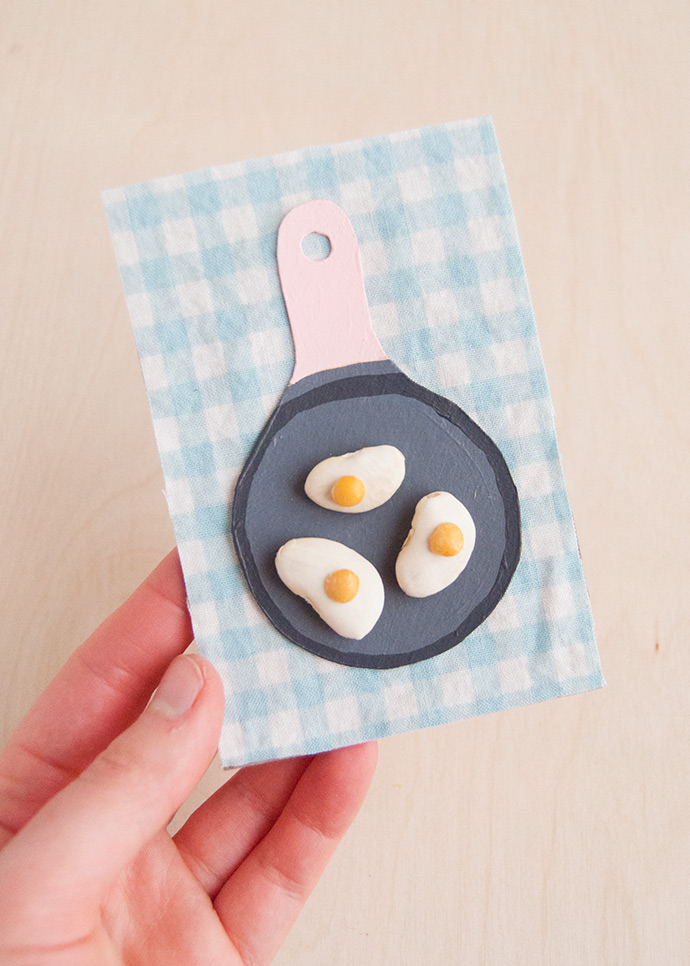
Find a circle to trace to be the round part of the frying pan – I used a circle that was 2″ across, which fit 2-3 eggs nicely. Trace this circle onto the cereal box carboard with a pencil and then sketch out a simple curved handle on one side. Once happy with the shape, cut out, punch a hole at the end of the handle, and use this first shape as a template to trace as many as needed. Cut them all out.
Step 2
Paint the frying pans! You can do this in any color you like – I first painted the round part with a charcoal shade, let dry, then added a slightly darker charcoal circle on top to emphasize the look of a frying pan. Then I used pink and magenta for the handles. Let all paint dry completely.
Step 3
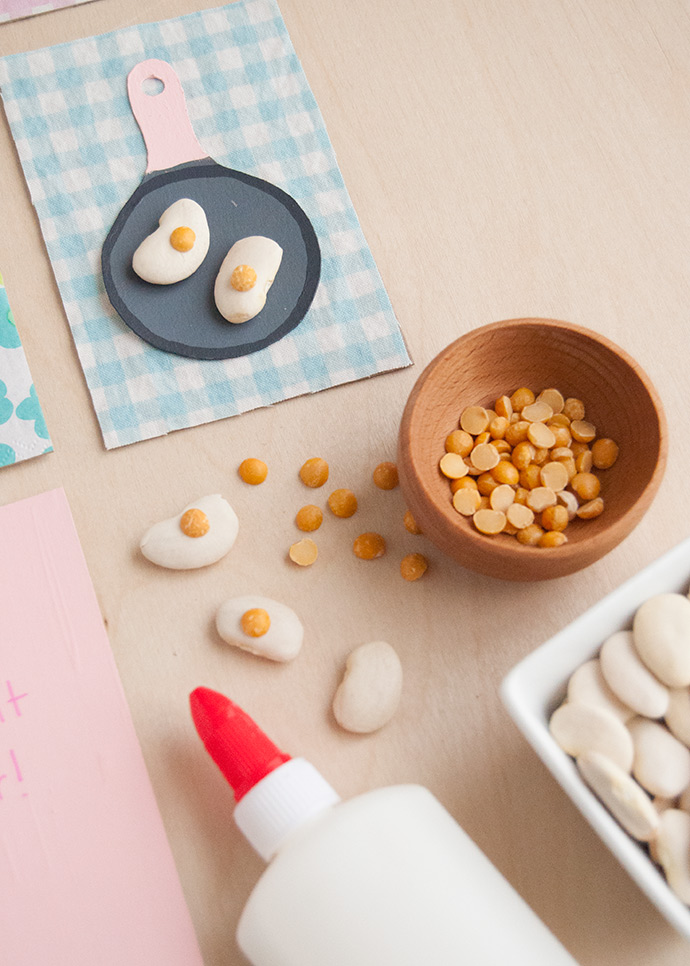
Arrange fried eggs onto the frying pans, using a lima bean as the egg white and a split pea as the egg yolk. Glue them together and then glue them onto the pans. Let dry.
Step 4
Cut out rectangles for the background cards – these can be whatever size you like, but these ones are 3″ across and 4.5″ tall. Attach patterned paper to create a colorful background! I used blue gingham fabric as well as paper napkins (pink gingham and blue floral) and attached them all using double-stick tape. Check to see what the coverage is like on the printed side of the cereal box cardboard – if nothing is visible through the paper, it’s best to cover this side up and leave the plain side for the written details on the back. If you can see the cereal box through the paper though, stick down a piece of white cardstock or paper first to hide this before attaching the patterned paper/napkin/cloth on top.
Step 5
Write your details on the back of the card! You can leave the cereal box plain or give it a coat of paint first for another pop of color – if doing this, let dry completely, and then write your message. You could even use these as Easter brunch invitations!
Step 6
Use white glue to secure the frying pans to the fronts of the cards. Let dry completely.
Happy crafting!